Showing posts with label cute. Show all posts

Saturday, 1 October 2022

hair bow


I saw this cute hair bow idea on pinterest and decided to make my own. I followed a tutorial and found the shape bulky in the centre, so I decided to change the pattern and make my own to share with you. I have photographed the three main stages below and you can see the end result, once tied, above. At the bottom of this post is a printable instruction sheet including the template to make your own.


Mx

Friday, 12 March 2021

Easter Pattern


Last year I started designing embroidery patterns which are on sale on my etsy page, but thought I'd share my latest one with you for free here !! 


The idea with this one is to be able to turn it into a cute little hanging egg shaped decoration for Easter, but I always love to see everyone's unique versions. Please feel free to share your makes on Instagram using #craftylilmousepatterns and check it out for inspiration.

Mx 

Saturday, 14 March 2020

Birthday stitchers swap 2020... what i made!!


I decided to take part in the birthday stitchers swap on Instagram again this year. I was so pleased to be making for one of my close friends again too! I had so much to choose from the inspiration mosaic Zena made, it was full of fun ideas and I was quickly excited to get started. 


For the main make I chose to make a quilted tote bag with strawberry patchwork. I used similar construction to the previous one I had made, but changed the measurements (I'm hoping to do a tutorial blog for this soon!). I knew Zena had already received a larger grey tote, so it would be nice to make something different and a bit smaller. The smaller size also made more sense to fit the size of the patchwork strawberry


To make the bag I used red and green scraps for the strawberry patchwork and Everglades by Betsy silver for Michael Miller for the white. I added an Essex linen in ‘midnight’ to finish the bag outer nicely. For the lining, I used Strawberry tea by Axelle design for Michael Miller and added a slip pocket inside. This print felt like the perfect match for the patchwork design on the outer. I picked the Aurifil thread in shades 2745 & 2021 to use as I thought the colour matches were great


For the small makes, I started with a medium sized sewing case as Zena had included a few similar ones on her mosaic. I didn't want to purchase another sewing pattern, so I just made it up as I went along. I'm pleased with how it turned out, (although I'm sure there was a lot easier way to make it, so I wont go into that!) 


The main feature of this make for me though was the EPP. I didn't want to do just regular hexie shapes, but I don't feel quite ready for anything as fancy as clam shells. I decided a honeycomb was a nice option, it was a little different but still in my comfort zone. It also worked very well with the fussy cut images that I wanted to include. I felt it would be too much to make the entire case from patchwork, so I opted for a panel on each side instead. I joined my EPP shapes together, appliqued them onto the linen, then quilted over the top. This was the first time doing something like that and I'm so happy with how it looks. I used several prints from the Penny Rose fabrics 'bunnies & blossoms' by Lauren Nash range, some cream/ natural linen (I cant remember the shade colour) and Aurifil thread '2311'. I know Zena likes to add extra details into her makes, so I thought it was only right I did the same when making for her too. I made zip charms using some strawberry shaped beads and handmade hearts. I also used a single honeycomb shaped piece of fabric, appliqued on to the inside with stuffing in, to create a mini pin cushion!


Next was a small drawstring pouch with a pocket on the front. To make it, I used some cotton + steel fabrics. Zena said she likes neon's and I knew I had some prints that I had bought without a plan of what project to make with them. This seemed like the perfect opportunity to use them. I liked using the different prints but felt like they blended a bit to much, so I went in search for some trim and ribbon. The neon was a struggle to find and it isn't a perfect match, but it's close enough to make the pocket look pretty and fasten the pouch.


The last little make was one of my mini travel pinnies.  I used the Riley Blake 'little sweetness' range by Tasha Noel, which I know Zena loves and managed to fussy cut the little dresses for the front to really make a feature of the print. The extras that I bought for Zena was a Cath Kidston mug, a 'z' candle and some charms. The best gift wrapping for any sewist is fabric of course, tied with a big ribbon. I also made a little scrappy keyring that served as a gift tag! 


It was a pleasure making everything and I'm pleased to say Zena loves her gifts. More photos of her gifts are on my @craftylilmouse Instagram account and you can go see all the beautiful things Zena makes on her account @mycreativepottylife too!
As for my birthday stitchers swap parcel, I still have a while to wait. I am already getting excited and will share those as soon as they arrive...

These projects were on my finish-a-long list, so I can tick them as complete!!

Mx


Sunday, 1 March 2020

mini travel pinnie


Last year I took part in an Instagram sew along called #teenytinypinnieparade and created this special pincushion.
It has magnets inside to be able to attach to clothes or car seat belts for travelling. With features including a puff for pins and needles, plus space to attach binding clips to the side it is just perfect for me.


It worked out so well, I  made a few as little thankyou gifts. I then decided I liked it so much, others might too, so I would make it into a pattern. 


It is available (as an instant digital download) on my etsy store if you fancy making one too!

Mx
 

Tuesday, 3 December 2019

Dashwood advent

After making a stocking last year for a friends little girl, I decided an advent calendar would be perfect for this Christmas. I picked out the dashwood studio panel, with a very cute illustration, and little pockets for chocolate coins.
 
 
After I’d cut out the pockets, I decided to wundaweb all of the sides down to help stop it fraying with use. I top stitched across all of the top edges and then stitched all the pockets on to the panel.
I cut a piece of backing and wadding to the same size as the advent panel. I also cut out 4 rectangles of backing fabric to create hanging loops. With these, I stitched 2 pieces of backing fabric wst, then turned it out and repeated to create 2. I topstitched the two pieces in place to the upper section of the backing, leaving a gap between them. I then stitched the advent rst to the backing and wadding pieces, trimmed some wadding from the seam allowance and turned out. I stitched up the turning gap and added some top stitching/quilting to the advent to hold the layers together. I cut a piece of dowel to size and threaded it through the tubes. I then ladder stitched both outer ends closed to stop it falling out. The gap in the middle means you can just hang it up or add a ribbon if you need too. 

 
This is one of my finishalong projects, you can check out the rest of my list here.

Mx

Sunday, 1 December 2019

sweet seaside bunting...


As part of my birthday stitchers swap parcel, I made my partner some bunting. Sally had suggested she’d like some bunting, however, it wasn’t really clear from her inspiration board what style she would prefer. Knowing Sally’s fabric tastes and because I wanted it to feel fresh and summery, I chose the Tasha Noel seaside fabric range first.
I think bunting is always better double sided, so I chose the Tasha Noel a small floral design from the a little sweetness range to compliment it. Making it reversible also gave her an alternative look in case she didn’t like the seaside theme. Since I learnt Sally’s favourite colour is red, and it matched my fabric choices perfectly, I picked out a red lace edge binding for the top of the bunting.
I first fussy cut some of the seaside characters, then added the other fabrics in between from the range until I was happy with the layout. I cut the same amount of florals and interfacing. I’m not quite sure why I interface bunting, I just like the way it looks. I stitched it all together and then tried to get a photo of it all, which turned out to be quite tricky.
I never know how many pennants to make when sending bunting, this might be a lot but hopefully she will find somewhere to hang it all!
This is one of my finish-a-long projects, although finished in Q2 I think... it wasn’t gifted until October so I’m including it in my Q4 finishes. You can see my finish-a-long list here.
Mx

Friday, 15 November 2019

star cushion


If you saw an earlier blog post this year, you might remember I took part in a birthday swap on Instagram. I had quite a while to wait for my partners birthday though. I was given the lovely Sally aka @chasing.tigers on Instagram, to make for. I was both thrilled because she has become a close friend online, but also anxious since she is such a talented maker herself.


Anyway, I chose to make this cute fussy cut cushion as her main gift. The cushion design was featured on her inspiration board, and with a bit of quilty maths, I worked out the measurements to make it. I was struggling to find coloured fussy cuts in my stash, so did a bit of fabric swapping to get enough. I also purchased this cotton and steel tiger fabric, as I just knew it was the perfect centre to personalise the cushion. Both me and Sally had purchased this low volume fabric, so I was pretty confident she would like it.
 
 
After my meadowland quilt experience I hate flying geese, so why I chose to do this cushion with 16  geese, I do not know! I wasn’t looking forward to sewing them, however, they went surprisingly well. I did simple straight line quilting 1/2” apart and made one of my concealed zip backs(tutorial for that here). Once I had sewn my cushion together, I added top stitching to the edges. I think this gives a nice finish to the cushion without the need to add binding.
 
 
The entire thing came together quite quickly and I love how it turned out. Thankfully my partner has received her gift now and loves it!
 
This is one of my finish-a-long projects. Even though this was technically made it in Q3, I hadn’t yet gifted it to be able to share so I am including it for Q4 instead. Read about my list here.

Mx

Saturday, 2 November 2019

My Christmas stocking


For a few years I have seen a Christmas stocking sew along on instagram. It is hosted my @sunnydaysupply and all the stockings they feature are fabulous... I just had to make my own!
I was going to join in last year, I even started, the plan for my patchwork soon changed though and that patchwork turned into a cushion that was gifted to a friend.
Fast forward to this year and although I had too many projects already, I started my stocking again. This time I wanted to try something different and just have some fun sewing. I decided I would use the scraps I had left from cutting out a quilt. It is some heather Ross sugarplum fabrics, with cute mice! I then chose to patchwork using the quilt as you go method. I have seen it lots on instagram but not found the right project to actually try it... til now.

It was so much fun to just add pieces and quilt, although I did consider fabric placement a little. I did end up with a white patch on one side, but I still think it looks ok especially since its only the one side. I wasn't planning to do both sides, but I was enjoying sewing and had scraps left, so I figured why not?


I finished quilting both sides of my stocking and trimmed to the same size. I cut out the matching check lining, which was a big  piece left over from the same quilt.
Once I had sewn it all together, I still felt like it was missing something. I decided I'd add a pom pom trim... I have kept buying them without a project and they seemed like the perfect finishing touch for this. As it was my first time sewing pom poms, I went for a simple straight top stitch in the middle of the band. I did have to change to a zipper foot on my machine to get past the pom poms. Part of me wishes I had taken the time to hand stitch them in place, however, I think it looks neat enough to be happy as they are.

This was a lot of first times and I am so pleased with how it has come together.

If you want to see more great stocking inspiration, visit the #sunnystockingsal on instagram.

Mx

Wednesday, 15 May 2019

My birthday stitchers swap

 
This year I signed up to take part in a birthday stitcher swap, over on Instagram. I recently had my birthday and these are the wonderful gifts I received. Maria (aka @madame_tailor on Instagram) sent my gifts from Germany.

First is my main handmade gift, which is this super carry all caddy. Marie used some beautiful art gallery fabrics and rose gold hardware. It looks so pretty plus with so much space and pockets, I’m sure will be very useful for holding plenty of projects.


My second handmade gift was this mini makers station, which is designed to go over the arm of a chair. It has some great pockets on either side, a thread catcher which buttons on and a tray on top. It has magnets in the bottom of the tray and pin cushion to stop them falling off and so you can use it separately too if you wanted. Maria used some more of the sonata fabrics that coordinated with the caddy. It is backed with a really great low volume print that I love. The third handmade item is this adorable mouse toy. She has a pretty dress and a beautiful hand stitched face, even some blush.


Lastly is this Lola zip pouch. It matches the other 2 gifts and I think it is my favourite print from that range too. They look so lovely together, I definitely think I will have to keep them all together and be super organised. 

 
Maria also included a few other extras including a mini charm, pin cushion ring and ribbon (shown in the makers station above) some chocolates and bath soaps. Not forgetting my dog, Millie, who also got some treats and a toy... Although she was rather more interested in my mouse! 
 
 
I can’t share what gifts I have made for my partner yet, because it’s not my her birthday until later this year. I would say I don’t want to spoil the surprise, which I don’t, but I also haven’t made them yet! 
 
Mx

Monday, 22 April 2019

Easter bunny bag


I made this cute drawstring bag as an Easter gift for a little girl. I bought the ‘bunny tales’ by lucie crovatto by studio e fabrics and some carrot fabric (I don’t know the name and my fq doesn’t have a salvage), a while ago and knew it would be perfect for this project. I added some dashwood twist fabric and some pale blue ribbon that I thought matched the fabrics. I made the pouch with a boxed base so that a bunny soft toy would sit inside and in years to come there is space for plenty of chocolate eggs. I took extra time and care to stitch the turning gap up neatly so the bag is also reversible.


This isn’t a tutorial but if you're interested in the measurements (also so I have a reference point) I have written them below:
4 @ 7” x 9” with a 2 1/4” square cut from all the bottom corners
2 @ 1 1/2” x 8”
2 pieces of ribbon approximately 25”

Mx

Sunday, 21 April 2019

Easter bunny hoop


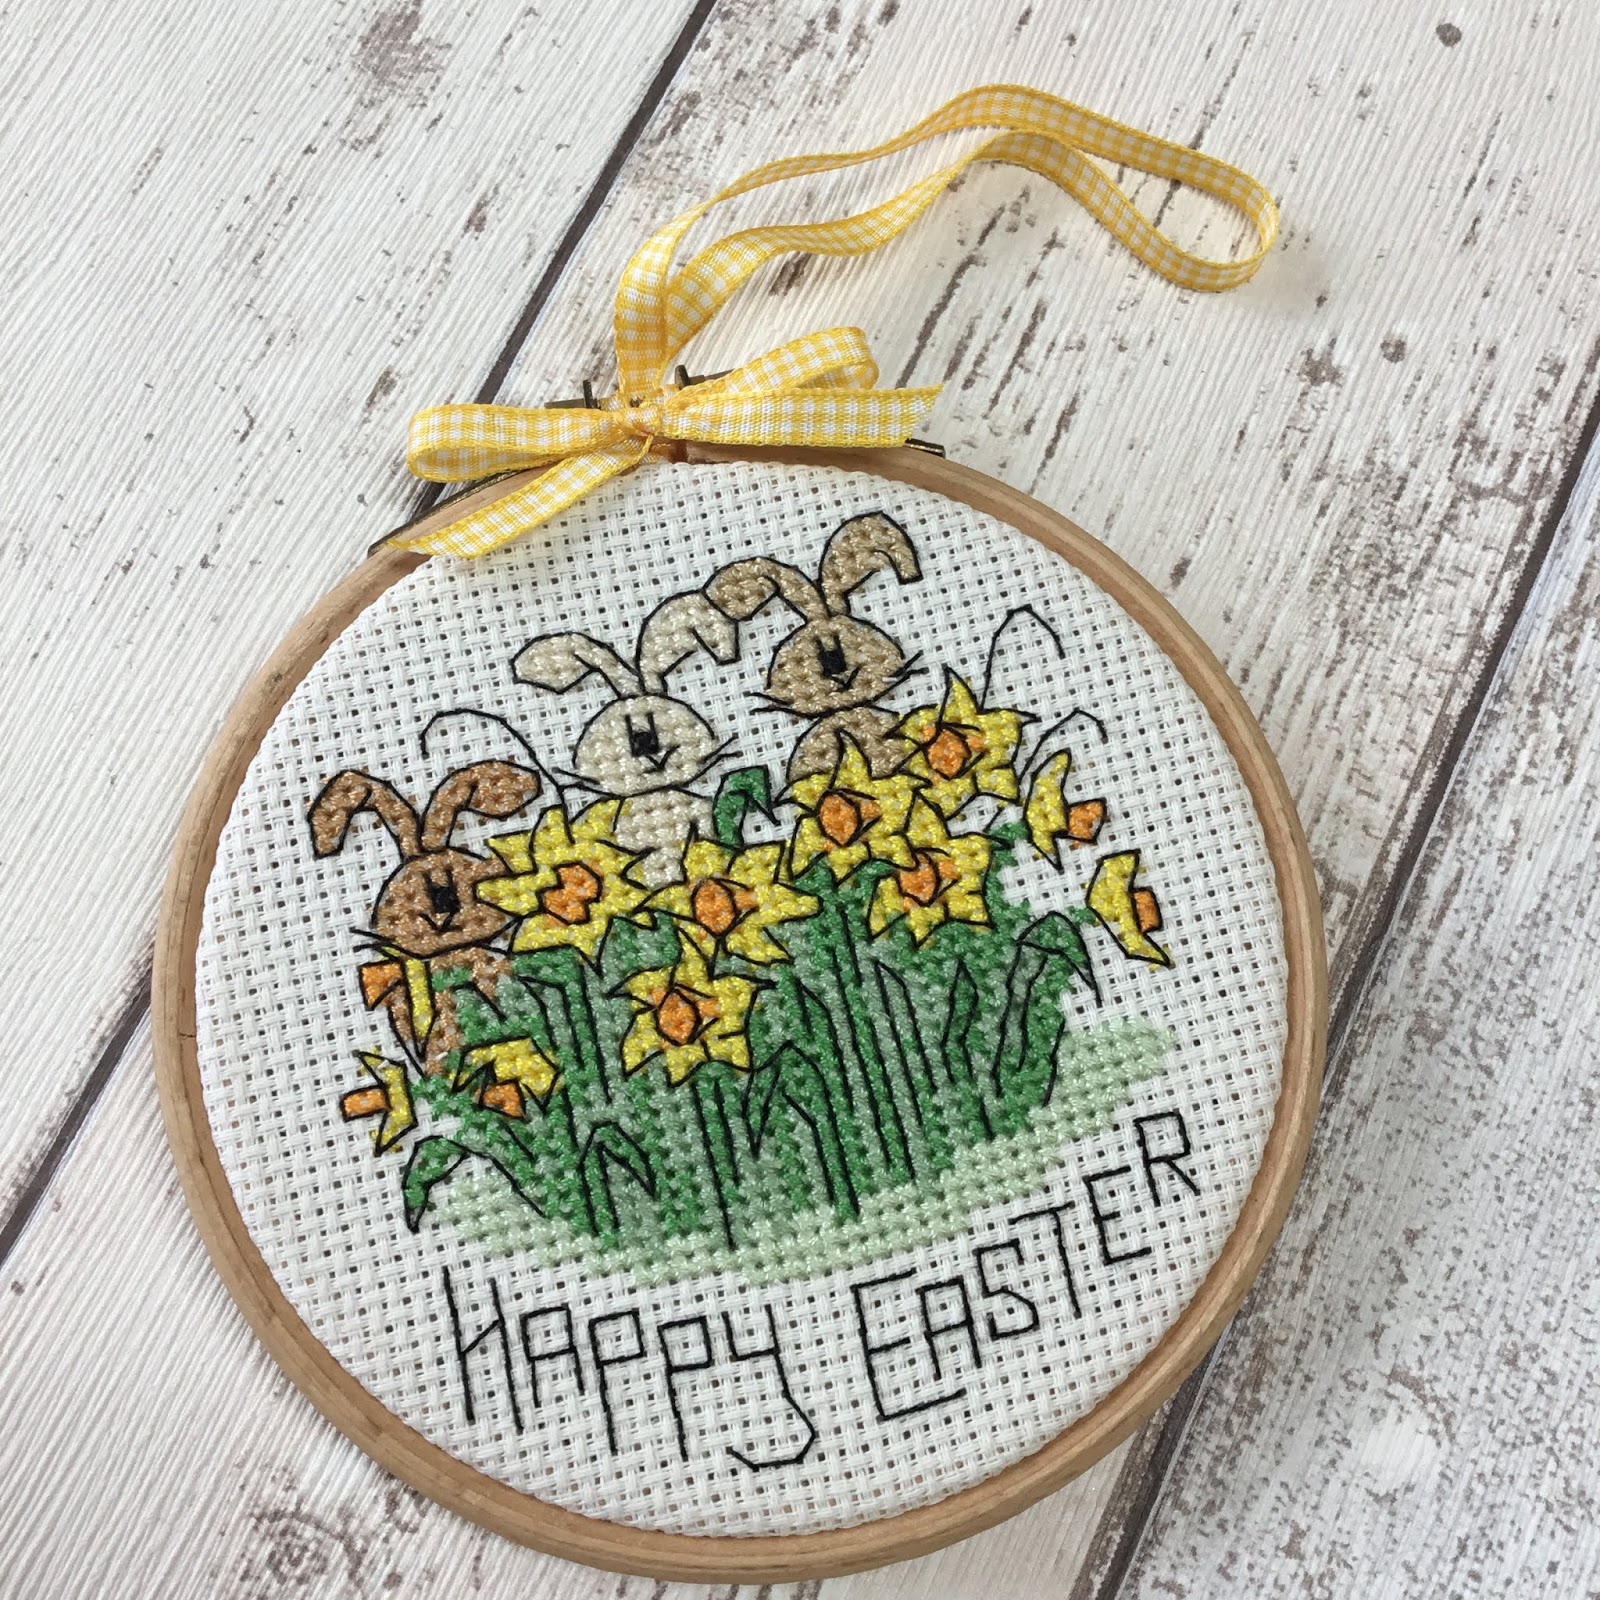
I bought a daffodil patch cross stitch kit from hobbycraft and thought it would make a lovely Easter decoration. I stitched it last summer but since Easter had already gone, I didn’t finish it til now. 
To make my hoop art decoration I firstly chose my hoop size and drew around the hoop onto some card, I used this to make a template for later. I took my finished stitched panel and placed into an embroidery hoop. I pulled the fabric nice and tight into the hoop and used a screw driver to really tighten the top, then trimmed the fabric to be an even size all around. I added glue to the inside of the wood frame and stuck the fabric down neatly. 
I then made sure my card circle was the right size to cover the back of my hoop and cut a piece of yellow fabric, adding a good 1/4” for seam allowance around the card template. I did a running stitch around the edge of the fabric and pulled the ends to tighten the fabric around the card. I ironed this then let it cool. I removed the card to be just left with the fabric circle. I laid this onto the back of the hoop and stitched in place, using a ladder stitch with some neutral cotton. I had to bend a needle to make it easier for me to stitch it neatly. 
The final thing to do was add the ribbon for it to be hung up. I took a length of yellow gingham ribbon and tied a knot to secure both ends together creating a loop. I then threaded the ribbon loop through the gap near the screw and hooked it through itself to secure to the hoop, with the knot positioned under the screw. I cut a second piece of ribbon and wrapped it around, to cover the knot and most of the metal bar that would be on show, and tied it into a cute bow with the ends trimmed to size. 


A friend celebrates Easter much more than I do, so I have decided to gift this decoration. Since I am gifting this, it needed a box. I used kraft card to make a square base. The hoop is slightly longer than wide due to the fixings at the top, so to stop it shuffling around in the box I used cream card to make an insert. This holds the hoop snugly in place. I made an acetate lid, to just slot in between the 2 pieces. I’m really happy with how this turned out and think it looks quite professional. 
This was also one of my finish-a-long projects, although I finished it in Q1 I am going to enter it into Q2 since I didn’t want to spoil the surprise. You can read more about my finish-a-long projects here.

Mx

Saturday, 2 March 2019

bambi in meadowland


 I made a bambi quilt last year as a christening gift and had some fabric left over. Since the little girl was turning one this month, I thought I’d make a cushion to match. I couldn’t decide what patchwork design to make, but after a bit of thought, I decided the meadowland was a great choice.  Although the blocks are normally done a bit more scrappy or random, I thought the simple colour palette would work and the bambi images were perfectly sized for the blocks too. 


I made up the block and backed with fusible batting. I quilted with diagonal lines to follow the block and blend with the original quilt. I found a cushion pad the perfect size to fit the block, but it would work well to add a border if you had a larger cushion. I simply made the back with a zip inserted into the white bambi fabric cut to size. For a nicer finish, I made binding from the pink print to edge the cushion. Binding takes extra time to hand stitch around, but I think it is worthwhile.   

If you like this pattern, you can purchase from then came june and join the sew along on instagram with #meadowlandqal . I'll be joining the fun making myself a quilt, so you can follow my progress with it over on instagram.

Mx

Thursday, 7 February 2019

Micky quilt


Since I made a quilt for Annie’s christening (read about this quilt here) I thought it was only right that I made a quilt for another friends baby who was born at similar time. I knew he wasn’t going to have a christening, so his first birthday seemed like the perfect opportunity. 
For Finlay’s quilt, I wanted fabric that would also be quite timeless so he wouldn’t grow out of it too fast. I was lucky to find this Micky material on sale at a local shop and it seemed like fate... After all what is more timeless than Disney's Micky mouse!
As I had left it a little late to start, I chose to do a simple square patchwork design. I did however choose to combine 3 of the fabrics, using the layout to make a pattern. I think this makes quite a striking design and am very pleased I decided to make it this way. I was quite surprised how quickly it came together, made easier by a lot of chain piecing. My mum was also very helpful and did quite a lot of pressing the seams for me.

 
I chose the grey fabric for the backing since it was darker than the other prints but included all of the colours. I also made the quilt to the width of the fabric to save me piecing the back. I chose to do simple straight line quilting, going diagonally across the squares. I only quilted every other square too to give the quilt a softer feel. I used the red print as the binding to frame both the front and back nicely.


The measurements I used to make this quilt are below if you would like to make your own:
 
finished quilt size is 40.5" x 58.5"
 
fabric A (white) cut 35 @  5"x5"
fabric B (blue) cut 58 @  5"x5"
fabrc C (red) cut 24 @ 5"x5" plus 2.5" strips for binding
 
I cut the binding strips first, taking advantage of using the full length of the fabric. Then cut the squares from the remaining fabric. I cut and joined at least 230" of binding just to be safe.
I used 1/4" seam allowances throughout my quilt.
 
 
It was a very dull and windy January day so the pictures aren’t great, but the quilt was happily received and that’s the thing that matters the most.
 
This quilt was a project for my Q1 finish-a-long, you can read more about this here!
 
Mx

Tuesday, 8 January 2019

12daysofchristmasswap


I signed up to do the #12daysofchristmasswap2018 on instagram a few months ago. The idea is to make and buy 12 gifts for your partner to open on the 12 days after Christmas.
It is a secret swap and you are assigned a partner and no one knows who is making for who. When you sign up you fill out a form telling your partner your preferences and make a mosaic and post to instagram for more inspiration.
My partner was Helen, known as @polly_dolly_wolly on instagram, these are the gifts i sent...


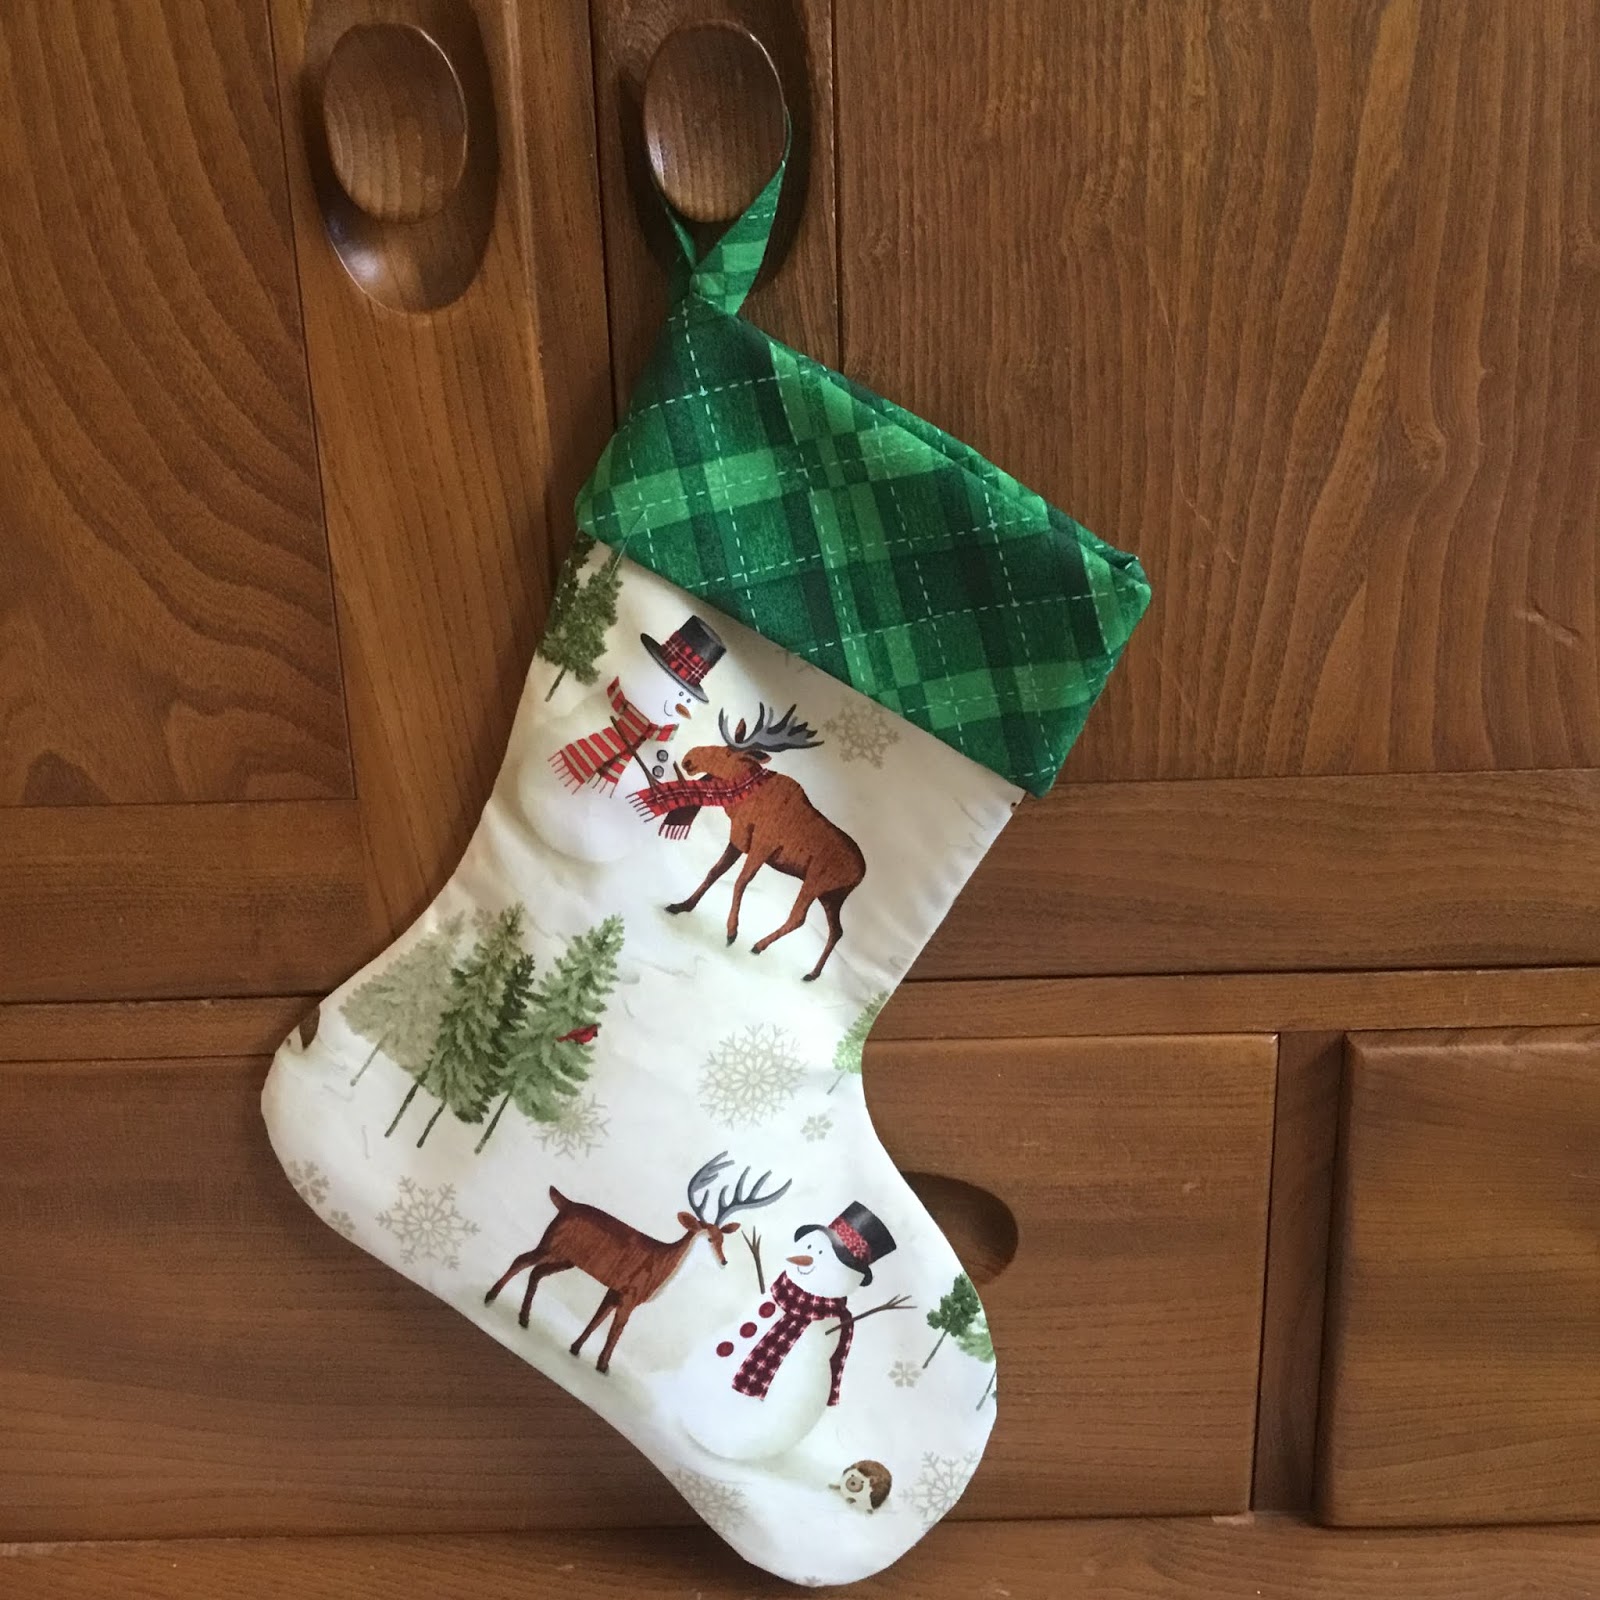
My first make was this Christmas stocking, using a fabric that was trational but still cute. I added the green cuff to be more Christmassy and fussy cut the characters to show them all. 


Next make was these 2 felt decorations, I chose the designs and cross stitched the centre panels. I added a felt border and back and blanket stitched together, also adding some stuffing for a plush feel.
 
 
Next was a partly bought and partly handmade gift. Since I didn't know her scent preference I purchased a selection of Christmas scented Yankee Candle tea lights along with a glass holder. I then made a hexagon shaped box for them to be gifted in. I added an acetate lid and some shredded tissue to give a more professional feel.
 
 
I made a zip pouch with a matching key fob for her next gift. I used a variety of coloured fabrics to make a patchwork panel and mixed it with some linen/calico fabric. I added a wipe clean lining and one of my handmade labels inside.
 
 
I chose a bright coloured zip that I felt worked with my fabric choices. The final touch was a charm for the zip pull. I used some jewellery supplies and chose this fun bead that matched the colour of the zip.
 
 
I screen printed a tote bag with a kitten design, using my screen sensation system, kipton the kitten screen and potting shed ink.

 
The next two gifts were a pin cushion and a needle book. I created the pattern for the pin cushion a few years ago and have made a couple before. For this one, I chose some bright coloured vintage sewing themed fabric and added lace and purple ribbon trims to the jar. 
 

I used the Aneela Hoey pattern for the needle book, doing the same adjustments as I did for the one I made in the sew along. I used the fabric to match the pincushion and combined it with some cream linen. I used some decorative stitches on my sewing machine with purple thread to add some detail on the pockets and on the front. 

 
The other gifts I included were a map puzzle, lindt chocolate, an organizer, loccitane soap and hand cream. I also sent some haberdashery items that I thought she might like; a needle egg, sparkle embroidery thread packs, vintage lace (that I found at a antiques fair) and some vintage buttons (that were from my granny).
 
I love gifts to be perfect for the person receiving them so I always put a lot of thought into gift giving. I was rather stressed at times about this swap, but was happy with what I sent. Thankfully Helen likes hers gifts and I even managed to choose some of her favourite things. 
 
These items were also on my finish a long list and although I knew I needed to finish them, it was quite hard not sharing any progress so this was an extra bit of motivation. You can read more about that here.
 
Mx