Showing posts with label hand stitched. Show all posts

Thursday, 17 October 2019

Binding tutorial: method 1

There are two main methods of binding that I use. The first is a simple binding for smaller projects and the other I mainly use for quilts. I thought I'd write a tutorial for each. The first one today and then the second next month.
Method 1 uses 2” strips of fabric and is sewn on to your project with a 1/2” seam allowance. I sometimes join on the bias however in this example I have used straight seams. The benefits of straight seams are that it requires less fabric and is easier to sew.
 
  
 Cut 2” strips the width of fabric (110cm = WOF)
Place 2 strips right sides together and pin the 2" width at one end. Sew together using a 1/4” seam allowance, then press the seams open. 
 
Press the strips in half lengthways, wrong sides together. Then, bring the long raw edges into the middle crease and press along again.


To attach the binding to your project:
1. Clip the binding onto the bottom edge with a few inches extra at the end for joining later. Stitch the binding on using a scant 1/2"seam allowance.
2. Measure and mark 1/2" from the corner and stop stitching when you reach the mark.
3. To shape the corner, fold the binding down wrong side together, vertically in line with the edge of the project, to create a 45 degree angle on the corner. Holding the corner in place, fold the binding back up and clip in place ensuring it is aligned along the corner edges.
4. Stitch from the bottom edge up to the next corner, stopping 1/2” before the end.
5. Repeat step 3 for each corner and continue sewing until you have about 3” before you reach the start of the binding, then stop.
6. To join the two ends, mark a line about 1” in from the end then fold it back on itself, wrong side together. Lay the other end of the strip over the top, right sides together and pin, only catching the top 2 layers of fabric.
7. Fold over to check, that it lays flat and the binding strips meet at the marked line. Make sure to secure the join in place with pins before you move it to sew.
8. Move the binding so the join overhangs the project. Stitch along the marked line to join the 2 layers of binding together. Once sewn, double check the binding lays flat along your project and trim to leave a 1/4"seam allowance, then press the seam open.
9. Stitch the joined section of binding to the project, again using the scant 1/2" seam allowance.

To finish your binding, turn over your project. Bring the binding over to the back, folding the raw edge in and the folded edge down. Clip to hold in place and hand stitch in place on the reverse. I use a ladder stitch although a slip stitch would also be fine. Alternatively, you can use a machine to top stitch close to the edge of the binding.
Mx
 

Wednesday, 15 May 2019

My birthday stitchers swap

 
This year I signed up to take part in a birthday stitcher swap, over on Instagram. I recently had my birthday and these are the wonderful gifts I received. Maria (aka @madame_tailor on Instagram) sent my gifts from Germany.

First is my main handmade gift, which is this super carry all caddy. Marie used some beautiful art gallery fabrics and rose gold hardware. It looks so pretty plus with so much space and pockets, I’m sure will be very useful for holding plenty of projects.


My second handmade gift was this mini makers station, which is designed to go over the arm of a chair. It has some great pockets on either side, a thread catcher which buttons on and a tray on top. It has magnets in the bottom of the tray and pin cushion to stop them falling off and so you can use it separately too if you wanted. Maria used some more of the sonata fabrics that coordinated with the caddy. It is backed with a really great low volume print that I love. The third handmade item is this adorable mouse toy. She has a pretty dress and a beautiful hand stitched face, even some blush.


Lastly is this Lola zip pouch. It matches the other 2 gifts and I think it is my favourite print from that range too. They look so lovely together, I definitely think I will have to keep them all together and be super organised. 

 
Maria also included a few other extras including a mini charm, pin cushion ring and ribbon (shown in the makers station above) some chocolates and bath soaps. Not forgetting my dog, Millie, who also got some treats and a toy... Although she was rather more interested in my mouse! 
 
 
I can’t share what gifts I have made for my partner yet, because it’s not my her birthday until later this year. I would say I don’t want to spoil the surprise, which I don’t, but I also haven’t made them yet! 
 
Mx

Tuesday, 14 May 2019

Liberty kantha cushion


I had seen the #libertysocietykanthastitchalong on Instagram last year...A chance to use some of my liberty fabric stash and try something I had never done before. Lots of beautiful projects were made last year, but I didn’t get chance to join in so I was excited to get started this time round.
I patch-worked my panel on the machine, using some of the liberty scrap packs I had bought from duck egg threads online. I then chose my batting and added a piece of white cotton, to make my quilt sandwich. I chose a few colours of #8 perle threads. It was my first time using these too, with a slight sheen, they where easy to stitch with. I used my add-a-quarter ruler to keep marking a guide line with a clover Hera marker. 
Unfortunately the quilt for nanas 80th birthday took priority, so I only got time to finish my panel while the sewalong was still running. I should have picked a smaller project but I just knew I wanted a cushion. To make up the cushion, I used a bigger piece of liberty tana lawn to coordinate with the front. Since I didn’t want to bind the cushion, I just did the turn out method, but it didn’t quite look right. I top stitched a border about 1/4” from the edge and I think this was the finishing touch it needed. 
It was quite relaxing to do the kantha stitching and gives such great texture. I also think it was quite good practice for if I wanted to do some hand quilting in the future. The liberty is so soft and the overall cushion feels very luxurious. I love it and am so pleased I took the time to make it.


This was one of my Q2 finish-a-long projects. If you want to read that list, click here!
Also if you fancy looking at some very beautiful projects similar to mine...Go to Instagram and check out #libertysocietykanthastitchalong, which was hosted by the lovely @tincatsew.
Mx


Sunday, 21 April 2019

Easter bunny hoop


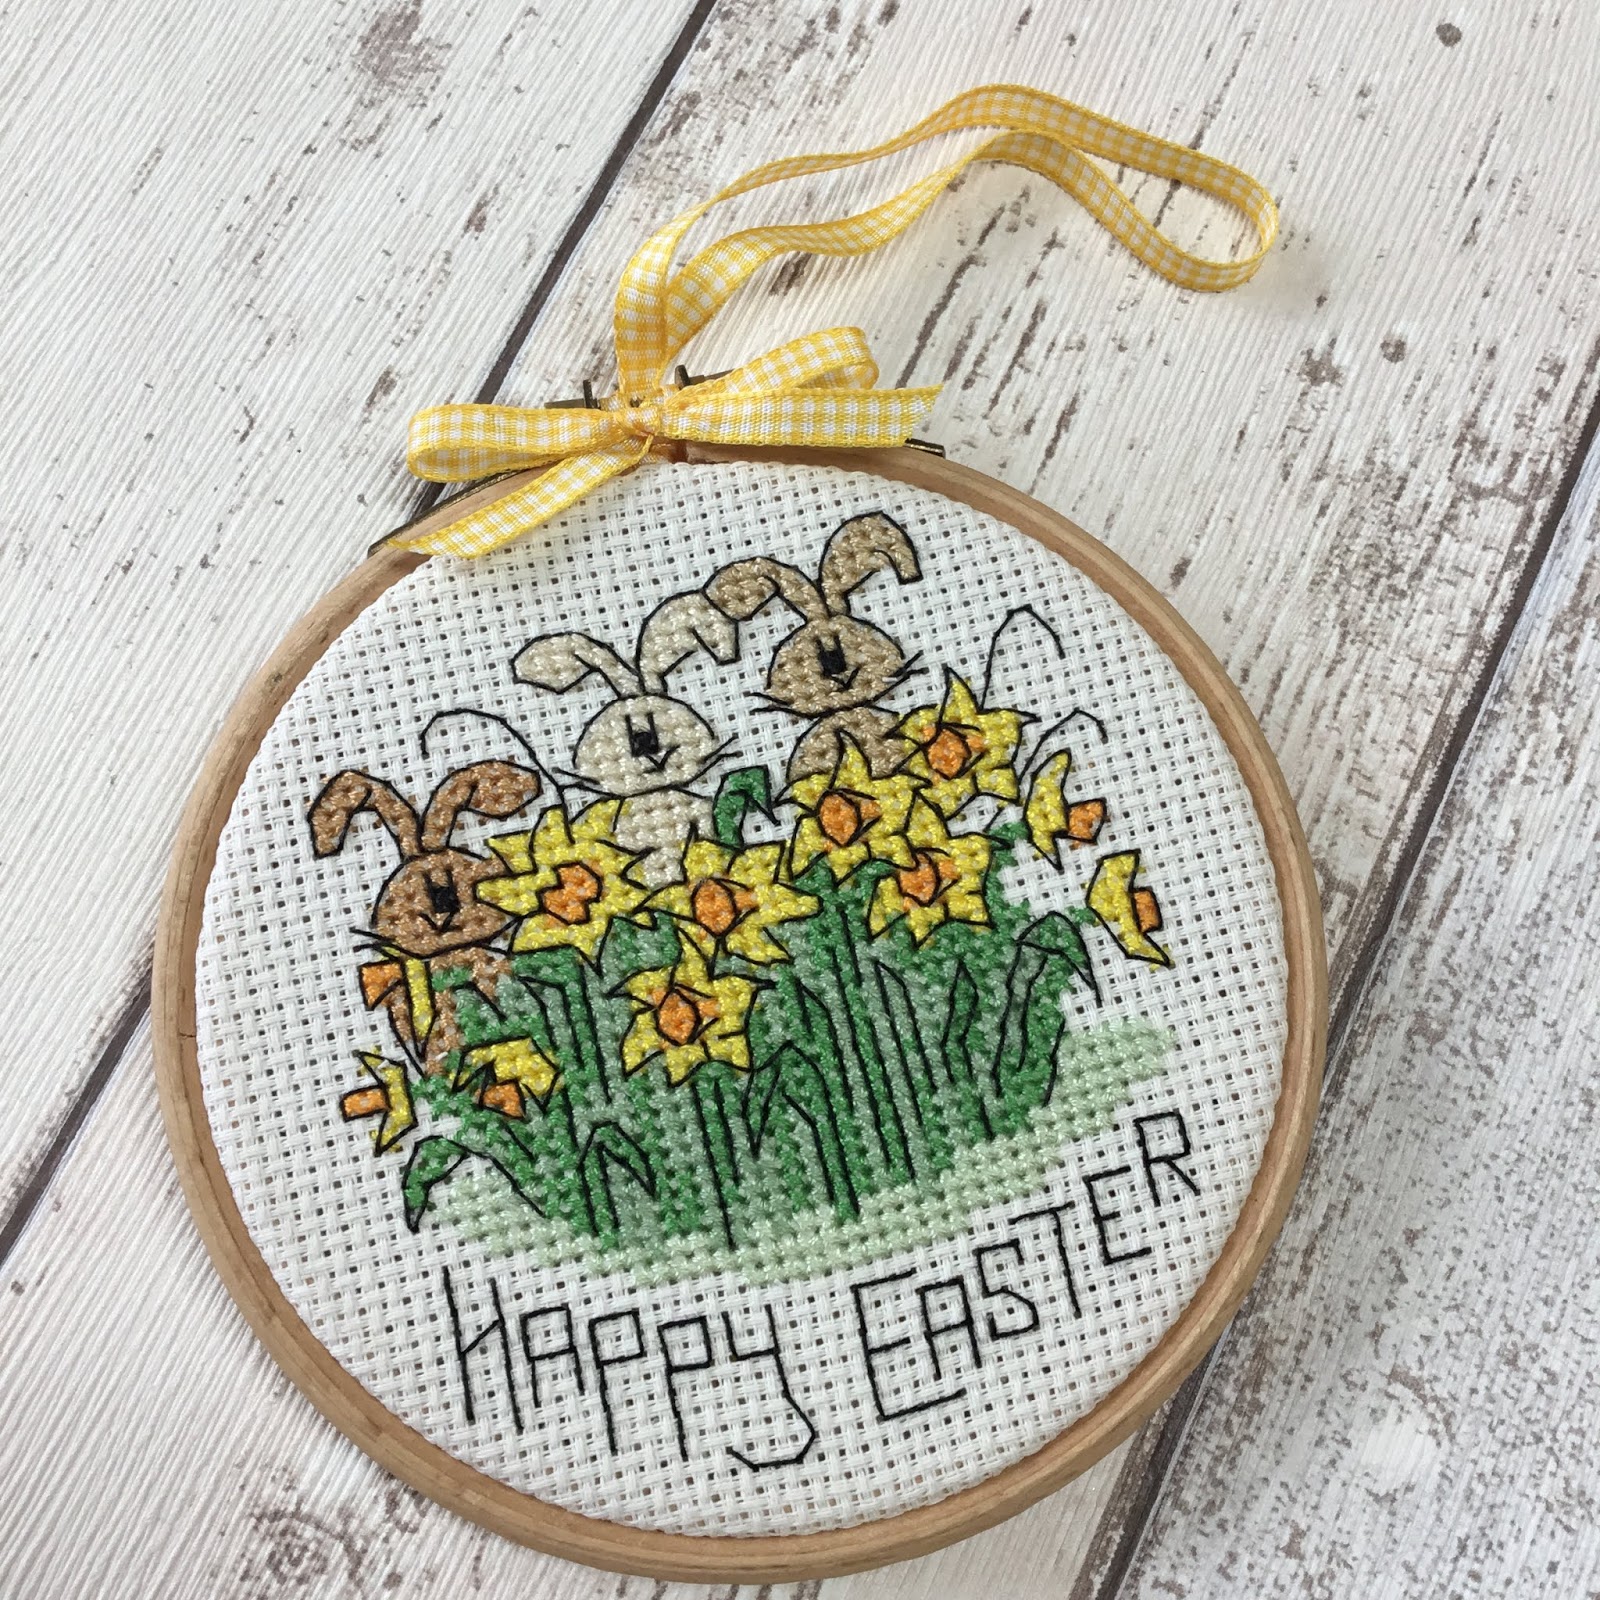
I bought a daffodil patch cross stitch kit from hobbycraft and thought it would make a lovely Easter decoration. I stitched it last summer but since Easter had already gone, I didn’t finish it til now. 
To make my hoop art decoration I firstly chose my hoop size and drew around the hoop onto some card, I used this to make a template for later. I took my finished stitched panel and placed into an embroidery hoop. I pulled the fabric nice and tight into the hoop and used a screw driver to really tighten the top, then trimmed the fabric to be an even size all around. I added glue to the inside of the wood frame and stuck the fabric down neatly. 
I then made sure my card circle was the right size to cover the back of my hoop and cut a piece of yellow fabric, adding a good 1/4” for seam allowance around the card template. I did a running stitch around the edge of the fabric and pulled the ends to tighten the fabric around the card. I ironed this then let it cool. I removed the card to be just left with the fabric circle. I laid this onto the back of the hoop and stitched in place, using a ladder stitch with some neutral cotton. I had to bend a needle to make it easier for me to stitch it neatly. 
The final thing to do was add the ribbon for it to be hung up. I took a length of yellow gingham ribbon and tied a knot to secure both ends together creating a loop. I then threaded the ribbon loop through the gap near the screw and hooked it through itself to secure to the hoop, with the knot positioned under the screw. I cut a second piece of ribbon and wrapped it around, to cover the knot and most of the metal bar that would be on show, and tied it into a cute bow with the ends trimmed to size. 


A friend celebrates Easter much more than I do, so I have decided to gift this decoration. Since I am gifting this, it needed a box. I used kraft card to make a square base. The hoop is slightly longer than wide due to the fixings at the top, so to stop it shuffling around in the box I used cream card to make an insert. This holds the hoop snugly in place. I made an acetate lid, to just slot in between the 2 pieces. I’m really happy with how this turned out and think it looks quite professional. 
This was also one of my finish-a-long projects, although I finished it in Q1 I am going to enter it into Q2 since I didn’t want to spoil the surprise. You can read more about my finish-a-long projects here.

Mx

Saturday, 23 March 2019

Pretty little mermaid


Last year this pretty little mermaid cross stitch kit was a free gift with a magazine. It was a fun little project to stitch in the car. I then left it unfinished til today. I added some pink felt on the reverse and used DMC threads (E316 & 48) to stitch around the outside of the mermaid. I then trimmed both fabric layers to the same size. 
This is one of my finish-a-long projects and I’m so happy I finished it. It looks so cute, especially in its gifting card, that was supplied in the kit.
To see my other finish-a-long projects click here!

Mx


Tuesday, 5 February 2019

Epp on the go


 As part of the #100hexies100days Instagram challenge hosted by @sewfoxymama, I was encouraged to baste 100 hexies. I chose to do all cotton and steel fabrics, although it was hard to find fabric to fit the weekly themes I just managed to do it. I was so pleased I completed all 100 days and on time! I was determined to make them into a project for me to keep and use. I originally thought of a bag but decided on this 2 in 1 pouch designed by aneela hoey. I actually had too many to just make this one pouch so I chose which hexies I wanted and gave the other half to my sister, for her to make a pouch too.
 
 
I decided on this layout and set to hand stitching them all together. Once stitched, I added batting to the reverse and did some straight line quilting going diagonally through the hexies. I chose my favourite girl with balloons fabric and used a medium/heavy interfacing on the reverse to line. Sparkle vinyl was an obvious choice for my pouch. I found a couple of bits from my scrap bag for the fastening tab and decided on a bright pink kam snap. I picked pink zips and the wonderful teal sprinkles fabric from cotton and steels basic range as my binding.
 
 
I must admit that I didn’t follow the book instructions completely. After making this pouch as part of the sewalong last year, I had a few little adjustments that made things a bit easier this time.

I am so happy with this pouch, all of my fabric choices and the cute fussy cut hexies makes it perfect. It is also super handy and has been used to hold my supplies for my ice cream soda EPP quilt I’m making. I will be doing most of the sewing on the go so it’s great to be able to pick this up in a rush and know I have everything ready to see, well apart from my glasses!
Mx


Tuesday, 8 January 2019

12daysofchristmasswap


I signed up to do the #12daysofchristmasswap2018 on instagram a few months ago. The idea is to make and buy 12 gifts for your partner to open on the 12 days after Christmas.
It is a secret swap and you are assigned a partner and no one knows who is making for who. When you sign up you fill out a form telling your partner your preferences and make a mosaic and post to instagram for more inspiration.
My partner was Helen, known as @polly_dolly_wolly on instagram, these are the gifts i sent...


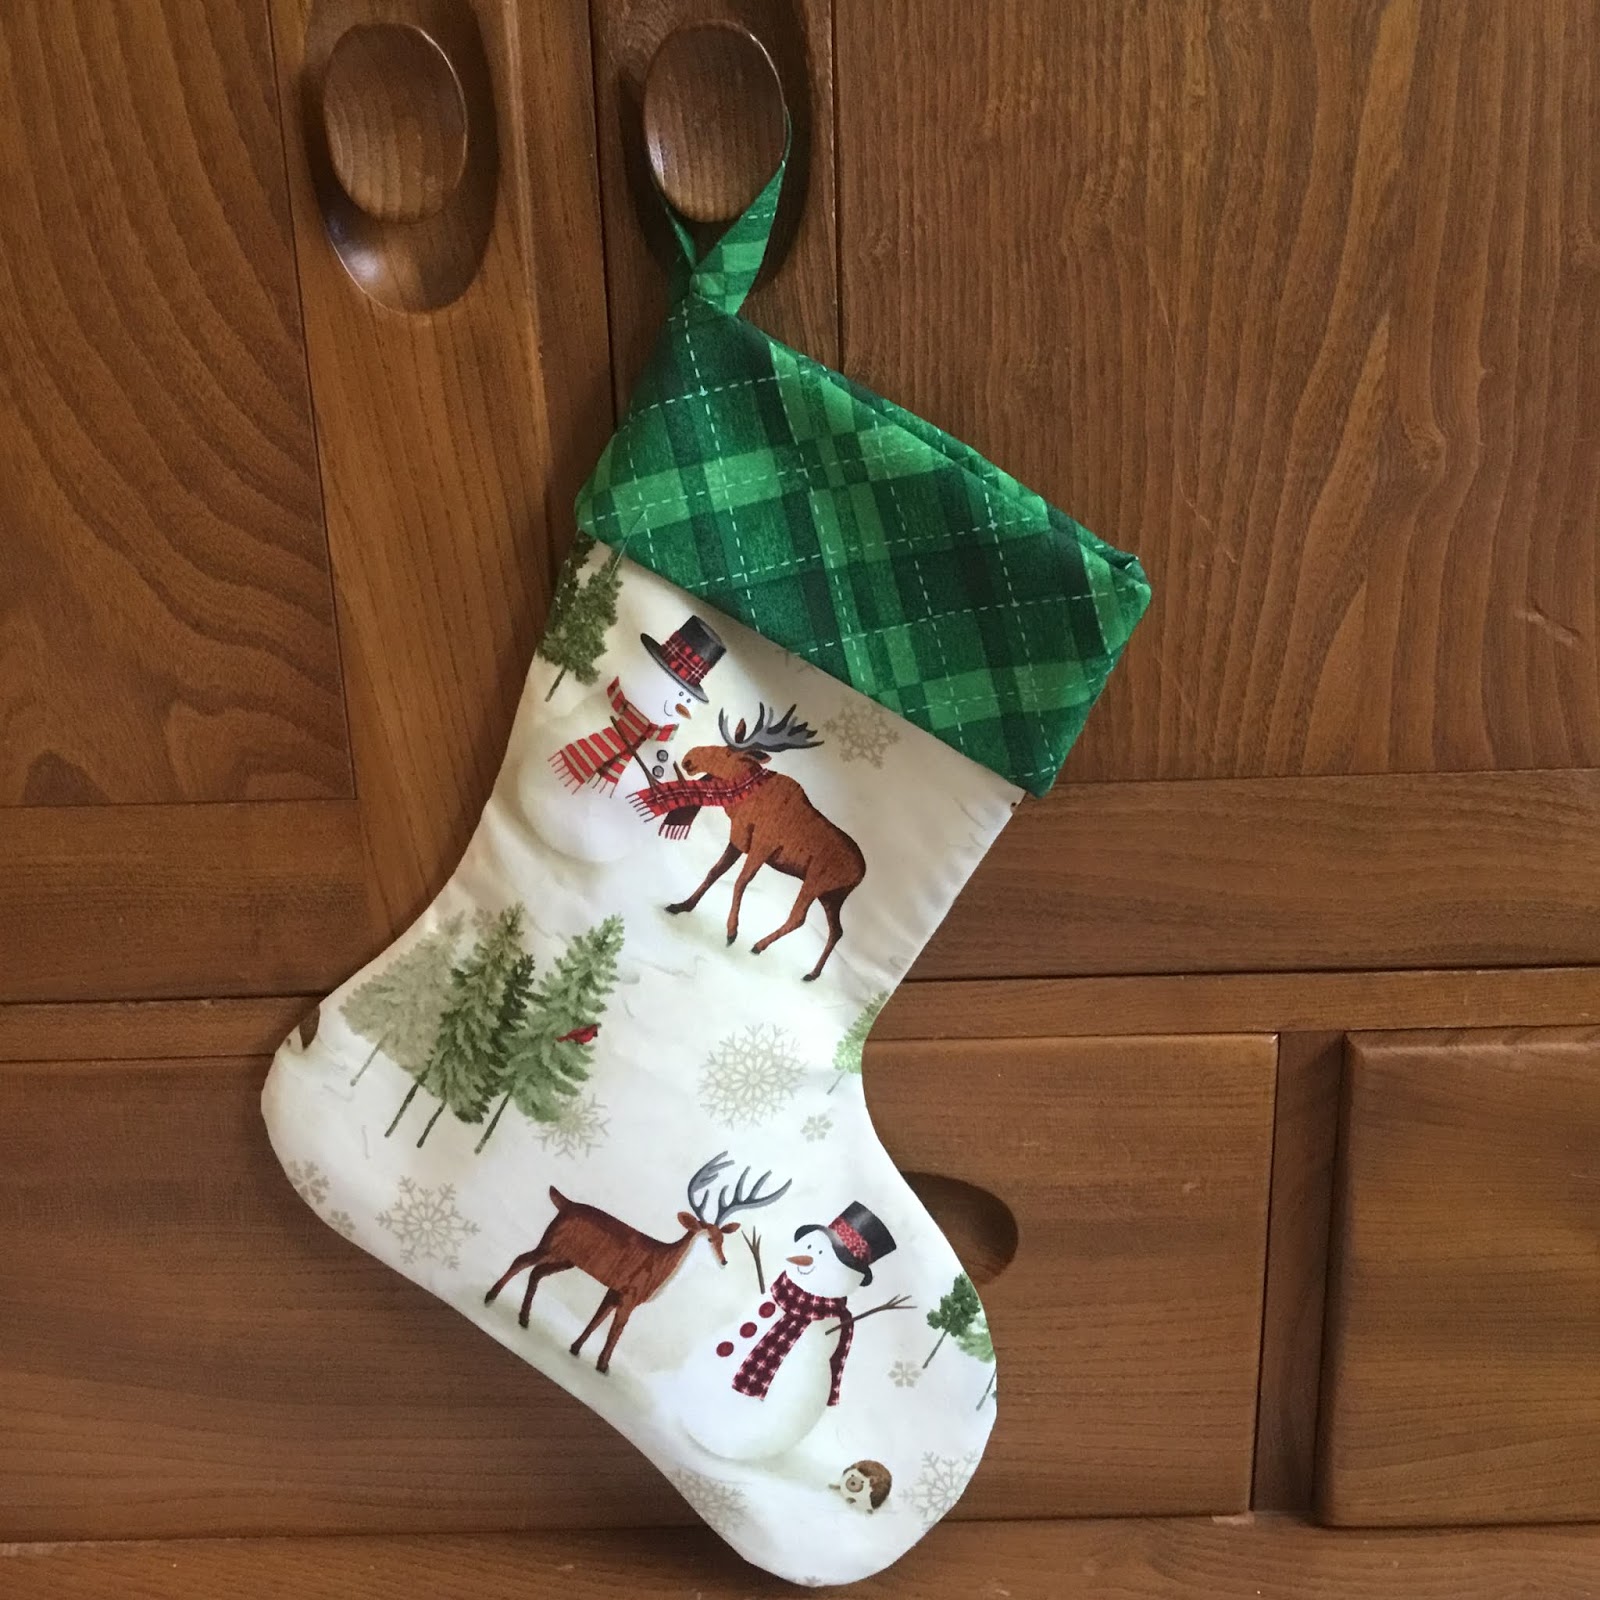
My first make was this Christmas stocking, using a fabric that was trational but still cute. I added the green cuff to be more Christmassy and fussy cut the characters to show them all. 


Next make was these 2 felt decorations, I chose the designs and cross stitched the centre panels. I added a felt border and back and blanket stitched together, also adding some stuffing for a plush feel.
 
 
Next was a partly bought and partly handmade gift. Since I didn't know her scent preference I purchased a selection of Christmas scented Yankee Candle tea lights along with a glass holder. I then made a hexagon shaped box for them to be gifted in. I added an acetate lid and some shredded tissue to give a more professional feel.
 
 
I made a zip pouch with a matching key fob for her next gift. I used a variety of coloured fabrics to make a patchwork panel and mixed it with some linen/calico fabric. I added a wipe clean lining and one of my handmade labels inside.
 
 
I chose a bright coloured zip that I felt worked with my fabric choices. The final touch was a charm for the zip pull. I used some jewellery supplies and chose this fun bead that matched the colour of the zip.
 
 
I screen printed a tote bag with a kitten design, using my screen sensation system, kipton the kitten screen and potting shed ink.

 
The next two gifts were a pin cushion and a needle book. I created the pattern for the pin cushion a few years ago and have made a couple before. For this one, I chose some bright coloured vintage sewing themed fabric and added lace and purple ribbon trims to the jar. 
 

I used the Aneela Hoey pattern for the needle book, doing the same adjustments as I did for the one I made in the sew along. I used the fabric to match the pincushion and combined it with some cream linen. I used some decorative stitches on my sewing machine with purple thread to add some detail on the pockets and on the front. 

 
The other gifts I included were a map puzzle, lindt chocolate, an organizer, loccitane soap and hand cream. I also sent some haberdashery items that I thought she might like; a needle egg, sparkle embroidery thread packs, vintage lace (that I found at a antiques fair) and some vintage buttons (that were from my granny).
 
I love gifts to be perfect for the person receiving them so I always put a lot of thought into gift giving. I was rather stressed at times about this swap, but was happy with what I sent. Thankfully Helen likes hers gifts and I even managed to choose some of her favourite things. 
 
These items were also on my finish a long list and although I knew I needed to finish them, it was quite hard not sharing any progress so this was an extra bit of motivation. You can read more about that here.
 
Mx

Monday, 7 January 2019

Sew 6 organisers giveaway


As part of the sewalong, we also held a giveaway at the end. Me and Zena sent a prize each with winners selected at random from those who joined us in the sewalong. My winner was Maja. 
We decided that since the participants had the book already,  we would use a different pattern by Aneela Hoey. I chose to make a flex frame case and hand stitch some decoration on, using the stitch & sew book.


I added a few extras to the package including some ribbon, a  notepad, pen, some little stationary bits and a handmade card. 

This was also one of my finish-a-long projects that I had on my list. you can see the original post here to find out more! 
Mx

Wednesday, 2 January 2019

An owl stocking


I chose this beautiful owl fabric to make a stocking for a friends baby. I opted for a large stocking to hold plenty of presents. I used some coordinating red fabric for the cuff and appliquéd her name and blanket stitched it in place on the front. I added some quilting with sparkle thread to the main stocking too. I think all these little touches make this an extra special stocking. 
 

I’m not sure what Annie will think to it since it’s only her first Christmas, but hopefully in a few years she will like it. 

This is also one of my finish-a-long projects, you can see more about this here!

Mx

Saturday, 13 January 2018

How I EPP

I recently read a great blog post by I'm studio lou (you can read her blog post here), explaining how she stores and does her EPP/ English paper piecing. I was inspired to share my own solutions with you in this blog.
I started doing an EPP quilt last year and am really enjoying it. When I started, I decided I would do 1" hexagons (I got some papers free in a magazine and couldn't wait to get started.) I chose a lovely fabric range called Sophia by Andover/Makower. I worked out how much fabric I would need to (hopefully) complete a double quilt, bought my fabric and got started. It is slow progress but I always knew it would be... I wanted a project which didn't have a deadline, so I would take time and not rush. It is also great that I can do some on the go and swap between different stages of prepping and stitching.
 I prefer the more traditional thread basting method and mostly like to do this on the go. I have a small pouch that I can take with me that has my essentials in. It holds a stack of pre-cut fabric squares, hexi papers, scissors, red thread (its contrasting so I can see it easily for removing later) and a small tin where I keep my pins and needles (I put a magnet into the bottom of the tin so the pin don't fall out as well!)
 
This pouch is a lot larger and stays at home. It holds extra supplies, like binding clips, 100% guttermann cotton thread, more fabric squares and pins with numbers on. It is also the perfect place to store the hexies I have basted.
 
 When I am ready to sew my hexies together I transfer them into this. I lay out my pattern on 12x12" cardstock, making sure all the patterned hexies are in the direction I would like to sew them. Because it takes me a while to get them sewn together, I had been wondering how to store them. I wanted them flat, dust free and to make sure the pattern didn't get mixed up while I wasn't sewing. I found this 12x13" clear box at a craft show and knew it would do the job perfectly. It is just the right depth to keep my cotton, binding clips, scissors and a hair bobble in, as well as my hexi layout. To sew my pieces together, I hold fabric right sides together and whip stitch over the edge making sure I don't catch the paper in the stitches.
 
Finally, I have this larger box. It's the start and the end box really. When I have completely sewn a sheet together, I add a numbered pin and move it to this box. It also holds all the fabric I purchased to do this quilt, some already cut into squares for basting and the rest just waiting to be cut when needed. There's spare needles (size 8 quilting gold eye needles are my preferred needle), and another set of hexi papers in there too.
 
Please forgive me for using the loccitane pouches, I had quite a few going spare and even though I sew, I still like to use them. I don't often sew for myself but I am planning on that changing this year... I really want to make some storage solutions for myself using the aneela hoey book.

Mx

Saturday, 9 April 2016

patchwork ball


I love hand sewing, so this patchwork ball was the perfect project to make for a friend. this is easy to make using the English paper piecing (EPP) method of patchwork. I used some very retro fabric that my mum bought in the 80's for this one. i decided that i wanted to make a fragrant hanging ball, instead of just a standard toy ball. to do this, i just added a piece of ribbon in to one of the seams to create a hanging loop. i using dried lavender and a little toy stuffing to fill out the shape. i think this makes a great little gift that can be used by anyone, (personalised by simply choosing a different fabric to suit the person)...
i have included a link to a tutorial on how to make a DIY patchwork ball...
Mx
(thanks to my friend Marcus for the picture as i forgot to take one!!) 

Sunday, 8 November 2015

Lest we forget...

thought I would just share this special make for remembrance sunday...


if you want to make your own poppy, you will need:
  • some red and green felt
  • some embroidery floss (or use multiple strands of standard cotton)
  • a black button.
  • a brooch back/ finding
  • fabric glue (optional)
I only use a backstitch and blanket stitch to create these poppies, which makes them easy to sew. I made a simple version with one layer and some stitch detail and another with an extra petal layer for added detail. I used fabric glue to help hold the layers of felt together and create more structure, but they would work without this.
 
 
Cut your felt shapes using the pattern pieces above. I added veins to the front leaf shape using backstitch. I added a brooch back to the second leaf shape before blanket stitching these two together. I stitched the button onto the first flower shape to form a centre (marked with an x on the template). I stitched the leaf onto the back of the other flower piece, (I tacked this on by only going through the first layer of felt of the leaf so that the stitches didn't show on the back.)  I then blanket stitched the two flower pieces together to finish my poppy.
 
For the more detailed flower, choose either petal 1 or petal 2 and cut these, along with the flower and the leaf shapes. I blanket stitched the two petal pieces together. I then secured a button where the cross on the pattern is. I then stitched the petal to the centre of the front flower shape lining the edges of the petals up. I made my leaf the same way as before and attached this to the other flower shape. The final step is to blanket stitch the two flower shapes together.

Mx

Friday, 24 July 2015

tweet tweet...


I thought I'd share some more of my hand stitched felt key rings with you. I found a template on pintrest and printed it out. I then used this to cut the felt pieces to make the birds. Each one has two pieces for the body and two wings, I used a different shade of the coloured felt for the wings and chose embroidery floss to match. I laid the pieces out with a wing on each body piece making sure they were facing the opposite way so they would come together to make a bird. I then secured the wings with blanket stitch on the blue one and backstitch on the others. I added French knots in black thread to create eyes. I then stitched the two body pieces together using blanket stitch. Once part way round, I added stuffing to give the birds some shape and secured a loop of ribbon to attach the key ring and completed the stitching to close the gap. These were nice easy shapes to cut and sew, so they would be perfect for beginners !
 
Mx 

Tuesday, 30 June 2015

very strawberry...


I made this strawberry keyring using panels of red felt. I added yellow French knots all over the panels to represent the seeds. I blanket stitched the panels together to form a cone shape, I then stuffed it before closing up the gap completely. I used green felt and cut out a pointy flower shape to make the leaves. I back stitched all the way around the edge and attached it in the centre, to the strawberry.  instead of using ribbon for this keyring, I made my own loop at the top.
Mx

Thursday, 18 June 2015

i carried a watermelon...


a friend requested a watermelon, after seeing my previous  keyring's. I cut a circle of green felt, a slightly smaller one in white and a slight smaller one again out of pink. I used coloured embroidery floss/ thread to add some details and secure the layers together. I folded my circle in half to find the centre and stitched a ribbon loop on the back. I cut out another circle of green felt, to the same size. I folded this in half, then trimmed either side down to make an elipse. I blanket stitched along one side attaching the front to the back, I then stuffed the watermelon. I made sure the shape was right and made any adjustments, by just trimming the felt a little. when I was happy with the shape I blanket stitched it all together, I added a bit more stuffing before I closed up the gap completely. I added on my metal keyring hoop to finish.
Mx