Showing posts with label BAG. Show all posts

Saturday, 14 March 2020

Birthday stitchers swap 2020... what i made!!


I decided to take part in the birthday stitchers swap on Instagram again this year. I was so pleased to be making for one of my close friends again too! I had so much to choose from the inspiration mosaic Zena made, it was full of fun ideas and I was quickly excited to get started. 


For the main make I chose to make a quilted tote bag with strawberry patchwork. I used similar construction to the previous one I had made, but changed the measurements (I'm hoping to do a tutorial blog for this soon!). I knew Zena had already received a larger grey tote, so it would be nice to make something different and a bit smaller. The smaller size also made more sense to fit the size of the patchwork strawberry


To make the bag I used red and green scraps for the strawberry patchwork and Everglades by Betsy silver for Michael Miller for the white. I added an Essex linen in ‘midnight’ to finish the bag outer nicely. For the lining, I used Strawberry tea by Axelle design for Michael Miller and added a slip pocket inside. This print felt like the perfect match for the patchwork design on the outer. I picked the Aurifil thread in shades 2745 & 2021 to use as I thought the colour matches were great


For the small makes, I started with a medium sized sewing case as Zena had included a few similar ones on her mosaic. I didn't want to purchase another sewing pattern, so I just made it up as I went along. I'm pleased with how it turned out, (although I'm sure there was a lot easier way to make it, so I wont go into that!) 


The main feature of this make for me though was the EPP. I didn't want to do just regular hexie shapes, but I don't feel quite ready for anything as fancy as clam shells. I decided a honeycomb was a nice option, it was a little different but still in my comfort zone. It also worked very well with the fussy cut images that I wanted to include. I felt it would be too much to make the entire case from patchwork, so I opted for a panel on each side instead. I joined my EPP shapes together, appliqued them onto the linen, then quilted over the top. This was the first time doing something like that and I'm so happy with how it looks. I used several prints from the Penny Rose fabrics 'bunnies & blossoms' by Lauren Nash range, some cream/ natural linen (I cant remember the shade colour) and Aurifil thread '2311'. I know Zena likes to add extra details into her makes, so I thought it was only right I did the same when making for her too. I made zip charms using some strawberry shaped beads and handmade hearts. I also used a single honeycomb shaped piece of fabric, appliqued on to the inside with stuffing in, to create a mini pin cushion!


Next was a small drawstring pouch with a pocket on the front. To make it, I used some cotton + steel fabrics. Zena said she likes neon's and I knew I had some prints that I had bought without a plan of what project to make with them. This seemed like the perfect opportunity to use them. I liked using the different prints but felt like they blended a bit to much, so I went in search for some trim and ribbon. The neon was a struggle to find and it isn't a perfect match, but it's close enough to make the pocket look pretty and fasten the pouch.


The last little make was one of my mini travel pinnies.  I used the Riley Blake 'little sweetness' range by Tasha Noel, which I know Zena loves and managed to fussy cut the little dresses for the front to really make a feature of the print. The extras that I bought for Zena was a Cath Kidston mug, a 'z' candle and some charms. The best gift wrapping for any sewist is fabric of course, tied with a big ribbon. I also made a little scrappy keyring that served as a gift tag! 


It was a pleasure making everything and I'm pleased to say Zena loves her gifts. More photos of her gifts are on my @craftylilmouse Instagram account and you can go see all the beautiful things Zena makes on her account @mycreativepottylife too!
As for my birthday stitchers swap parcel, I still have a while to wait. I am already getting excited and will share those as soon as they arrive...

These projects were on my finish-a-long list, so I can tick them as complete!!

Mx


Tuesday, 31 December 2019

Glam bag

I made this bag as part of a Christmas gift for a friend. She's a beautician so when I saw these fabrics, I knew they would be perfect for her bag. I mixed prints from the 'Kiss me, Kate' range by See Kate Sew for Riley Blake and 'Glam Girls' by American Dream House for Michael Miller.
 

I designed the panels to mix the fabrics and spread the colours. I then worked out the quilty maths and cut my pieces as follows:
 
lips: 15 1/2" x 3 1/2"  +  14 1/2" x 3 1/2"
xox: 3 1/2" x 4 1/2"  +  3 1/2" x 4 1/2"
bows: 9 1/2"x 2 1/2"  +  3 1/2" x 5 1/2"
lipsticks: 6 1/2" x 6 1/2"  +  6 1/2" x 4 1/2"
eyelashes: 9 1/2" x 4 1/2"  +  3 1/2" x 4 1/2"
stripe: 6 1/2" x 4 1/2"  +  6 1/2" x 5 1/2"
 
The panel was made using the quilt as you go method with 1/4" quilting and seam allowances. I then added the sequin print to the top and base with 1/2" quilting. I created the handles with the same sequin fabric, with interfacing for strength and batting for comfort.  
 
 
I boxed the corners on the base and lined with the bows fabric to finish. I also added a little handmade label into the side seam.
 
 
I'm pretty pleased with how the bag turned out and think it's a useful size... Thankfully my friend is also pleased with it!! This is one of my finish-a-long projects which you can find here.
 
Mx

Monday, 22 April 2019

Easter bunny bag


I made this cute drawstring bag as an Easter gift for a little girl. I bought the ‘bunny tales’ by lucie crovatto by studio e fabrics and some carrot fabric (I don’t know the name and my fq doesn’t have a salvage), a while ago and knew it would be perfect for this project. I added some dashwood twist fabric and some pale blue ribbon that I thought matched the fabrics. I made the pouch with a boxed base so that a bunny soft toy would sit inside and in years to come there is space for plenty of chocolate eggs. I took extra time and care to stitch the turning gap up neatly so the bag is also reversible.


This isn’t a tutorial but if you're interested in the measurements (also so I have a reference point) I have written them below:
4 @ 7” x 9” with a 2 1/4” square cut from all the bottom corners
2 @ 1 1/2” x 8”
2 pieces of ribbon approximately 25”

Mx

Tuesday, 8 January 2019

12daysofchristmasswap


I signed up to do the #12daysofchristmasswap2018 on instagram a few months ago. The idea is to make and buy 12 gifts for your partner to open on the 12 days after Christmas.
It is a secret swap and you are assigned a partner and no one knows who is making for who. When you sign up you fill out a form telling your partner your preferences and make a mosaic and post to instagram for more inspiration.
My partner was Helen, known as @polly_dolly_wolly on instagram, these are the gifts i sent...


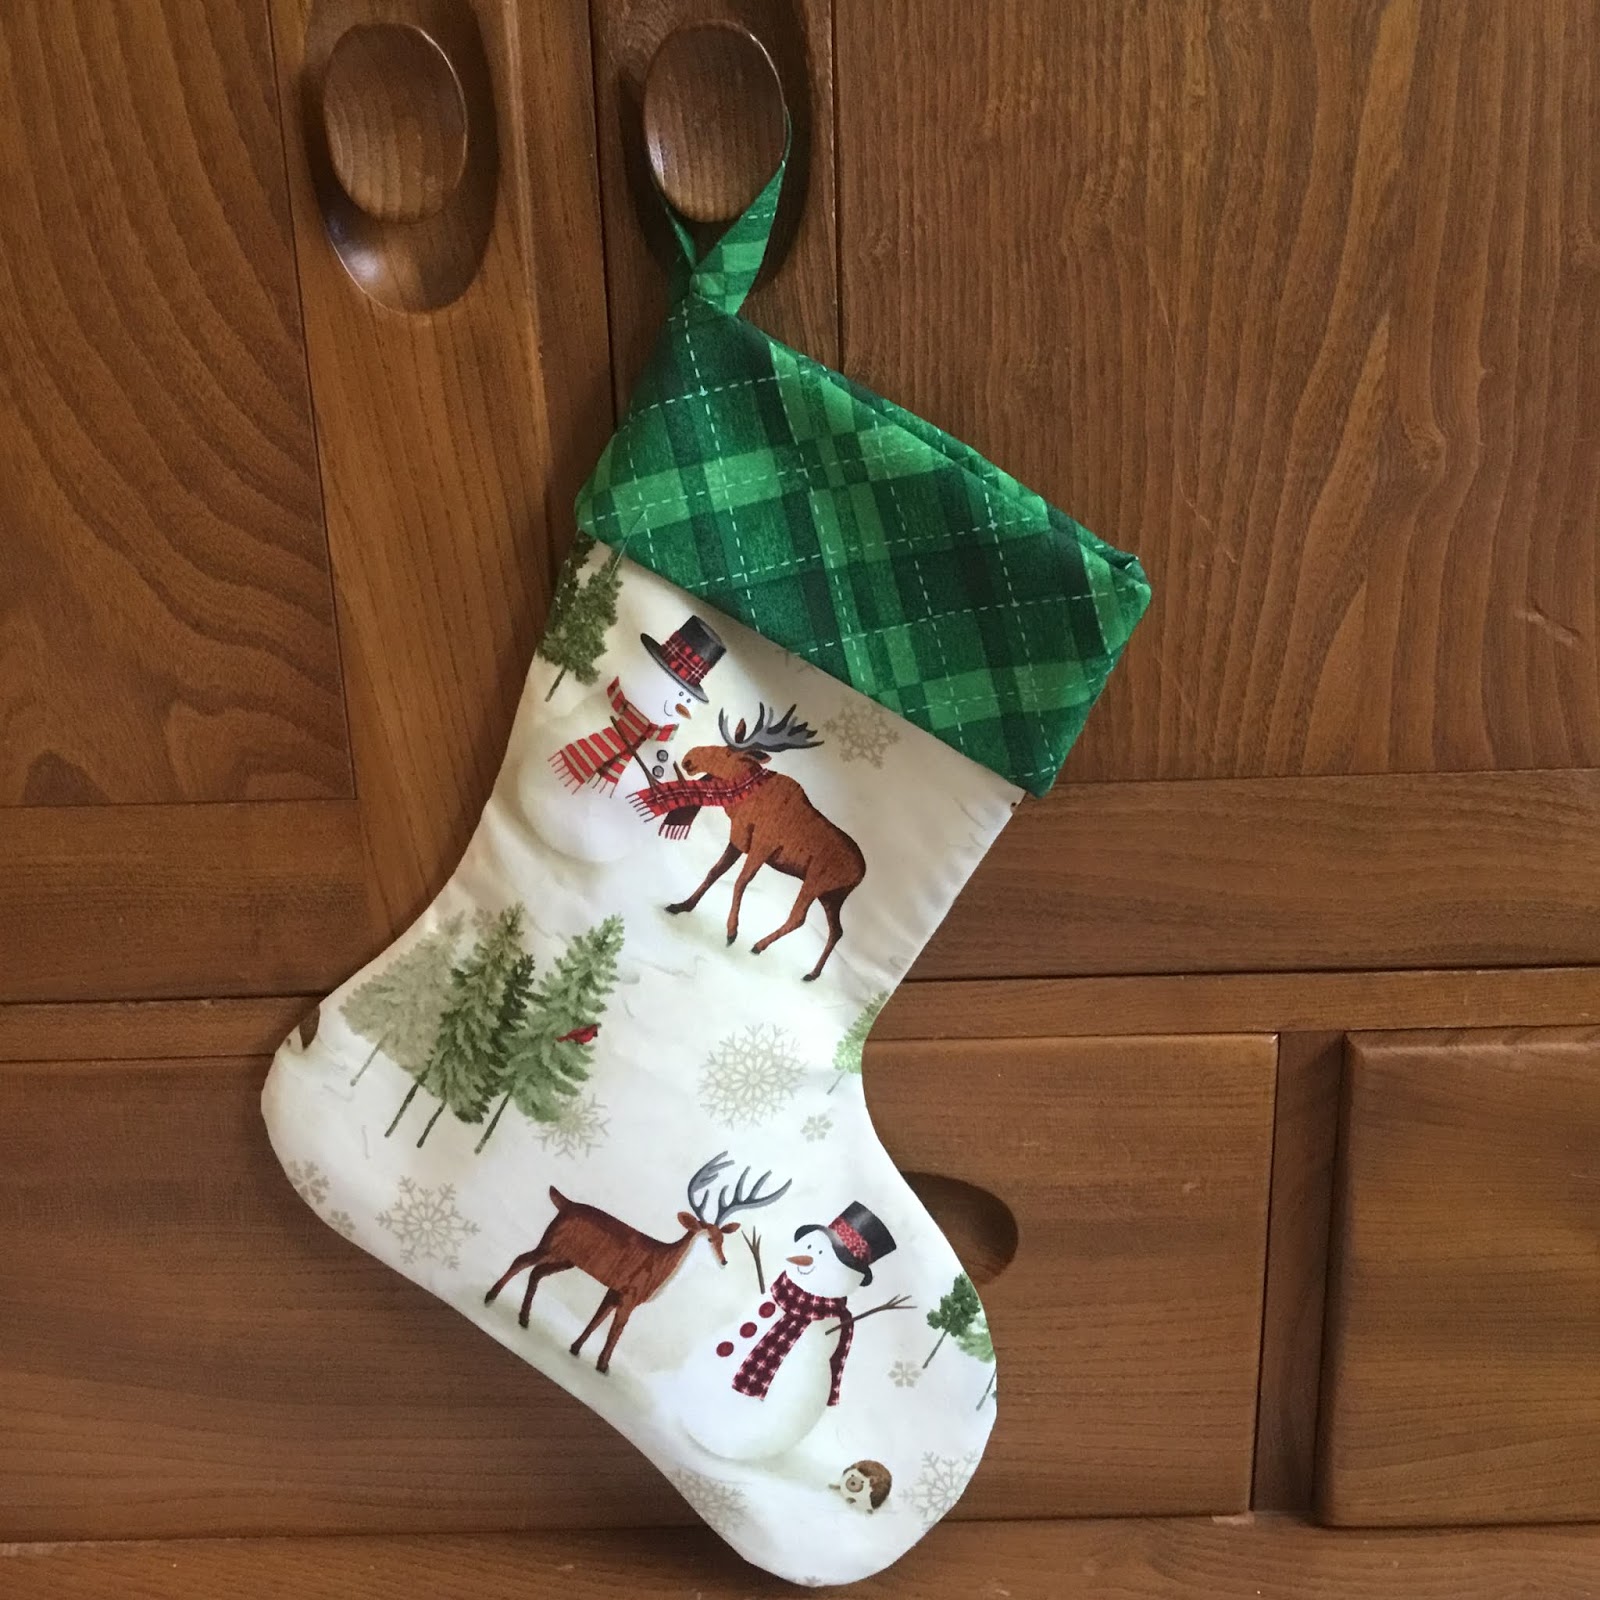
My first make was this Christmas stocking, using a fabric that was trational but still cute. I added the green cuff to be more Christmassy and fussy cut the characters to show them all. 


Next make was these 2 felt decorations, I chose the designs and cross stitched the centre panels. I added a felt border and back and blanket stitched together, also adding some stuffing for a plush feel.
 
 
Next was a partly bought and partly handmade gift. Since I didn't know her scent preference I purchased a selection of Christmas scented Yankee Candle tea lights along with a glass holder. I then made a hexagon shaped box for them to be gifted in. I added an acetate lid and some shredded tissue to give a more professional feel.
 
 
I made a zip pouch with a matching key fob for her next gift. I used a variety of coloured fabrics to make a patchwork panel and mixed it with some linen/calico fabric. I added a wipe clean lining and one of my handmade labels inside.
 
 
I chose a bright coloured zip that I felt worked with my fabric choices. The final touch was a charm for the zip pull. I used some jewellery supplies and chose this fun bead that matched the colour of the zip.
 
 
I screen printed a tote bag with a kitten design, using my screen sensation system, kipton the kitten screen and potting shed ink.

 
The next two gifts were a pin cushion and a needle book. I created the pattern for the pin cushion a few years ago and have made a couple before. For this one, I chose some bright coloured vintage sewing themed fabric and added lace and purple ribbon trims to the jar. 
 

I used the Aneela Hoey pattern for the needle book, doing the same adjustments as I did for the one I made in the sew along. I used the fabric to match the pincushion and combined it with some cream linen. I used some decorative stitches on my sewing machine with purple thread to add some detail on the pockets and on the front. 

 
The other gifts I included were a map puzzle, lindt chocolate, an organizer, loccitane soap and hand cream. I also sent some haberdashery items that I thought she might like; a needle egg, sparkle embroidery thread packs, vintage lace (that I found at a antiques fair) and some vintage buttons (that were from my granny).
 
I love gifts to be perfect for the person receiving them so I always put a lot of thought into gift giving. I was rather stressed at times about this swap, but was happy with what I sent. Thankfully Helen likes hers gifts and I even managed to choose some of her favourite things. 
 
These items were also on my finish a long list and although I knew I needed to finish them, it was quite hard not sharing any progress so this was an extra bit of motivation. You can read more about that here.
 
Mx

Monday, 7 January 2019

my #sew6organizers sewalong


This year I decided to host a sewalong on instagram, with the help of a friend zena. We chose to do 6 projects each from the Aneela Hoey stitched sewing organizers book, one per month. Everyone who joined in could choose their own patterns and make any little adjustments to the projects to suit them. The idea was to share our projects and we had a little group chat for any questions or help, making the most of the lovely sewing community on Instagram.
These are the six projects I made for the sewalong: I used the distant dreams collection from dashwood studios. I split the collection into 3 mini collections and added some dashwood twist fabric, (indigo and cherry I think).

 
I kept the first project simple with a little fold up pouch. This is a great little project that doesn't require a zip. It is an simple pattern to follow and can easily be adjusted to make other sizes.
The second project was this handy needle book. I liked this pattern, although I did make a few changes to the suggested pockets used in the pattern. In the book it shows 2 different sized pockets at the back, at the front is a single pocket with the addition of a small pin cushion. I changed the back to just have the 1 large pocket and since I didn't need a pin cushion, I chose to just do one large pocket at that side too. These work out perfectly to hold all the needles I keep in packets.


The next project was the see-it-all pouch... this is a very useful pouch and quite simple construction although the use of binding does make it slightly harder. I used sparkle vinyl as I liked the look and fussy cut the back to ensure I had a full peacock in the centre.
The fourth project was the 2-in-1 case. I love this case and I am using it to hold all my tools. This is made in a similar way to the see-it-all with the addition of a fastening tab. I had a few options for fastenings; I did try a button first but the button hole on my singer machine was not very neat and I was struggling with placement, I also considered using a magnetic clasp, but decided against this option as they are very strong and I didn't want my tools attracting to the magnets. The best solution I found worked as a fastening was a kam snap, both simple to fit and to use.  

 
Next was the fold up sewing folio. I found this project slightly tricky, not because of construction but directions. I kept getting very confused about the direction of things, so my layout differs slightly from the one pictured in the book. It is still fuctional though and my mum has taken it to store her sewing supplies.
 
The final project was the boxy pocket pouch, I like this pouch and it is definitely bigger than I expected it to be. Since it was the last project and I had been avoiding it slightly (I'm not sure why, maybe because I didn't want the sewalong to end) to give me a little nudge, I added this to my  finish-a-long list of things to make. You can read more about that here!
 
Overall, I enjoyed hosting the sew along and would definitely do another one. It was a joy to see everyone else's projects and make some friends along the way too. If you're interested in seeing all the projects for yourself, you can visit the #sew6organizers on instagram.
Mx

Thursday, 24 May 2018

simply screen printed totes

I have customised plain white cotton and calico tote bags with screen sensation screen prints. I have used  the 'dog', 'gothic peony', 'kaleidoscope', 'plumage' and 'plumage & folliage' screens with 'black', 'chrysanthemum', 'harbour blue', 'raspberry' and 'turquoise' inks. The screen prints add a bit of personality to a plain tote, perfect to use for shopping or gifting to others!

If you fancy screen printing at home, check out my blog post here all about screen sensation... plus there is a discount code to get 25% off supplies at crafting.co.uk
Mx

Friday, 11 May 2018

colourful creations...


 I took some basic white tote bags and customised them using two processes to create these colourful creations. To get the background colour, I first dyed the totes using inkodye. Each bag was scrunched and folded in different ways to create the tie dye effect. Although the dye can look great on it's own, I decided to add another layer to some using screen sensations prints. I have used the 'dog', 'fantasy flight', 'gothic peony', 'kaleidoscope' and 'plumage' screens with 'black', 'chrysanthemum' 'raspberry' and 'shadow purple' inks. I think these make the perfect gift for somebody who likes to be unique, since no dyed bag comes out the same and the screen adds a bold dash of personality to each one.


If you fancy screen printing at home, check out my blog post here all about screen sensation... plus there is a discount code to get 25% off supplies at crafting.co.uk
Mx

Friday, 27 April 2018

don't quote me!!

 I've been using some of the quote screens to customise more tote bags. Above is the 'be courageous and the wonders will follow' design printed in 'black' ink on a black handled calico tote and 'follow your dreams they know the way' screen printed in 'white' ink on a black tote. I think the lettering looks really nice in these simple monochrome variations, but it also works well in more colourful options.
 I have printed these two white tote with the 'be the reason that someone smiles today' screen. To create the two prints, I added blobs of  'berry', 'raspberry', 'bubblegum' & 'orange zest' inks. The first pull creates a streaked effect with the different colours, whilst the second pass creates a more subtle blend as the inks mix together more. The two white bags below were printed in the same way, this time with a mix of  'key lime' and 'blue sea' inks. I pulled across the 'make today amazing' screen for the first print, then downward on the second pass to create quote different looks on each.

if you fancy screen printing at home, check out my blog post here all about screen sensation. plus there is a discount code to get 25% off supplies at crafting.co.uk

 Mx

Monday, 19 March 2018

bags for the little ones

I bought these plain cotton drawstring bags online and thought they would make great bags for kids with the addition of a fun design on them. All the designs and inks are from screen sensations. I think they would be a great gift for little ones to give them a fun bag to carry their things in. I used the 'king lion' screen with 'orange zest' ink and the 'dinosaur' screen with 'key lime' ink for the above designs.
 
I masked off the writing on the 'cool croc' screen to only print the character using 'crisp apple' ink for the bag above. The 'unicorn wishes' screen was printed in a custom mix of 'berry', 'raspberry', 'bubblegum' & 'orange zest' inks. I only partially mixed the ink blobs directly on the screen before pulling the squeegee through to give the marbled effect. I simply used the 'peach amber' ink to print the 'alphanumerical' screen design on the final bag pictured below.


Mx

Sunday, 12 November 2017

black strap totes

I found these totes online which come with the black handles and thought they would look great customised with black screen printed designs. I have used the 'kaleidoscope', 'plumage' and 'wisdom' screens and the black ink from screen sensations and I'm pretty pleased with the results.
Mx

Saturday, 21 October 2017

go large!!

 
For this variation on the basic boxed bag (instructions here), I have made the bag much larger, quilted the fabric and added handles to be used as a knitting bag. To make it, I scaled up the pattern as follows:
  • the main body: 2x outer fabric, 2x batting & 2x lining measuring 12" x 24" with 3" square cutaways (for the boxed corners) 
  • handles:  2x outer fabric measuring 25" x 3 1/2" & batting measuring 24 1/2" x 1"
  • 18" zip

First, I roughly cut the outer fabric and batting to size, allowing extra for the quilting. I then quilted the outer fabric and batting using straight rows of stitching. Once quilted, I cut out the pattern pieces and began to assemble, treating the quilted pieces the same as I would usually treat outer fabric. For the handles, I cut an extra 2 lengths of batting and 2 strips of fabric to create quilted grab handles. If you prefer, you could use webbing or other construction methods to make the handles, (see more information here). Before the outer fabric and lining pieces were joined together, I machine stitched the handles in position on the outer fabric. This ensures the stitching isn't seen on the inside, keeping the finish as neat as possible. This style of bag, (simply enlarged with handles, but without quilting the fabric) would also work well for a swimming or gym bag, especially if you used a shower curtain or water resistant lining.


Mx

Sunday, 15 October 2017

attaching handles...

Following on from the making handles step by step tutorial, I wanted to show the different ways to attach handles. There are various methods to insert handles depending on the look you want and which works best for the project.

The handles can be sewn onto the outside of the bag/ project. The handles must be finished on ends, by tucking the raw edges inside the open end of the fabric and securing with a row of stitching. The strap can then be pinned into position and sewn to attach it to the project. The usual method for sewing to attach is to stitch a box with an X across the centre.
quilted handles stitched to the outside of a bag

The inserted handle shown below encloses the raw ends of the handle within the top seam between the outer fabric and lining. This creates a clean and simple look, but requires you to position and sew the handles during construction.
reinforced fabric handles inserted into top seam

You can also insert the handles in the base seam to create feature handles sitting up the outside of the bag. These can be topstitched  along the length to fully attach the handles to the side of the bag. Another option is to partially stitch up the length so the handles are attached top and bottom but leave loops in the middle for slipping objects in between, to carry a yoga matt on the outside of a gym bag for example.
webbing handles inserted into base seam

You can also use hardware to create more versatile handles, with adjustable length using D rings and sliders or detachable straps with snap hooks. There are lots of different types of hardware available, but most are joined to the project with a loop of fabric attached using one of the above joining methods.
adjustable reinforced handle with metal D ring and slider

Mx