Showing posts with label butterflies. Show all posts

Sunday, 29 December 2019

Butterfly cross stitch

 
I made this little gift using the butterfly hoop kit from cross-stitch crazy magazine I got a while ago. I followed the kit to stitch up the butterflies on the front, but didn't like the plastic hoop supplied with it. I decided to paint a wooden hoop the same size using my own custom mixed lilac shade of Annie Sloan (I'm afraid I can't remember which colours went into it!).
 
 
I added the coordinating fabric to finish the back of the hoop, first glued and then ladder stitched to secure it in place. The final touch was some organza ribbon to create a hanging loop and bow to cover the screw.
 
 
I finished this project earlier, but couldn't share until now as it was part of a Christmas gift. It is on my Q4 finish-a-long list which you can find here ....
 
Mx

Wednesday, 27 June 2018

bambi quilt


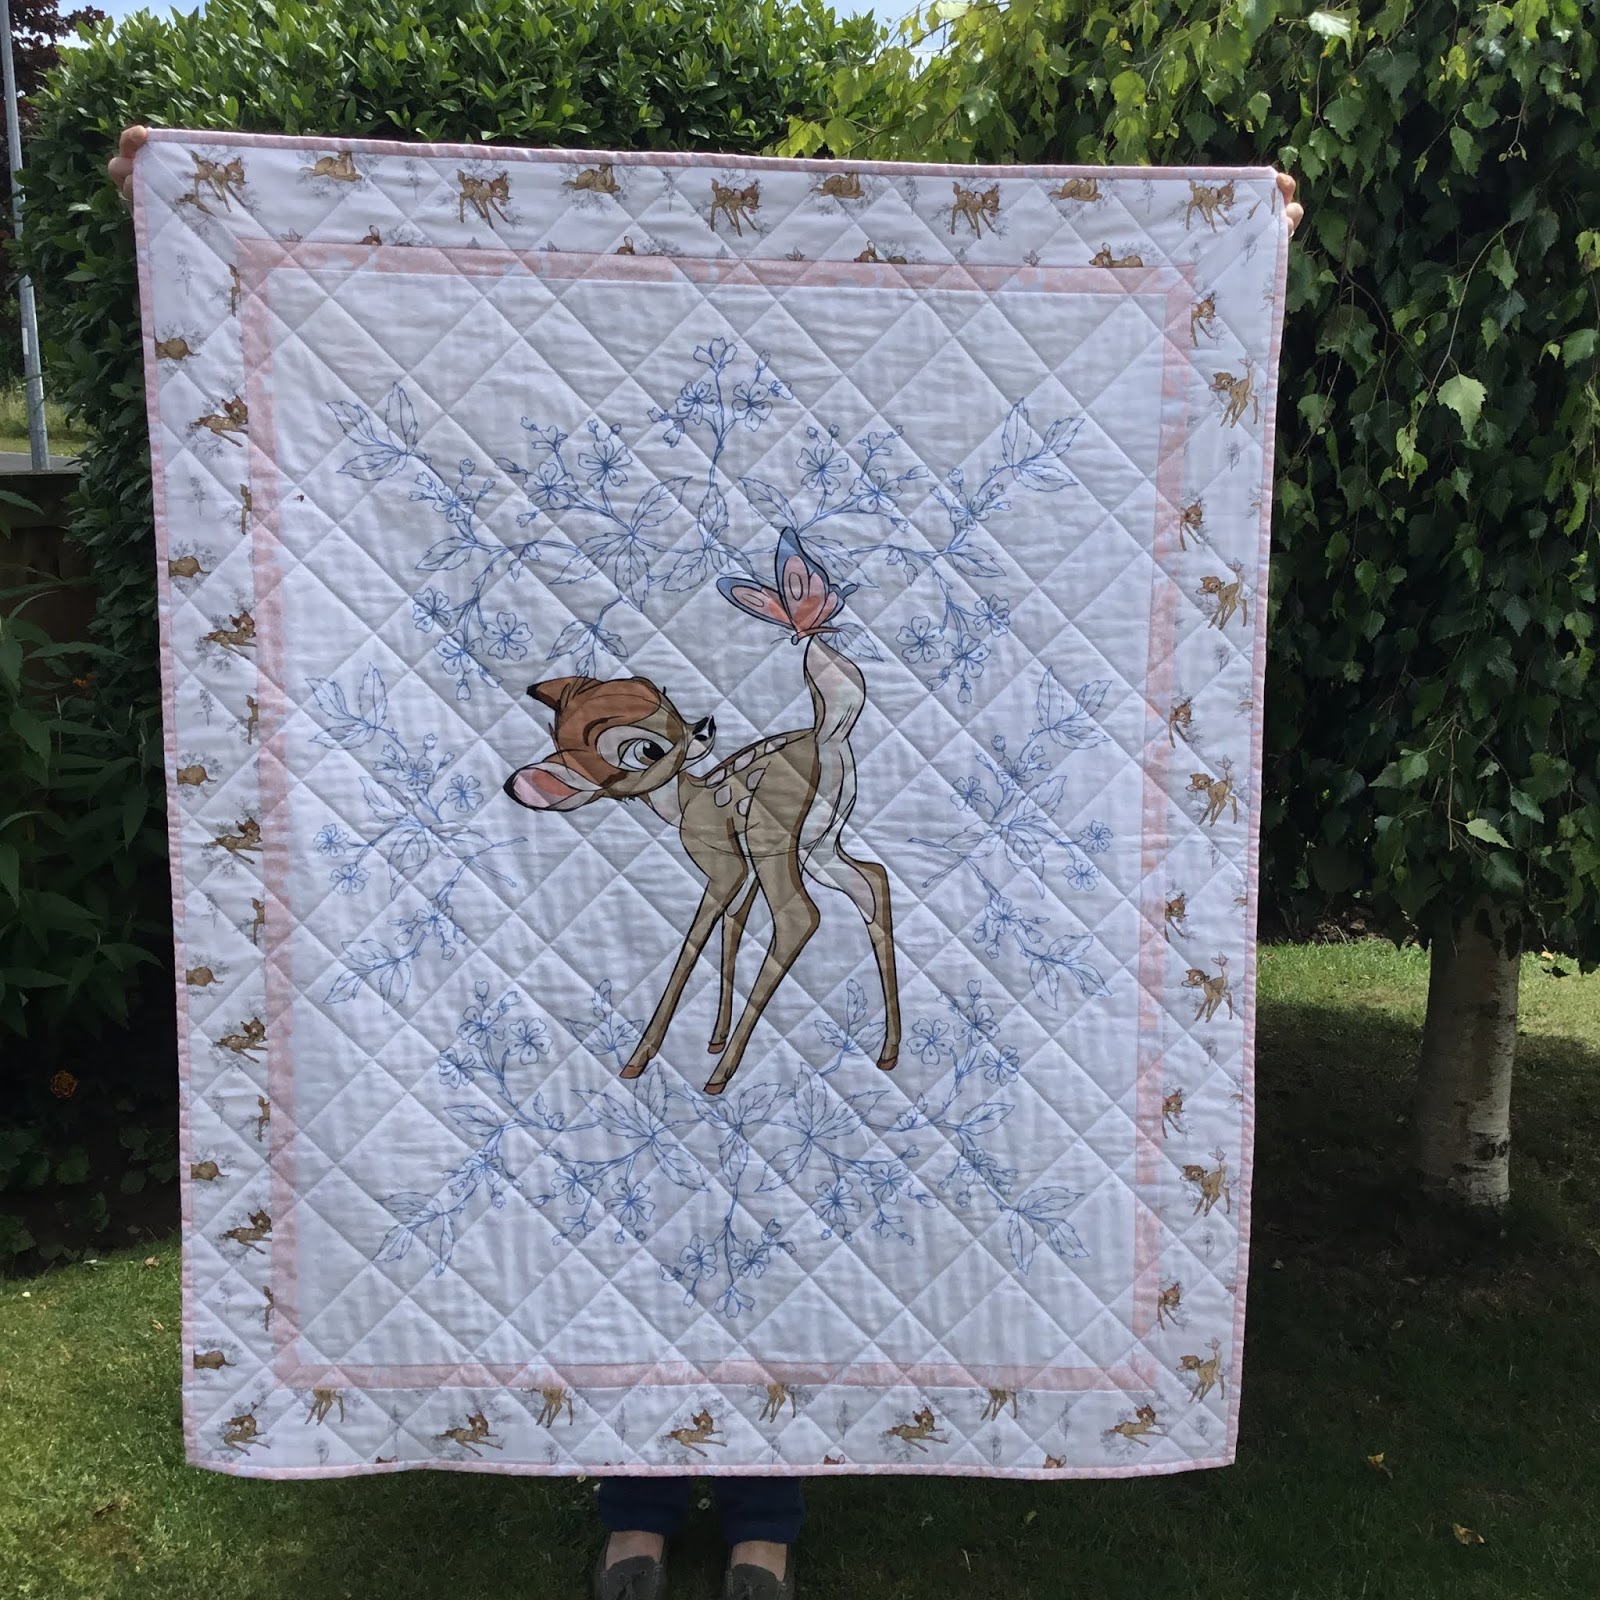
This is a very special quilt, not only is it the first quilt I have finished, but because it was made for a special occasion. A close friend had her first child and I just had to make this as a christening gift. Knowing how much we both like Disney, I knew this would be loved by them both for many years.
I originally bought the bambi panel to make a quilt for myself, but once the little one arrived, I knew it would be prefect for her.
I used other fabrics from the range to make borders, a pink to really frame the panel and add more colour, and then a larger border of small bambi images. I used the grey silhouette bambi fabric for the backing, and more pink for the binding. I chose to make my quilt to 43x52”, this was mainly so I didnt have to join fabric for the backing but it worked out a really nice size.
 
 
Since this was my first quilt and there was a deadline, the panel really helped cut down on the time it took to piece the quilt top. I did choose to thread baste my quilt sandwich as I'm not very good with pins and wanted it secure to help with the quilting. I did simple straight line quilting with my walking foot, using masking tape to act as a guide. I originally intended to just do evenly spaced diagonal lines, but decided to space them differently to make more of a pattern. I think this adds far more interest while keeping it achievable for my first quilt. 
Once I had finished stitching I needed to remove all my tacking stitches and trim all the edges, removing any excess batting. For binding I cut 2.5” strips and folded them in half before attaching to the edge of my quilt. I used a ladder stitch to hand sew the binding on the reverse to finish.
The final touch was a handmade by label, I recently purchased from wunderlabels uk... Luckily they arrived in time!! I just used a backstitch to attach it to my quilt.
 
Add caption

I am really pleased with how the quilt turned out, it was happily received and know it will be cherished. I can't wait to get sewing some more now ... I think its safe to say I have the quilting bug !!
Mx

I laid wool over the quilt to help decide on a quilt pattern.

close up of thread basting in progress
 

Thursday, 24 May 2018

simply screen printed totes

I have customised plain white cotton and calico tote bags with screen sensation screen prints. I have used  the 'dog', 'gothic peony', 'kaleidoscope', 'plumage' and 'plumage & folliage' screens with 'black', 'chrysanthemum', 'harbour blue', 'raspberry' and 'turquoise' inks. The screen prints add a bit of personality to a plain tote, perfect to use for shopping or gifting to others!

If you fancy screen printing at home, check out my blog post here all about screen sensation... plus there is a discount code to get 25% off supplies at crafting.co.uk
Mx

Friday, 11 May 2018

colourful creations...


 I took some basic white tote bags and customised them using two processes to create these colourful creations. To get the background colour, I first dyed the totes using inkodye. Each bag was scrunched and folded in different ways to create the tie dye effect. Although the dye can look great on it's own, I decided to add another layer to some using screen sensations prints. I have used the 'dog', 'fantasy flight', 'gothic peony', 'kaleidoscope' and 'plumage' screens with 'black', 'chrysanthemum' 'raspberry' and 'shadow purple' inks. I think these make the perfect gift for somebody who likes to be unique, since no dyed bag comes out the same and the screen adds a bold dash of personality to each one.


If you fancy screen printing at home, check out my blog post here all about screen sensation... plus there is a discount code to get 25% off supplies at crafting.co.uk
Mx

Saturday, 25 November 2017

monochrome totes

I have customised these black totes with white ink and screen printed designs from screen sensations. I have used the 'mask', 'gothic peony', 'kaleidoscope' and 'plumage & folliage' screens. The white ink really pops on the dark fabric and adds some interest to these plain totes I got online.

Mx

Sunday, 12 November 2017

black strap totes

I found these totes online which come with the black handles and thought they would look great customised with black screen printed designs. I have used the 'kaleidoscope', 'plumage' and 'wisdom' screens and the black ink from screen sensations and I'm pretty pleased with the results.
Mx

Tuesday, 16 June 2015

money, money, money!!

 
i made this little apron to keep money secure when doing a craft fair or market stall. i recycled some jeans that didn't fit as the main material for this project. If you want to make your own, follow the steps below...
  1. cut off the leg to the required length, then cut up both of the seams (you could just cut one seam and keep the other as the base of the apron).
  2. if you want extra detail, add this now, (I added an applique butterfly with free motion stitching to the front of mine.)
  3. add the zip to the top of the apron on the front and apron tape to the back section (make sure its long enough to fasten around your waist). 
  4. put right sides together and stitch all the way around the rectangle (no need to leave a gap for turning, just remember to undo the zip enough to turn the fabric through!!)
  5. once you have sewn that, overlock or zigzag stitch around again for strength.
  6. turn out and press.
You now have a finished money apron. the next steps are not needed, so if your just a beginner or prefer a simple design you can stop and admire your work. If you want to add more, follow these last two steps...
  1. mark a line where you would like a divide then draw a line to about half / three quarters way up, then sew up this line.
  2. add bias binding around the edges for extra colour and decoration.
 
Mx