Showing posts with label patchwork. Show all posts

Friday, 12 August 2022

Narvi Quilt

 Its about time I introduced you to my latest quilt pattern... the Narvi Quilt! 

Its a nice and easy to make strip quilt. I made mine using pre cut layer cake pieces but it would be a fabulous scrap buster. 

To get this pattern simply go to the extras on my 'buy me a coffee page', link here!

Crafty lil mouse x

Saturday, 23 April 2022

Eris quilt pattern


I recently made my Ersa Quilt pattern (available to buy on Etsy). I used some Alison Glass fabrics but didn't have a large piece for the quilt backing. Instead I decided to make a patchwork back using the left overs. When my sister saw it, she thought it was another quilt top, so I have decided to share it as a free quilt pattern for you.

You can save the picture above and print as a full page to colour or just open on your device to see measurements. You can easily change the size of this quilt too. For example if you want your quilt 6" longer just make the 12 1/2" to 13 1/2" instead. 

 Here is a full view of my Eris flimsy before I quilted and trimmed it. 


I hope you like the Eris quilt pattern and make one, I cant wait to see it if you do, please share it on Instagram using #erisquilt and #craftylilmousepatterns so I don't miss them.
Mx

Thursday, 10 February 2022

Dione quilt pattern...


 I have been making sewing patterns for a couple of years now and love putting my ideas out into the world. As I make more and more quilts, it was a natural progression for me to create my own designs. I love to doodle ideas and it has been amazing to see them come to life in quilt form.

So here is my first quilt pattern, the Dione quilt...


The quilt pattern comes with the fabric requirements, cutting and construction instructions for 4 sizes. I chose to make the baby size using the cute 'Guinevere' fabrics from Riley Blake designs. I'm so pleased with how lovely this quilt looks, the photos really don't do the fabrics justice. I always love using prints so I wrote the pattern to be directional fabric friendly. 


It was then suggested to me that I make an extra large version of the block. So I did just that and made the Dione XL which comes in 2 sizes. I love the impact of the pattern on a large scale and like that it can showcase bigger prints with the scaled up pieces, plus the supersize block makes them so quick to make.


Again I chose to make a baby sized quilt, this time using some cute robots as the feature print, mixed with some basics in coordinating colours. I found the perfect backing to match too. 


The Dione quilt pattern is now available to purchase in my Etsy store, if you fancy making your own version. There is also a surprise second version of the quilt included in the pattern as I just couldn't resist playing with the design to give even more options!

 I am so excited to see all the different quilts people make using my pattern too so please tag me @craftylilmouse in your makes with the #dionequilt on Instagram. 

Mx

Thursday, 25 February 2021

My liberty Collider cushion...


I had the pleasure of pattern testing for the collider quilt by made just sew. I was excited to get started when I saw the pattern, although I couldn't commit to an entire quilt, we agreed I would make one block into a cushion. I chose to use Liberty London tana lawn fabrics.

 To make the prints stand out a little I added a solid, I chose the art gallery pure solids, as they are a nice weight cotton to use with lawn fabrics. I used  the cotton candy pink since I didn't want white and thought it would work nicely with the prints I had picked out. If you fancy making your own cushion using this pattern, I made the throw size block to make an 18" cushion and used one fat quarter for all the background pieces.

The pattern is well written and came together nice and quickly. Since there's a lot of sewing and cutting on the bias, I did use best press to starch my fabrics before I started cutting and sewing. I would highly recommend this with this pattern and fabrics. I also used a 75/11 sized needle in my sewing machine because I was using the lawn fabric. 


I decided to do some hand quilting for this cushion. I used a 12 wt Aurifil thread in shade 2021. I used thread gloss to help with the stitching, its not necessary but I enjoy the smell and using it.   
Once it was all hand quilted, I was straight on to making it in to a cushion. 


To make the zip cushion back, I used my tried and trusted method. You can see my tutorial here on how I make them.

The collider pattern is lovely and I'm so happy with my new cushion. You can now buy the pattern here.

Mx


Friday, 11 December 2020

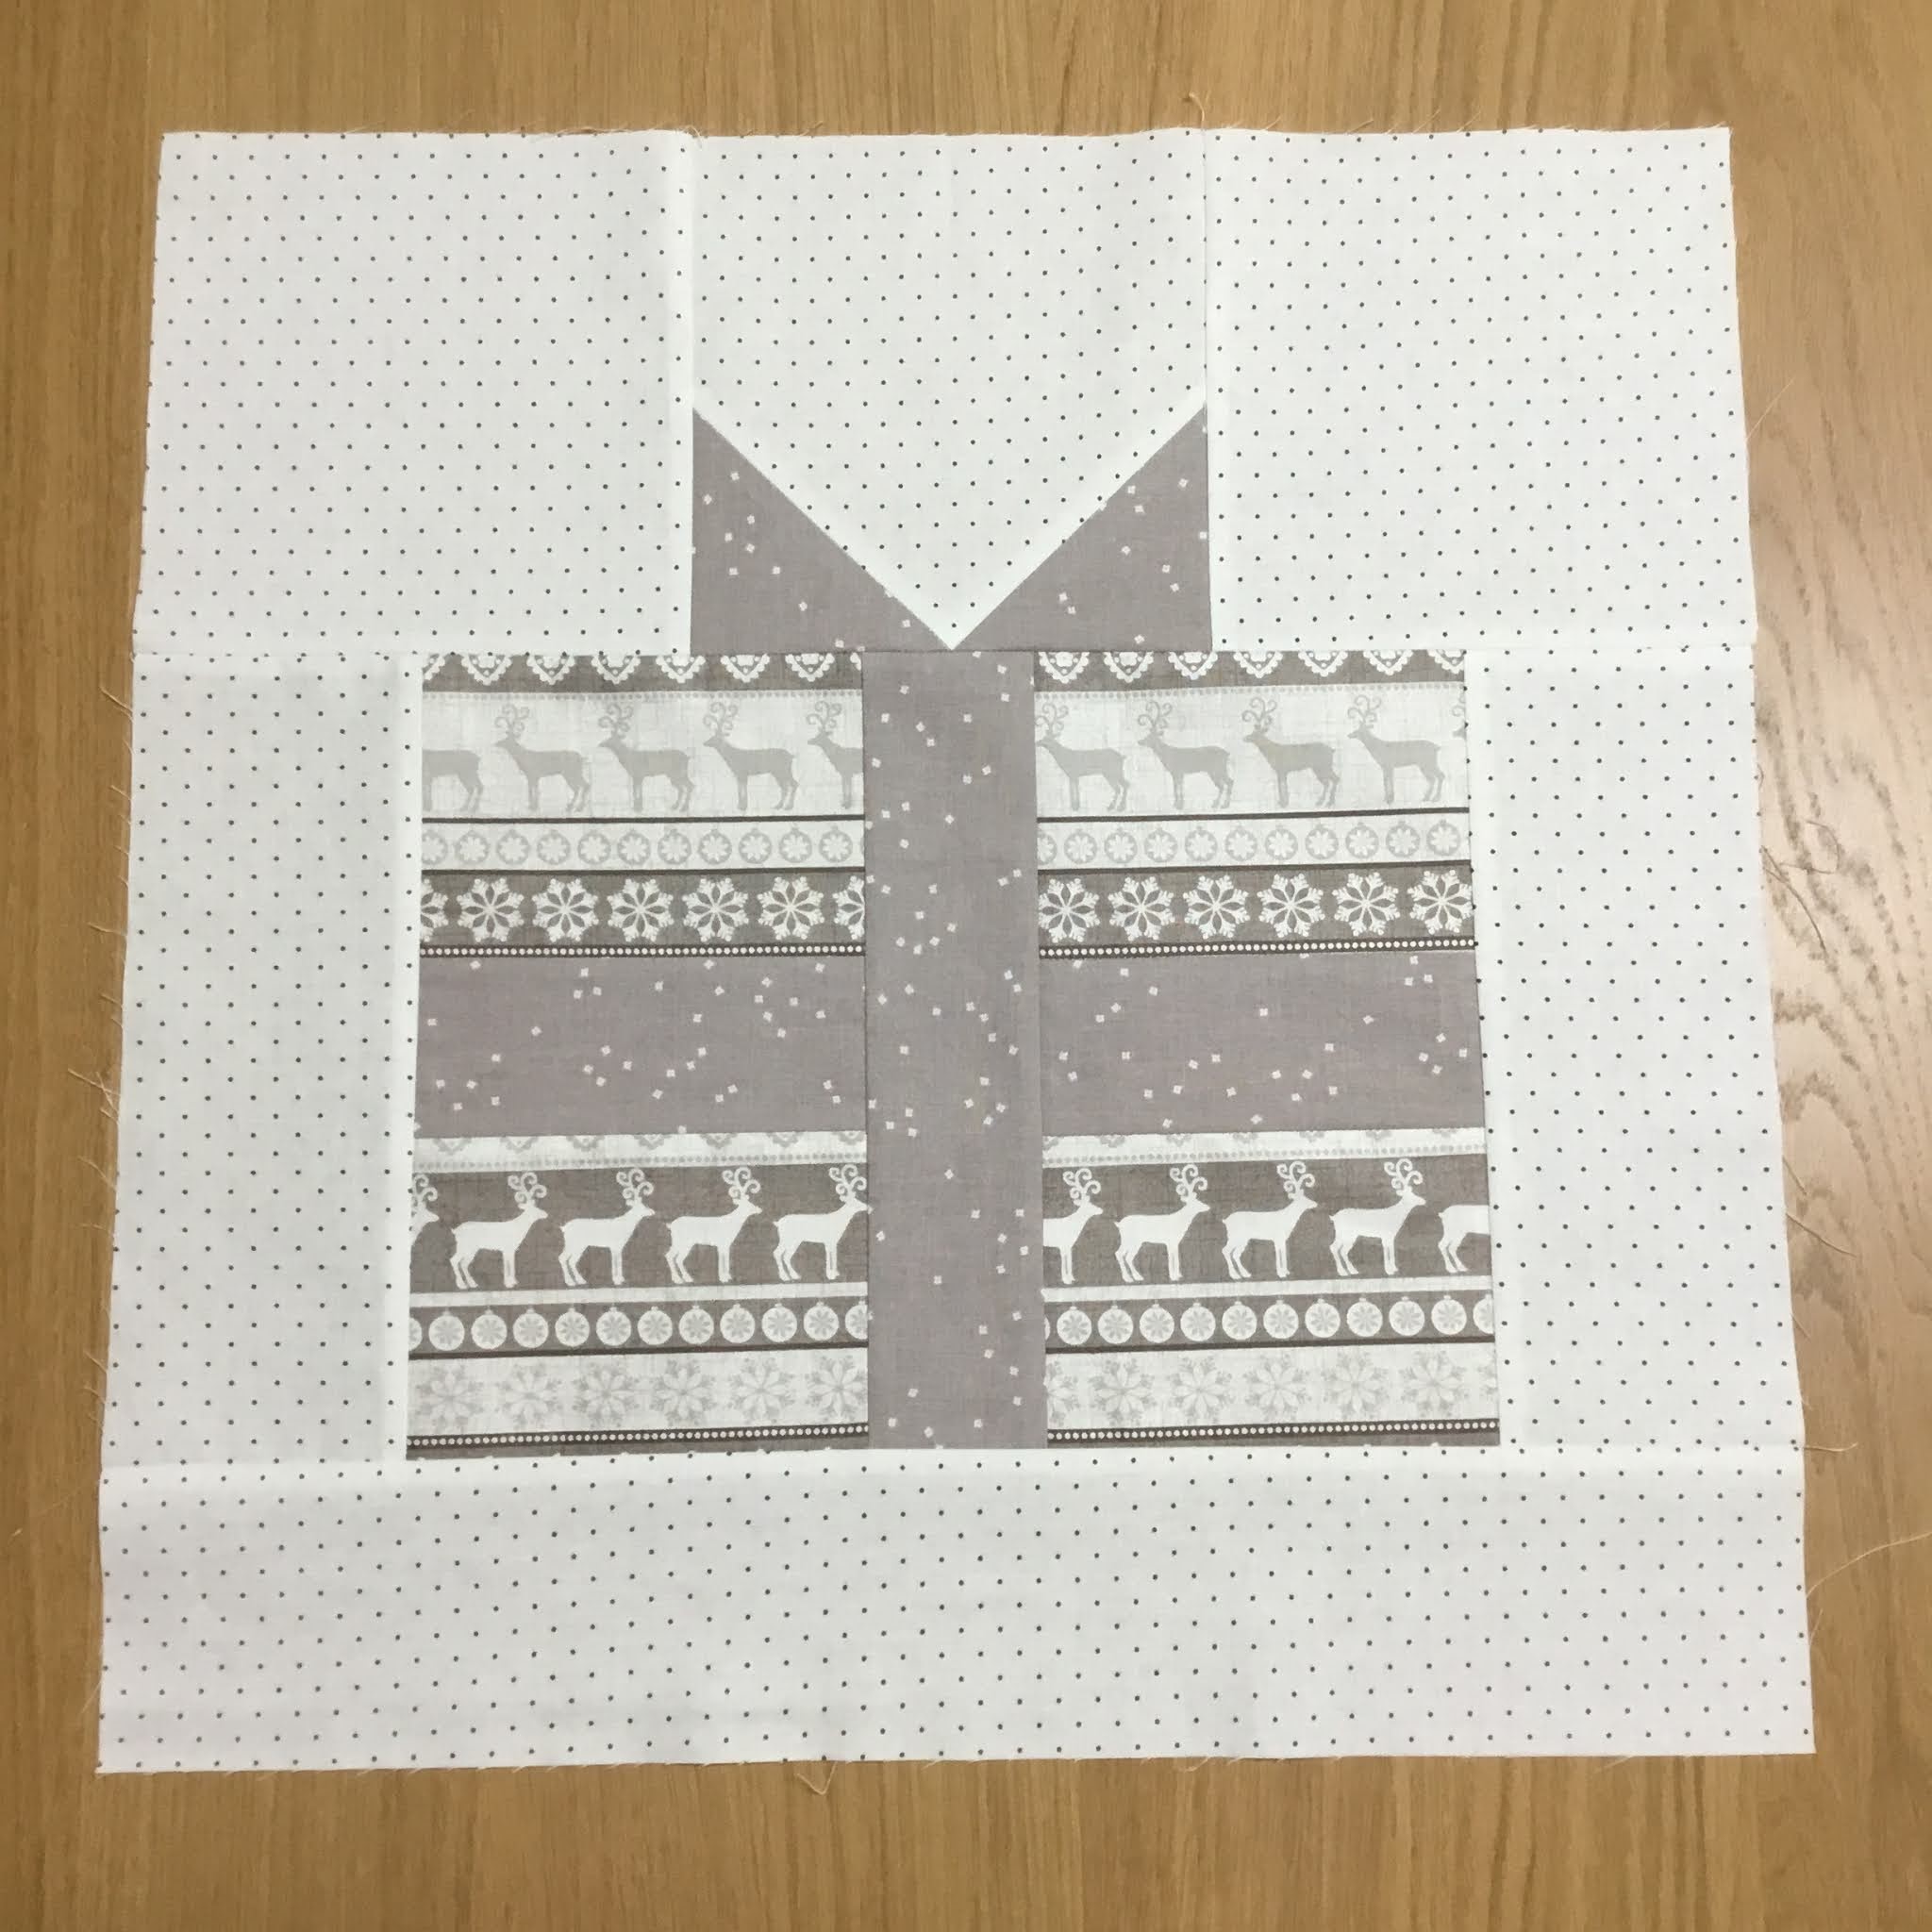
christmas gift cushion

 There are so many present style patchworks about and most are free. However they weren't quite the right size and had extra seams... so I made my own and thought I'd share it here with you.

It is really simple patchwork and easy for a beginner, (an advanced stitcher will have it made in no time!)

So here we go... all measurements are height x width. Seam allowances are 1/4" unless otherwise stated. The finished cushion is 17" square, although larger borders could be added to make it bigger.

Background: cut 3@ 6 1/2" x 6 1/2"

                 2@ 9 1/2" x 3 1/2"

                 1@ 3 1/2" x 18 1/2"

Ribbon: cut 2@ 3 1/2" x 3 1/2"

            1@ 2 1/2" x 11"

            1@ 9 1/2" x 2 1/2"

Present: cut 1@ 8" x 11"


To assemble:


1.  Take a 3 1/2" ribbon square, on the wrong side of fabric draw a diagonal line from corner to corner. Place it on top of one of the 6 1/2" background pieces, right side together, and sew on the line across the corner.
2. Trim away the corner to leave a 1/4" seam allowance. 
3&4. Press seam open. Repeat for the other bottom corner.


5. Sew a 6 1/2" background square to both sides of the finished block, using a 1/4" seam allowance. Press seams away from the center.


6. Cut the present fabric in half horizontally. Place the matching ribbon piece in the middle and sew. Press seams open.

7. After stitching the ribbon, cut in half vertically this time. Add the next ribbon piece in the same way, this time press the seams in towards the centre. It will look like this...


8.  Place the 9 1/2" x 3 1/2" background pieces right side together on each side of the present. Press seams away from the centre.

 
9. Once you have the present section all sewn, add the ribbon section to the top. Press this seam open. Then add the remaining background piece to the bottom, press seam away from the centre, to complete the block.


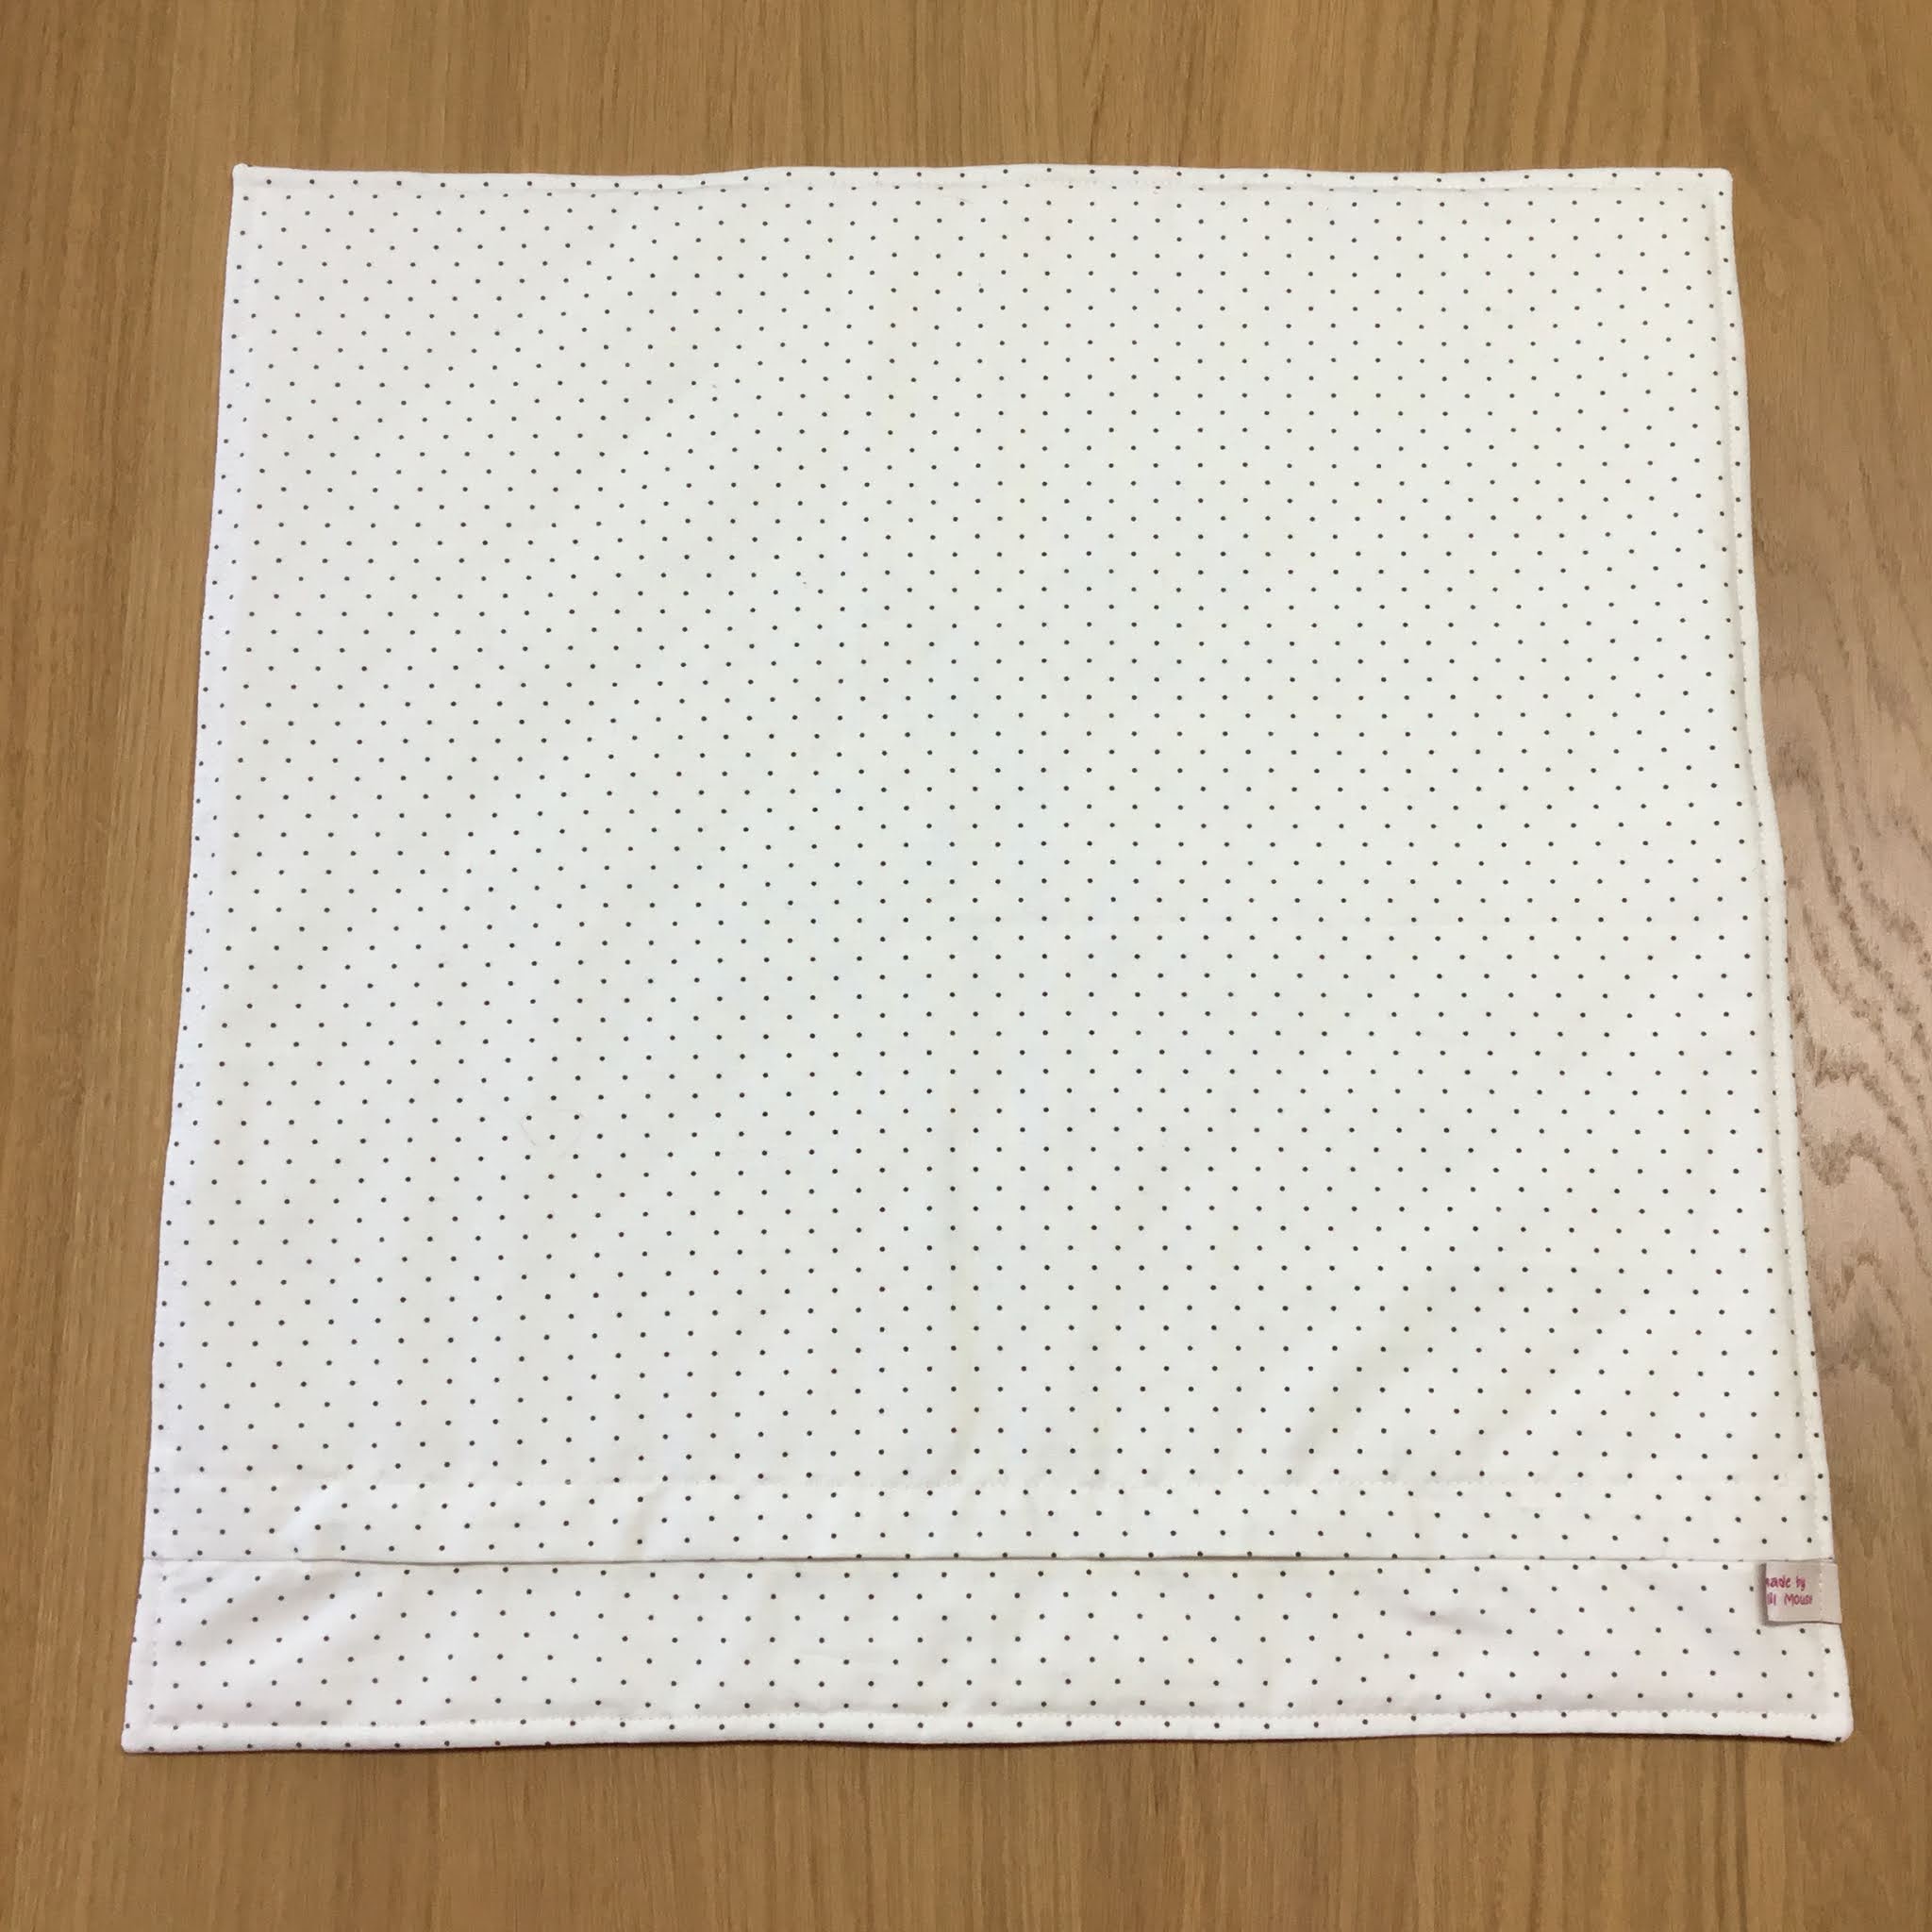
This is what the back will look like.


To finished my cushion, I quilted using a 2" grid on the diagonal. I made a cushion back using my method (find the tutorial here). To keep it simple I didn't add binding this time, choosing the turn it through method and adding a top stitch 1/4" in from the edge.


 I hope you liked the tutorial and I would love to see your finished projects too. Please tag me on social media @craftylilmouse and use the #craftylilmousepatterns
Mx


Saturday, 18 July 2020

My #100daysusingcottonandsteel project finished!

Let’s face it my #100dayproject2020 did not go entirely to plan. There's some projects on my list I intended to do and didn't, some I actually finished and a few I started, but are still in progress. So here's a run down of the projects I made...

The postage style quilt- I was super pleased to get it slightly bigger than I expected at 84 inches square. This was 441 4” squares in the end! I chose a quilting design that needs custom quilting by a long armer and there was quite a wait list, so it will be a while before I get it back to bind and finish. We will all just have to wait a while for those photos, but here is the finished top before the quilting!

The scrappy triangle cushion- this was finished early in the project. I pieced and then hand quilted it. I am super happy with how it looks and it's now in full use in the lounge. Tutorial blog for that is here!

Patchwork tote- well this was worked on a little in the middle of the 100 days but left until the last push to actually finish. I went with using only melody miller designed fabrics in the end and love the way it turned out.

Pin badge banner- made for my sisters birthday. I have been wanting to make one for ages, so I’m pleased I have made one now. I added a rainbow panel to the top for some fun colour. I also made her a key ring with the perfect selvage too!

A rainbow jelly roll quilt- so technically I didn’t use a jelly roll at all, which would have made it so much easier. Anyways, I am so happy with my new quilt. You can see and read more about it here including where to get the free pattern to make your own!

Selvedge cushions- I always wanted to use the fun selvedges from my stash but I wasn’t sure what for exactly. I took inspiration from a quilt a lady was making on instagram. I didn’t have any where near enough for a quilt, so I made a pair of cushions instead. They look so fun with my quilts and other cushion in the lounge.

I made 2 pouches- one to join in with a sew along, (although I didn’t like the original size so changed everything.) I made another where I supersized the idea to be a pencil case, again using all my own measurements and a different construction method to make it work.

A fabric bookmark using a few scraps, which I was going to give away but ended up keeping in the end... I did gift something else instead !!

I also made a few smaller projects: a #weeboxybasket (pattern by sweet cinnamon roses), 2 key rings using selvedges, which feature the fun text and prints to make them extra special for myself and mum and a simple hair ribbon, made using lawn fabric for extra softness.

It wasn't just me using my cotton and steel stash in the 100 days... My mum used my mini travel pinnie pattern (available in my Etsy store here) to make a gift for my sister.
My sister is also in the middle of using my stash to make herself a quilt too! I didn’t take photos to share but I finished cutting out my entire ice cream soda Epp quilt. I also cut out and have started a triangle quilt, more will be shared for that soon, hopefully. I also used some stash doing a giveaway of 70 precut hexies. 

So overall during the project I might not have finished everything but I feel like I got a lot made so I’m happy with that. I did however end up purchasing a few bits, mainly large cuts for backings and a few basics. This definitely wasn’t helpful in reducing my stash. In fact even though I have made so many things, including cutting out 5 quilts, I still don’t look to have used much!
I learnt I actually like doing my other hobbies still and miss them if I give something else too much attention. I also feel a little lost now my challenge is over and my focus has been removed.
I think going forward I need to set smaller goals to get the sense of achievement, but definitely make time for other activities I enjoy too. 
Mx

Wednesday, 8 April 2020

My #100dayproject!


For the last few years I have joined in with an Instagram based challenge called the 100 day project. You get to choose your own project or goals and for 100 days you work on them and post daily photos. I’m never very good at the daily posting but do love a nice challenge and setting myself goals. The best thing about this is you get to pick your own project to work on.

I’m sure I have mentioned before, I’m making an all cotton and steel, EPP ice cream soda quilt. It’s a fabulous pattern and a long term project, but because I wanted a nice scrappy feel and a total celebration of cotton and steel, I needed lots of prints. So I started collecting, mostly bought as fat quarters or scrap packs, but also swapped or kindly gifted fabrics too.
My stash is now pretty huge and I feel like I need to use some of it up...well a lot actually. With that in mind I have chosen my project for this year, #100daysusingcottonandsteel ! I have a plan including a lot of things I’d like to make. Hopefully I will get them all finished, however, I doubt it given the fact I’m including a couple of quilts. Not my ice-cream soda quilt, that would be just crazy! I do plan to sew some blocks though.

I got far too excited planning my project and have already spent quite some time selecting fabrics and lots of cutting preparation. Given the fact I got distracted doing this and forgot about a couple of gifts I needed to make, I am going to set aside a couple of days off during my 100 days to make those. 

So an outline of my project :

Try and use up as much of my cotton and steel stash. Make as many projects in the 100days as I can. Try to post daily, probably in my story and completed projects on my feed. Most importantly, use my stash and have fun!

Now onto the projects I want to make :
  • A postage stamp/sampler style quilt. This will hopefully be a square of every cotton and steel fabric I currently own.  I’m hoping this will be a bed sized quilt so I will try to do the top and maybe the back, but will probably send it away to be long arm quilted and doubt it will be back in time to be fully complete. (I don’t know when this will be given the strange circumstances we are currently in).
  • A wonderland quilt. I don’t have enough to have a bed sized quilt but I should manage a nice lap size. I will try to quilt and bind this one myself, hopefully finished in the 100days.
  • A patchwork tote bag. I have made a couple of nice tote bags lately and really want one of my own.
  • A scrappy triangle patchwork cushion.
  • My unicorn retreat pouch and maybe a couple of other pouches.
  • A pin badge banner, just because.
  • I will also do some slow stitching and work on my ice cream soda quilt blossoms!
  • I’m sure a few other bits will be made along the way too, maybe even another couple of quilts... let’s see how it goes...

So let’s see what I can do over the next 100 days using cotton and steel!
Mx


Friday, 27 March 2020

mini travel sewing case


I have created my mini travel sewing case and I love it. It has a zip pocket and a slip pocket, optional felt needle minder and all fastens with a ribbon. 
I have made two so far, one to keep my sewing essentials in at home. The second is this scrappy patchwork one, that I'm planning to keep in the car with a small cross stitch kit in. Its super neat and perfect for travelling.


If you don't want to use it for sewing, fill it with what ever else you fancy, it also fits a passport and money nicely. 


You can now purchase the #minitravelsewingcase pattern in my Etsy store!


Mx

Saturday, 14 March 2020

Birthday stitchers swap 2020... what i made!!


I decided to take part in the birthday stitchers swap on Instagram again this year. I was so pleased to be making for one of my close friends again too! I had so much to choose from the inspiration mosaic Zena made, it was full of fun ideas and I was quickly excited to get started. 


For the main make I chose to make a quilted tote bag with strawberry patchwork. I used similar construction to the previous one I had made, but changed the measurements (I'm hoping to do a tutorial blog for this soon!). I knew Zena had already received a larger grey tote, so it would be nice to make something different and a bit smaller. The smaller size also made more sense to fit the size of the patchwork strawberry


To make the bag I used red and green scraps for the strawberry patchwork and Everglades by Betsy silver for Michael Miller for the white. I added an Essex linen in ‘midnight’ to finish the bag outer nicely. For the lining, I used Strawberry tea by Axelle design for Michael Miller and added a slip pocket inside. This print felt like the perfect match for the patchwork design on the outer. I picked the Aurifil thread in shades 2745 & 2021 to use as I thought the colour matches were great


For the small makes, I started with a medium sized sewing case as Zena had included a few similar ones on her mosaic. I didn't want to purchase another sewing pattern, so I just made it up as I went along. I'm pleased with how it turned out, (although I'm sure there was a lot easier way to make it, so I wont go into that!) 


The main feature of this make for me though was the EPP. I didn't want to do just regular hexie shapes, but I don't feel quite ready for anything as fancy as clam shells. I decided a honeycomb was a nice option, it was a little different but still in my comfort zone. It also worked very well with the fussy cut images that I wanted to include. I felt it would be too much to make the entire case from patchwork, so I opted for a panel on each side instead. I joined my EPP shapes together, appliqued them onto the linen, then quilted over the top. This was the first time doing something like that and I'm so happy with how it looks. I used several prints from the Penny Rose fabrics 'bunnies & blossoms' by Lauren Nash range, some cream/ natural linen (I cant remember the shade colour) and Aurifil thread '2311'. I know Zena likes to add extra details into her makes, so I thought it was only right I did the same when making for her too. I made zip charms using some strawberry shaped beads and handmade hearts. I also used a single honeycomb shaped piece of fabric, appliqued on to the inside with stuffing in, to create a mini pin cushion!


Next was a small drawstring pouch with a pocket on the front. To make it, I used some cotton + steel fabrics. Zena said she likes neon's and I knew I had some prints that I had bought without a plan of what project to make with them. This seemed like the perfect opportunity to use them. I liked using the different prints but felt like they blended a bit to much, so I went in search for some trim and ribbon. The neon was a struggle to find and it isn't a perfect match, but it's close enough to make the pocket look pretty and fasten the pouch.


The last little make was one of my mini travel pinnies.  I used the Riley Blake 'little sweetness' range by Tasha Noel, which I know Zena loves and managed to fussy cut the little dresses for the front to really make a feature of the print. The extras that I bought for Zena was a Cath Kidston mug, a 'z' candle and some charms. The best gift wrapping for any sewist is fabric of course, tied with a big ribbon. I also made a little scrappy keyring that served as a gift tag! 


It was a pleasure making everything and I'm pleased to say Zena loves her gifts. More photos of her gifts are on my @craftylilmouse Instagram account and you can go see all the beautiful things Zena makes on her account @mycreativepottylife too!
As for my birthday stitchers swap parcel, I still have a while to wait. I am already getting excited and will share those as soon as they arrive...

These projects were on my finish-a-long list, so I can tick them as complete!!

Mx