Wednesday, 2 January 2019

An owl stocking


I chose this beautiful owl fabric to make a stocking for a friends baby. I opted for a large stocking to hold plenty of presents. I used some coordinating red fabric for the cuff and appliquéd her name and blanket stitched it in place on the front. I added some quilting with sparkle thread to the main stocking too. I think all these little touches make this an extra special stocking. 
 

I’m not sure what Annie will think to it since it’s only her first Christmas, but hopefully in a few years she will like it. 

This is also one of my finish-a-long projects, you can see more about this here!

Mx

Saturday, 15 December 2018

#sncaswap18


Over on Instagram I join in with the #saturdaynightcraftalong most weeks. Towards the end of the year they have a swap. Last year I signed up and although quite stressful, I received the most beautiful gift and enjoyed making my gift to send too. This year I signed up to do the #sncaswap18 as soon as I could.


I found out my partner was @a.fox.made.this I was thrilled as I knew who she was straight away. I was able to order some fabric straight away as I thought her favourite designer is Tula pink. Alex makes the most beautiful bags and pouches so I crossed making those of my idea sheet. I had thought of making a cushion but eagerly waited for her inspiration mosaic. I was thrilled to see a couple of cushions and plenty of patchwork. I was drawn to one of the patterns on her board and decided that could work nicely in the Zuma fabric range by Tula pink. 
 

I did have to do some quilty maths and a couple of sample blocks before I made a start. The patchwork came together surprisingly well and although most of my points aren’t perfect the overall effect i thought was quite striking. I added fusible fleece to the back and did some simple quilting, either side of the seams. I made the cushion back with a zip in. I basted the two sides together and attached the binding. I used a ladder stitch to hand sew the binding to the back and finish my cushion for Alex. For my first attempt at this much patchwork and making a cushion this way, I am very happy with what I made. 
 

To complete the swap package, I added in some fox socks from accessorize, a christmas scented diffuser, a colouring in postcard and a screen printed tote bag I made.

This was also one of my finish-a-long projects that I had on my list. you can see the original post here to find out more!  

***


The other part of this swap is what I received. I made this mosaic and posted it on Instagram as inspiration for my partner.
 

 I received my parcel from @sewinthecorner and it’s beautiful. Michelle has made me a sewing caddy to use when I hand sewing in the lounge and this will definitely be going away with me and used in the car too. I especially love the cute fussy cut patchwork panel on one side.


As an extra Michelle also made a beautiful bee pin cushion that was featured on my mosaic, I love the added embroidered details on the bottom too. As extras she included some yummy chocolates, ribbon, embroidery threads and some washi tape.


Mx

Tuesday, 16 October 2018

2018 finish-a-long Q4

I am slightly late to the party but have decided to join in with the 2018 finish-a-long. It is hosted by a few bloggers, the nearest to me is Sandra in Ireland. You can visit her blog to find out all the information about this here... but it is basically a low pressure online community that encourages you to finish all your wip (work in progress) and I have a few at the moment!

My projects for this quarter:


  • My last #sew6organisers sewalong pouch
  • Unicorn retreat bag
  • Cotton + steel #100hexies100days2018
  • Polar bear patchwork cushions 
  • Stitch and sew project (for my giveaway prize and the sewalong in November)
  • A owl Christmas stocking
  • Make a project from the blue liberty panel I stitched months ago
  • Christmas diamond patchwork (have some cut)
  • The Adele dress I cut out in summer
  • Dashwood advent calendar for myself 
  • Do something with the patchwork block I made for my sister
  • A mermaid bookmark (not pictured)
  • Easter hoop cross stitch (not pictured)
  • Christmas bunting (not pictured) 
I will also add the #12daysofchristmasswap2018 im working on and have signed up to do the #saturdaynightcraftalong swap!


This is quite a few projects and I know I will probably not finish them all. Also a high possibility I will start some more along the way but at least I’m doing this with good intentions of finishing everything... only time will tell.


Mx

Wednesday, 27 June 2018

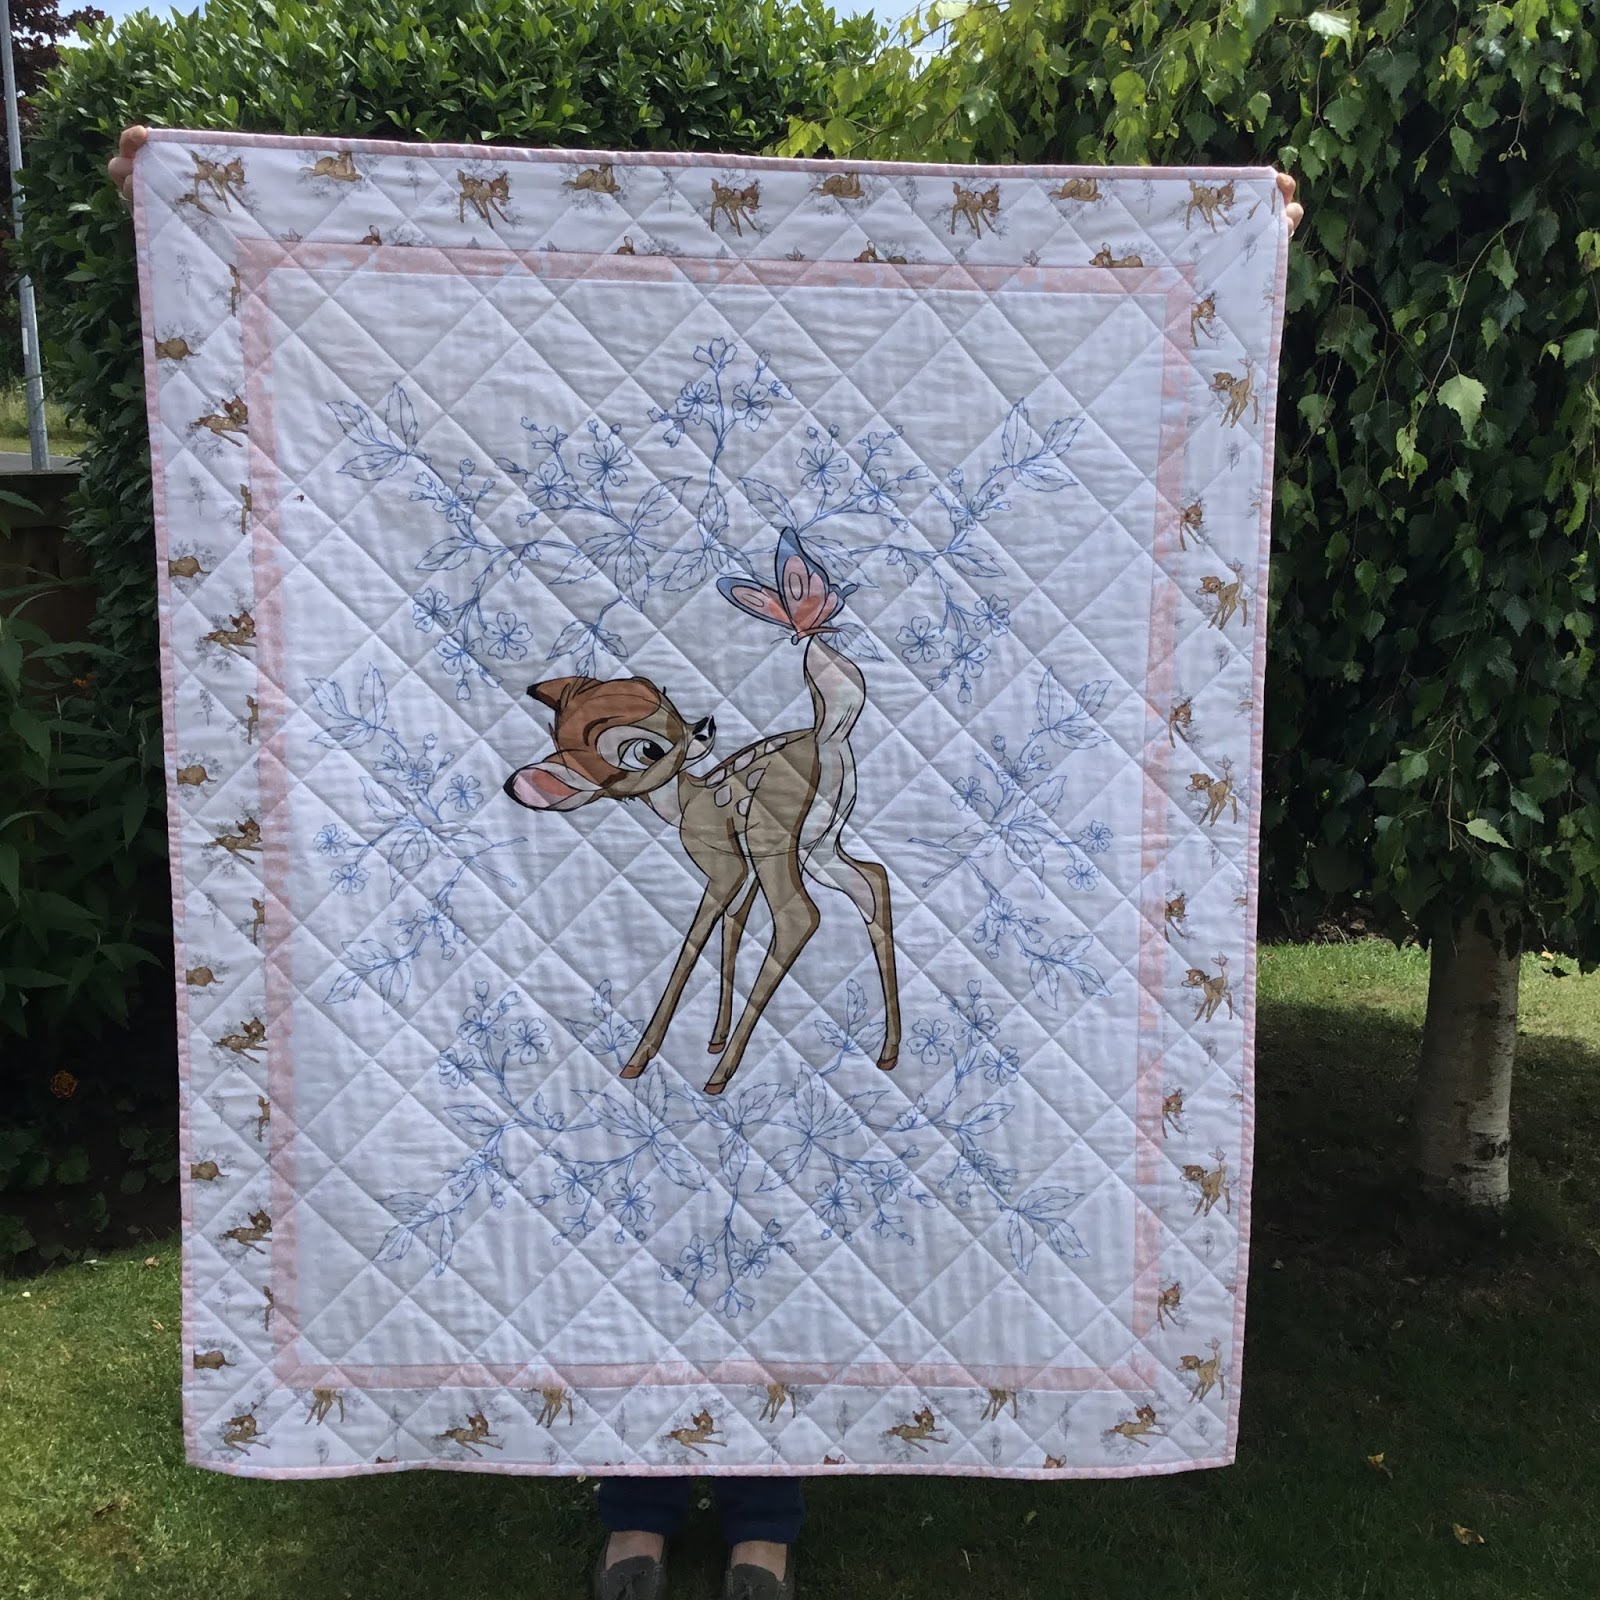
bambi quilt


This is a very special quilt, not only is it the first quilt I have finished, but because it was made for a special occasion. A close friend had her first child and I just had to make this as a christening gift. Knowing how much we both like Disney, I knew this would be loved by them both for many years.
I originally bought the bambi panel to make a quilt for myself, but once the little one arrived, I knew it would be prefect for her.
I used other fabrics from the range to make borders, a pink to really frame the panel and add more colour, and then a larger border of small bambi images. I used the grey silhouette bambi fabric for the backing, and more pink for the binding. I chose to make my quilt to 43x52”, this was mainly so I didnt have to join fabric for the backing but it worked out a really nice size.
 
 
Since this was my first quilt and there was a deadline, the panel really helped cut down on the time it took to piece the quilt top. I did choose to thread baste my quilt sandwich as I'm not very good with pins and wanted it secure to help with the quilting. I did simple straight line quilting with my walking foot, using masking tape to act as a guide. I originally intended to just do evenly spaced diagonal lines, but decided to space them differently to make more of a pattern. I think this adds far more interest while keeping it achievable for my first quilt. 
Once I had finished stitching I needed to remove all my tacking stitches and trim all the edges, removing any excess batting. For binding I cut 2.5” strips and folded them in half before attaching to the edge of my quilt. I used a ladder stitch to hand sew the binding on the reverse to finish.
The final touch was a handmade by label, I recently purchased from wunderlabels uk... Luckily they arrived in time!! I just used a backstitch to attach it to my quilt.
 
Add caption

I am really pleased with how the quilt turned out, it was happily received and know it will be cherished. I can't wait to get sewing some more now ... I think its safe to say I have the quilting bug !!
Mx

I laid wool over the quilt to help decide on a quilt pattern.

close up of thread basting in progress
 

Thursday, 31 May 2018

home sweet home ...

I bought a cheap cushion to customise for some screen sensations home décor. I simply centralised the 'home sweet home' screen on the front of the cushion cover and printed with 'potting soil' ink to tone in with the neutral check. I think it makes for a simple but effective way to personalise your home and this screen is perfect for the job!!
If you fancy screen printing at home, check out my blog post here all about screen sensation... plus there is a discount code to get 25% off supplies at crafting.co.uk
Mx

Thursday, 24 May 2018

simply screen printed totes

I have customised plain white cotton and calico tote bags with screen sensation screen prints. I have used  the 'dog', 'gothic peony', 'kaleidoscope', 'plumage' and 'plumage & folliage' screens with 'black', 'chrysanthemum', 'harbour blue', 'raspberry' and 'turquoise' inks. The screen prints add a bit of personality to a plain tote, perfect to use for shopping or gifting to others!

If you fancy screen printing at home, check out my blog post here all about screen sensation... plus there is a discount code to get 25% off supplies at crafting.co.uk
Mx

Friday, 11 May 2018

colourful creations...


 I took some basic white tote bags and customised them using two processes to create these colourful creations. To get the background colour, I first dyed the totes using inkodye. Each bag was scrunched and folded in different ways to create the tie dye effect. Although the dye can look great on it's own, I decided to add another layer to some using screen sensations prints. I have used the 'dog', 'fantasy flight', 'gothic peony', 'kaleidoscope' and 'plumage' screens with 'black', 'chrysanthemum' 'raspberry' and 'shadow purple' inks. I think these make the perfect gift for somebody who likes to be unique, since no dyed bag comes out the same and the screen adds a bold dash of personality to each one.


If you fancy screen printing at home, check out my blog post here all about screen sensation... plus there is a discount code to get 25% off supplies at crafting.co.uk
Mx