Saturday, 11 March 2017

2 colour boxed zipper pouch


Following on from the boxed base zipper pouch, I created a 2 colour variation. This involves an extra stage of joining fabrics together to create a different look. For the one shown here, I have used two Michael Miller cotton printed fabrics - 'pineapple palm' and 'migration', with shower curtain fabric for lining. For this particular pouch, I also scaled up my original pattern to be used as a wash bag which will fit an average full size shower gel in. For this size, you will need a 12" zip to coordinate with your chosen fabrics.

To begin, cut rectangles from each of your fabrics following the dimensions below. Be aware, if your fabric has a directional pattern, the long edge will be the length of the bag.
  • 2 x fabric A (pineapples) measuring 5 1/2" x 11 1/2"
  • 2 x fabric B (chevron) measuring 4" x 11 1/2"
  • 2 x lining (shower curtain with interfacing bonded prior to cutting) measuring 9" x 11 1/2"
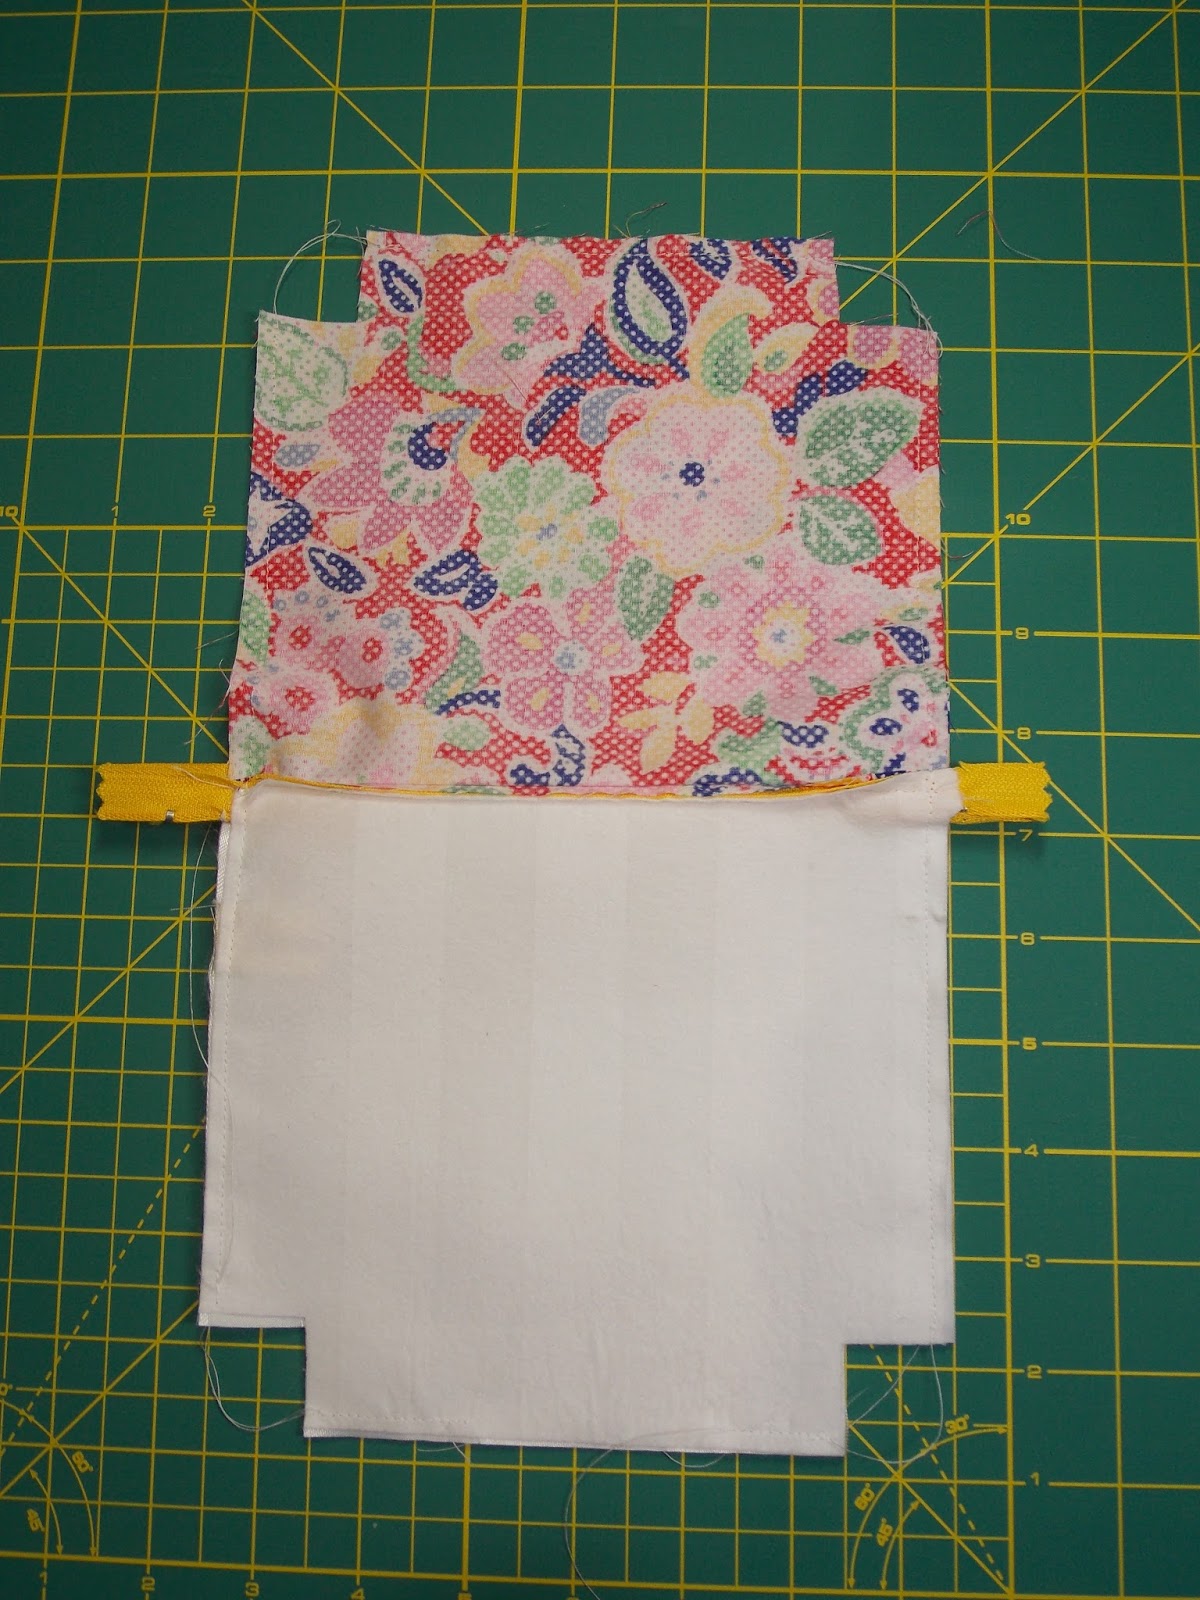
Now, you need to join your outer fabrics together to create 2 side panels. Pin fabric A to fabric B right sides together, along the longest edge, (if using directional fabric, make sure that you are pinning the bottom edge of fabric A to the top edge of fabric B). Sew along the seam using a 1/4" seam allowance. Open out the fabric and press the seam down towards fabric B. Top stitch to ensure the seam is laying flat and secured in place for a professional looking finish. Repeat with the other fabric A and B pieces. Then, take each of the outer fabrics (fabric A & B) and the lining pieces and trim into a 'T' shape by cutting a 1 1/2" square from both bottom corners on the long edge (see diagram below).
 Once you have reached this stage, you can treat your joined pattern pieces as you would the single pieces of outer fabric on the original pattern found here. Simply follow these step by step instructions to construct the pouch. Just take extra care to match up the joining seams between the two fabrics when sewing the outer pieces together.


As always, you can adjust the dimensions of the pattern to create your own version. You can also play around with different fabric choices as this design works well with combinations of patterned, plain or even varied textures of fabrics, such as a faux leather base and cotton top ... it's up to you! Have fun making and please share the results, you can tag me in your photos on instagram @craftylilmouse or comment below with link to your pictures.
Mx

Saturday, 25 February 2017

Boxed base zipper pouch ...


Following on from last months step by step pouch project, I thought I would show you how to make a pouch with a boxed base. With just a few more steps than a basic zipper pouch, this is a great way to create a pouch with a little more room inside. I have used a colourful printed cotton for the outer fabric and sections of a fabric shower curtain for a waterproof lining, perfect for a wash bag or cosmetics pouch.

Cut your 2 x fabric and 2 x lining pieces to 7 x 6 1/2 " rectangles. You will also need a zip at least 8" long and coordinating cotton. As an optional extra, I cut a piece of ribbon to create a 'handmade' tag for inside. Once you have your rectangles of fabric, cut away a 1" square from each of the bottom corners, (see image above).


You can now begin construction. Start by layering the zip between the right sides of a lining piece and an outer fabric, ensuring the top edges line up before pinning and sewing.

Once sewn, press and turn so right sides face outwards then top stitch along the zip edge for a neat finish.


Now repeat for the other side layering the other half of the zip between the right sides of the lining and outer fabric. Don't forget to press and top stitch.
Open up the zip to enable turning through, then pin around the edges with lining to lining and outer fabric to outer fabric, right sides together. Make sure your zip is held down towards the lining. If adding a tag, now is the time to pin in place so it will become trapped in the side seam of your lining.


You now need to sew around the edges of the rectangle making sure you leave a gap in the base for turning through and do not sew the square corner cut-outs... the corners are sewn afterwards to create the boxed shape! Press and trim any excess from the ends of the zip.


Next, shape the boxed corners by opening the fabric out where you have a gap in the stitching, then pinching the seams together to create a flat edge, (see above image). Try to ensure the side and base seams align before pinning and sewing.


 You will need to sew each of the 4 corners, then press by folding the base down flat and running the iron along (see outer fabric in image).


Turn through and slip stitch the gap in the lining before giving it a final press. You now have one completed boxed base zipper pouch. As always, you can play with the starting measurements to create different sized pouches to suit your needs.

Mx

Saturday, 11 February 2017

get organised zipper purse ...


I got this fun Christmas fabric, Copenhagen print factory copyright design by Josephine Blay and decided to make a purse. I have designed it like the zipper purse on last months step by step, only this time with the addition of a divider/pocket inside. It's simpler to make without the divider, but it helps with organisation when using the purse and we all know you need to be organised for Christmas!!

You will need to follow last months instructions to cut the pieces for the pouch, along with an additional piece of lining fabric to create the divider. This extra piece will need to be around 2" less than twice the height of your lining piece. So, if you want a purse with a finished height of 4" x 5" long, cut your divider to measure 6 1/2" x 5 1/2". This will create a 3" high divider to sit neatly inside to create sections without catching on the zip. 

To construct, begin with the divider and fold the fabric in half wrong sides together and press. Add interfacing to one half of this piece on the inside to add stiffness (following to the product instructions). Then, top stitch along the folded edge to give a crisp neat finish, as this will be the visible part of the divider. Next, add the divider to the right side of one of the lining pieces, pinning along the base and both sides. Stitch along the three edges to hold it in place and give it a press. You can then make the purse as normal, simply following last months instructions found here.

Mx

Sunday, 29 January 2017

simple little zipper pouch ...

 
Cut 2 outer fabric and 2 lining fabric @ 4 1/2" x 5 1/2"
you will also need a coordinating coloured thread and a minimum of 6 " zip (I used an 8" and trimmed down later as this is what I had in). I also like to add a little handmade label (this is taken from a length of printed ribbon)
 
 
 Layer a lining right side up, then the zip teeth facing up and outer fabric right side down. Pin along the top edge of the zip, keeping everything in line.
 
 
Using the zipper foot on the sewing machine, sew along the edge leaving around 1/4" seam allowance. Press the seam.
 
Flip the fabric so the right sides are facing outwards and press again. Now top stitch along to edge to hold the fabric away from the zip for a neat finish.
 
 
Now, repeat for the other side of the zip, (see above for what the layers should look like)
 
 
Once top stitched, your project should look something like the image above.
 
 
Now lay the fabric so the lining pieces are right sides together and the outer fabrics are right sides together. You need to  make sure the zip is partly open (so you can turn your project through once sewn). The zipper teeth need to be pushed down towards the lining, (see picture above).
If you are adding a handmade label, you should insert this now. Fold into a loop so the right sides face out, then place between the lining fabrics part way down the side seam. Ensure the writing is facing the right way up and both ends of the label are securely pinned into the seam allowance. 
 
 
 Now sew around the outer edge, remembering to leave a gap in the lining. Press, then turn to check its all ok. Now turn back through to the inside and trim any excess from the ends of the zip. Now, over lock (or zig-zag stitch using your normal machine) around the edge for extra strength.
 
 
You can now turn through and use a slip stitch to close the hole in the lining. You can see in the above image how the handmade label has been secured into the lining seam. Once happy, give it all a final press.
 
 
Your finished pouch should measure 5" x 4". You could adjust the size of the fabric and zip to make your own version larger or smaller as you wish, (just add 1/2" on to the finished size you want to allow for seams).
 
Mx

Friday, 2 December 2016

oliver snowman


I created this large stocking for my other cousin, in the same way as the previous one here. This time, I chose the snowman fabric and personalised with his name.
 
Mx

lucy owl


I made this large stocking as a Christmas gift for my cousin. I chose this cute owl fabric with a plain red for lining and the top band. I personalised one side with her name as an extra special touch, but this is optional and could be left out or swapped for an alternative embellishment. I scaled this stocking up to be big enough for lots of presents, but you can make it any size you like ... just buy the fabric accordingly.

Here's how I made it:
  1. To create a pattern draw a stocking shape onto some baking paper/newspaper. Cut this out. For the second pattern piece draw around the stocking shape but add 4" to the top edge. Cut out this 2nd pattern piece and label lining. 
  2. Cut 2 stocking shapes from patterned fabric and 2 lining pieces from a contrasting coloured fabric using the lining pattern. *If you want to personalise your stocking you need to do so now before starting to constructing your stocking*
  3. Sew 1 piece of patterned fabric to 1 piece of lining fabric, right sides together, along the top edge of the stocking. Repeat for the remaining 2 pieces of fabric.
  4. Lay both sewn pieces out flat, right sides together (lining to face lining, pattern to face pattern) and pin all the way around the edge. Be sure you match the seam you have already sewn.  
  5. To create a loop for hanging, cut a length of ribbon and bring the ends together to create a loop. Then place the loop 3" down from the seam in between the right sides of the lining fabric, leaving the cut ends just peeking out. When you sew around the edge, the loop should become secured in the seam.
  6.  Machine stitch around the stocking leaving a gap in the lining, for turning out. 
  7. Turn the stocking right sides out, through the gap and press with an iron. Hand stitch the gap in the lining using a slip stitch. Push the lining inside the stocking and fold the top cuff over to finish.
 
* To personalise the stocking, I decided to add the name. To do this, I backed some of my lining fabric with heat n bond iron on adhesive (sewable). I then die cut letters from this fabric using my sizzix bigz alphabet die set. I positioned these onto the patterned fabric and removed the backing to stick down, once I was happy with the placement. I ironed the pieces to fix the bond before securing with free motion machine stitching around each letter.*

I think this makes for a nice simple but effective gift, perfect for the season. I hope you can follow my instructions to enjoy making your own... Any questions please comment below. I would also love to see any of your makes, simply tag me on @craftylilmouse on instagram or post on my facebook !!
 
Mx

Monday, 26 September 2016

halloween bunting!!


  • basic grey for moda cotton (Halloween fabric) 3 x half a metre
  • iron on interfacing (medium weight) 1.5 metres
  • black bias binding (1 inch wide) 9 metres
  • sew easy equilateral 60' triangle template
I cut 3 different patterned fabrics into 5 1/2" strips. I cut these into the bunting shape using the sew easy- equilateral 60' triangle template. I cut interfacing into 5" strips and used the template to cut my triangles. I ended up with 96 fabric triangles and 48 of the interfacing. I then paired up the fabric triangles with one layer of interfacing for each pair. I then ironed the interfacing to one of the triangles from each pair, before sewing the pair of fabric triangles right sides together leaving the top edge open. I then trimmed the excess fabric with pinking shears and turned them right way around. I then pressed each of the triangles to keep the edges neat and shapes flat. To assemble the bunting, I first arranged the colours into the desired pattern. I then folded the binding in half and ironed along the full length to create a crease. Each of the triangles was then placed between the binding and pinned into position, leaving an inch gap between them and 5 inch spare on either end. The final stage was to sew along the entire length of the binding to secure all of the triangles in place.
 
The bunting was then ready to hang for a party or special occasion. This one is for Halloween but a change of fabric could make it perfect for any occasion or just for interior décor !! It can also be a great project for scrap busting to use up those offcuts of different fabrics. This project did leave me with some spare fabric which could be used up in other projects or a miniature version of bunting.
 
Mx