Tuesday, 20 August 2024

Salvedge chair Part 2.

Once you have your chair, next is taking it apart. Take photos along the way, it will help to remember how to put it back together. Remove staples carefully as you can use the original cover as a pattern. I didn’t have that luxury this time but have done with previous projects so know from experience it can make it a lot quicker and easier. If it’s an arm chair, you will most likely need to unscrew the arms to get all the fabric off. Just save the screws for later and take care when handling the chair as it will be more unstable without them, keep popping them back in when you don’t need access to the sides to put less strain on the structure. Definitely put the screws back in while working on the frame and woodwork. 

Woodwork on old furniture generally needs a good wash with sugar soap (diluted as the back of the bottle suggests) and wipe down. Sanding is usually required, the amount will depend on the degree of wear and tear. I got lucky as mine was done for me this time so I just gave it a light sand with very fine grit paper before waxing. I used Annie Sloane clear wax as I had some from previous projects and liked the original wood colour. You could paint or use a coloured wax, depending on how you want your chair to look. 

If your chair is in reasonable condition when you remove the covering, you don't have to strip it back any further. It might need new batting, foam or uncovering further. Use your judgment on how it looks and stop when you’re happy. 

Mine needed taking back to the springs. I added strapping/ strong webbing to the frame to add support and hopefully make the chair last longer. If the springs seem strong and you're not worried, skip this step. Then was a layer of hessian. This stops the springs from damaging the foam and protects them. I stapled this on the inside edge of the frame, as you don’t want to be stapling everything in the same place. Keep staples off the back edge as much as possible until the back needs putting on. 

Next is a layer of fire-retardant upholstery foam. You can choose the thickness and density: Standard is firm blue high density, medium is grey and soft is yellow/white. The thickness is generally sold by inch. You can buy as a sheet you cut or some places sell some cut-to-shape pieces. With the foam, you need to consider how deep you want the seat and how firm you like the seat. There are options to stack different foams to layer a firmer base structure with a thin soft top layer for comfort. I used 1" blue foam for the back, cut to the size of the frame. To fix, add glue (upholstery spray adhesive) to the back and edges of the foam. Put the foam flat to the hessian, then create a curved profile working around the edges by tucking the flat edges under so they stick face down to the hessian base.  Add staples along the edge to hold firmly in place, how many staples you will need to add will depend on how well the glue has gripped. If you want a more boxy profile, only glue the back of the foam, as the tension of the fabric covering will soften the hard edges later. 

Now add a layer of fire retardant batting/wadding. These come in different weights and widths too. I used polyester 4oz wadding. Stick down with spray glue onto the foam, smoothing the wadding into place as you go. Take care to shape the corners without adding extra bulk, cut away excess and lightly glue the cut edges together as needed.

The final preparation layer is the fire-retardant upholstery barrier cloth. I found a heavy-weight fire retardant cotton calico. Take your time to put this layer on neatly as this forms the foundation of the chair before the final layer. Measure your chair, going around to the back of the frame, and cut your fabric roughly to size, allow extra to hold as you staple and trim away excess when everything is stapled in place. Start in the centre at the top and add a few staples along the top edge to hold in place. Smooth down and keep tension on the fabric pulling down to the bottom, underneath and around to the back, then hold in place with a few staples along the bottom edge. Now do a few on each side with an even tension, keeping the fabric taut but not overly tight to dig in or make the foam bumpy. Continue adding staples working outwards from the centre on all sides until you come close to the corners. You will need to create a tuck or tiny pleats to gather the fabric smoothly around the corners. 


I chose to work on the back of the chair and then the seat pad. Hopefully, you will have a seat pad you can work with, again just judge this by look and comfort. As mine was completely missing, I had to start from scratch layering 3 layers of foam: grey then blue then yellow glued together. 2 layers could work equally well, 1 firm and 1 medium or soft depending on how you would like to sit. You will need to cut the foam to size and might want to round off the corners for a softer shape, though I chose not to for this one. The foam needs to be covered in fire retardant batting and calico. I use Gutermann upholstery thread for the calico as it is thicker and stronger than regular cotton thread. 

As my seat was a simple block shape, I could create a simple calico cover, however, if you have rounded off your seat, you might need to contour your calico further to match. I measured the circumference of the foam pad by wrapping the tape measure around the width and length. Half these measurements and add 1” then cut 2 pieces of fabric to size. Sew the pieces together along 3 sides, leaving a large turning gap at the back/4th edge, using 1/2" seam allowance. Then box the corner by the depth of the seat pad, like you would a boxy pouch. Fold the side seams to match to create a triangle at the corner and pin to hold. Measure and mark at the size you need, so that the sewn line will match the depth of your seat. Now sew across the corners and cut away the excess. It's a good idea to check the fitting before you cut away excess. When removing excess, if possible, cut one seam allowance slightly smaller than the other, as it will be less bulky and have a neater finish. Squeeze the batting-covered foam seat pad through the turning gap and hand-stitch up the hole once you're happy. 

You will now have a chair effectively, simply needing a fabulous cover/jacket. So, you can pick a wonderful fabric and cover the chair with the final top layer, or as I did patchwork and quilt your cover. 

Mx

Sunday, 18 August 2024

Salvedge chair


Welcome to my salvedge chair blog series. Basically I salvaged a chair and used selvedge's to give it a new life and space in our home.

House renovation is expensive and since I love old furniture, I am more than happy to save some pennies buying old and up cycling. Last year I have discovered Facebook marketplace. It’s fair to say it’s been amazing if a little bit dangerous. I will get around to doing my other bits of furniture but with a good wash they are usable so painting can wait. However I spotted a chair for free! The magic word is free. Did we need another chair? Probably not but I couldn’t resist. In fairness I had been looking at chairs when searching for our sofa and had tried to buy a couple of others but was too far or had gone already. It was local and all the woodwork had been prepped and sanded, which was an amazing time saver. The lady had started recovering the chair but had got stuck and abandoned the project. It looked a bit of a mess and was missing the seat entirely but I hoped I could just either finish it or more likely recover it. I have done a few bits of re upholstery before so wasn’t worried. When it come to taking all the staples out and getting it ready, we discovered some random bits of foam tucked in and foam that had been added to the back which was making the shape of the chair very dated. The more we took off the worse it got so we took it back to springs. That was a little bit more scary and required a touch more research, it also meant the project got moved up the to do list. 
I have always fancied putting a quilt in the festival of quilts and had decided this was the year. Then after starting to sew my Ruby Star Society stash this year I wanted a selvedge's project. Me and Abbie were chatting one day and decided a quilt coat made from them would be fun, and different for the entry too. When we went to collect the chair, I joked with the lady about maybe even doing it patchwork and Abbie said no! However after me suggesting the selvedge's would be quirky she liked the idea, it would mean I couldn’t do the coat and enter the competition. It is a quilt creation category though and maybe a chair would count, after a quick email I got my response… Yes, you can enter a chair! That moved it up the to do list, to the best get started list, as the festival of quilts deadline was soon. 
There was some struggles along the way. My health conditions mean I’m not very strong, I wasn’t strong enough to use even the electric stapler we bought. So Abbie was on staple duty, both pulling out and putting in. We actually used a regular hand held stapler for most of it in the end and think the electric one isn’t worth buying if you only plan on doing a couple of small projects. The arm fell off and when it come to getting it back together we couldn’t manage it. My neighbour ended up helping and putting a fresh screw into it to fix it, we used the original screws for everything else though. I had an accident with the seam ripper, which followed with many tears and hours of redoing things to mend that. This added to the stressful deadline that was getting close. However we got there in the end and it looks fabulous (if I am allowed to say so) so well worth all the effort. I have had many lovely comments before and after on Instagram and at the festival of quilts, with many people wanting to do one for themselves. I never expected it so hopefully this blog series inspires and helps if anyone wants to have a go. 


Firstly you need a chair, ideally one that’s free or cheap. You might even have one that’s at home you love but needs a facelift. Go for whatever budget suits you though, if you love a shape or style it may be worth the extra cost. Remember as well as money for supplies and fabric, you will be adding time and energy, you need to like the shape and style ideally before you start. You can pick whatever style you would like, some will just be a bit more of a challenge than others. Some chairs will be in better condition, they might be more money, but won’t need taking back to springs so you can save on supplies. 

Stay tuned for the next blog, with hopefully some helpful tips on putting the chair back together.
Mx


Sunday, 3 December 2023

The final sew hot brand rep parcel!


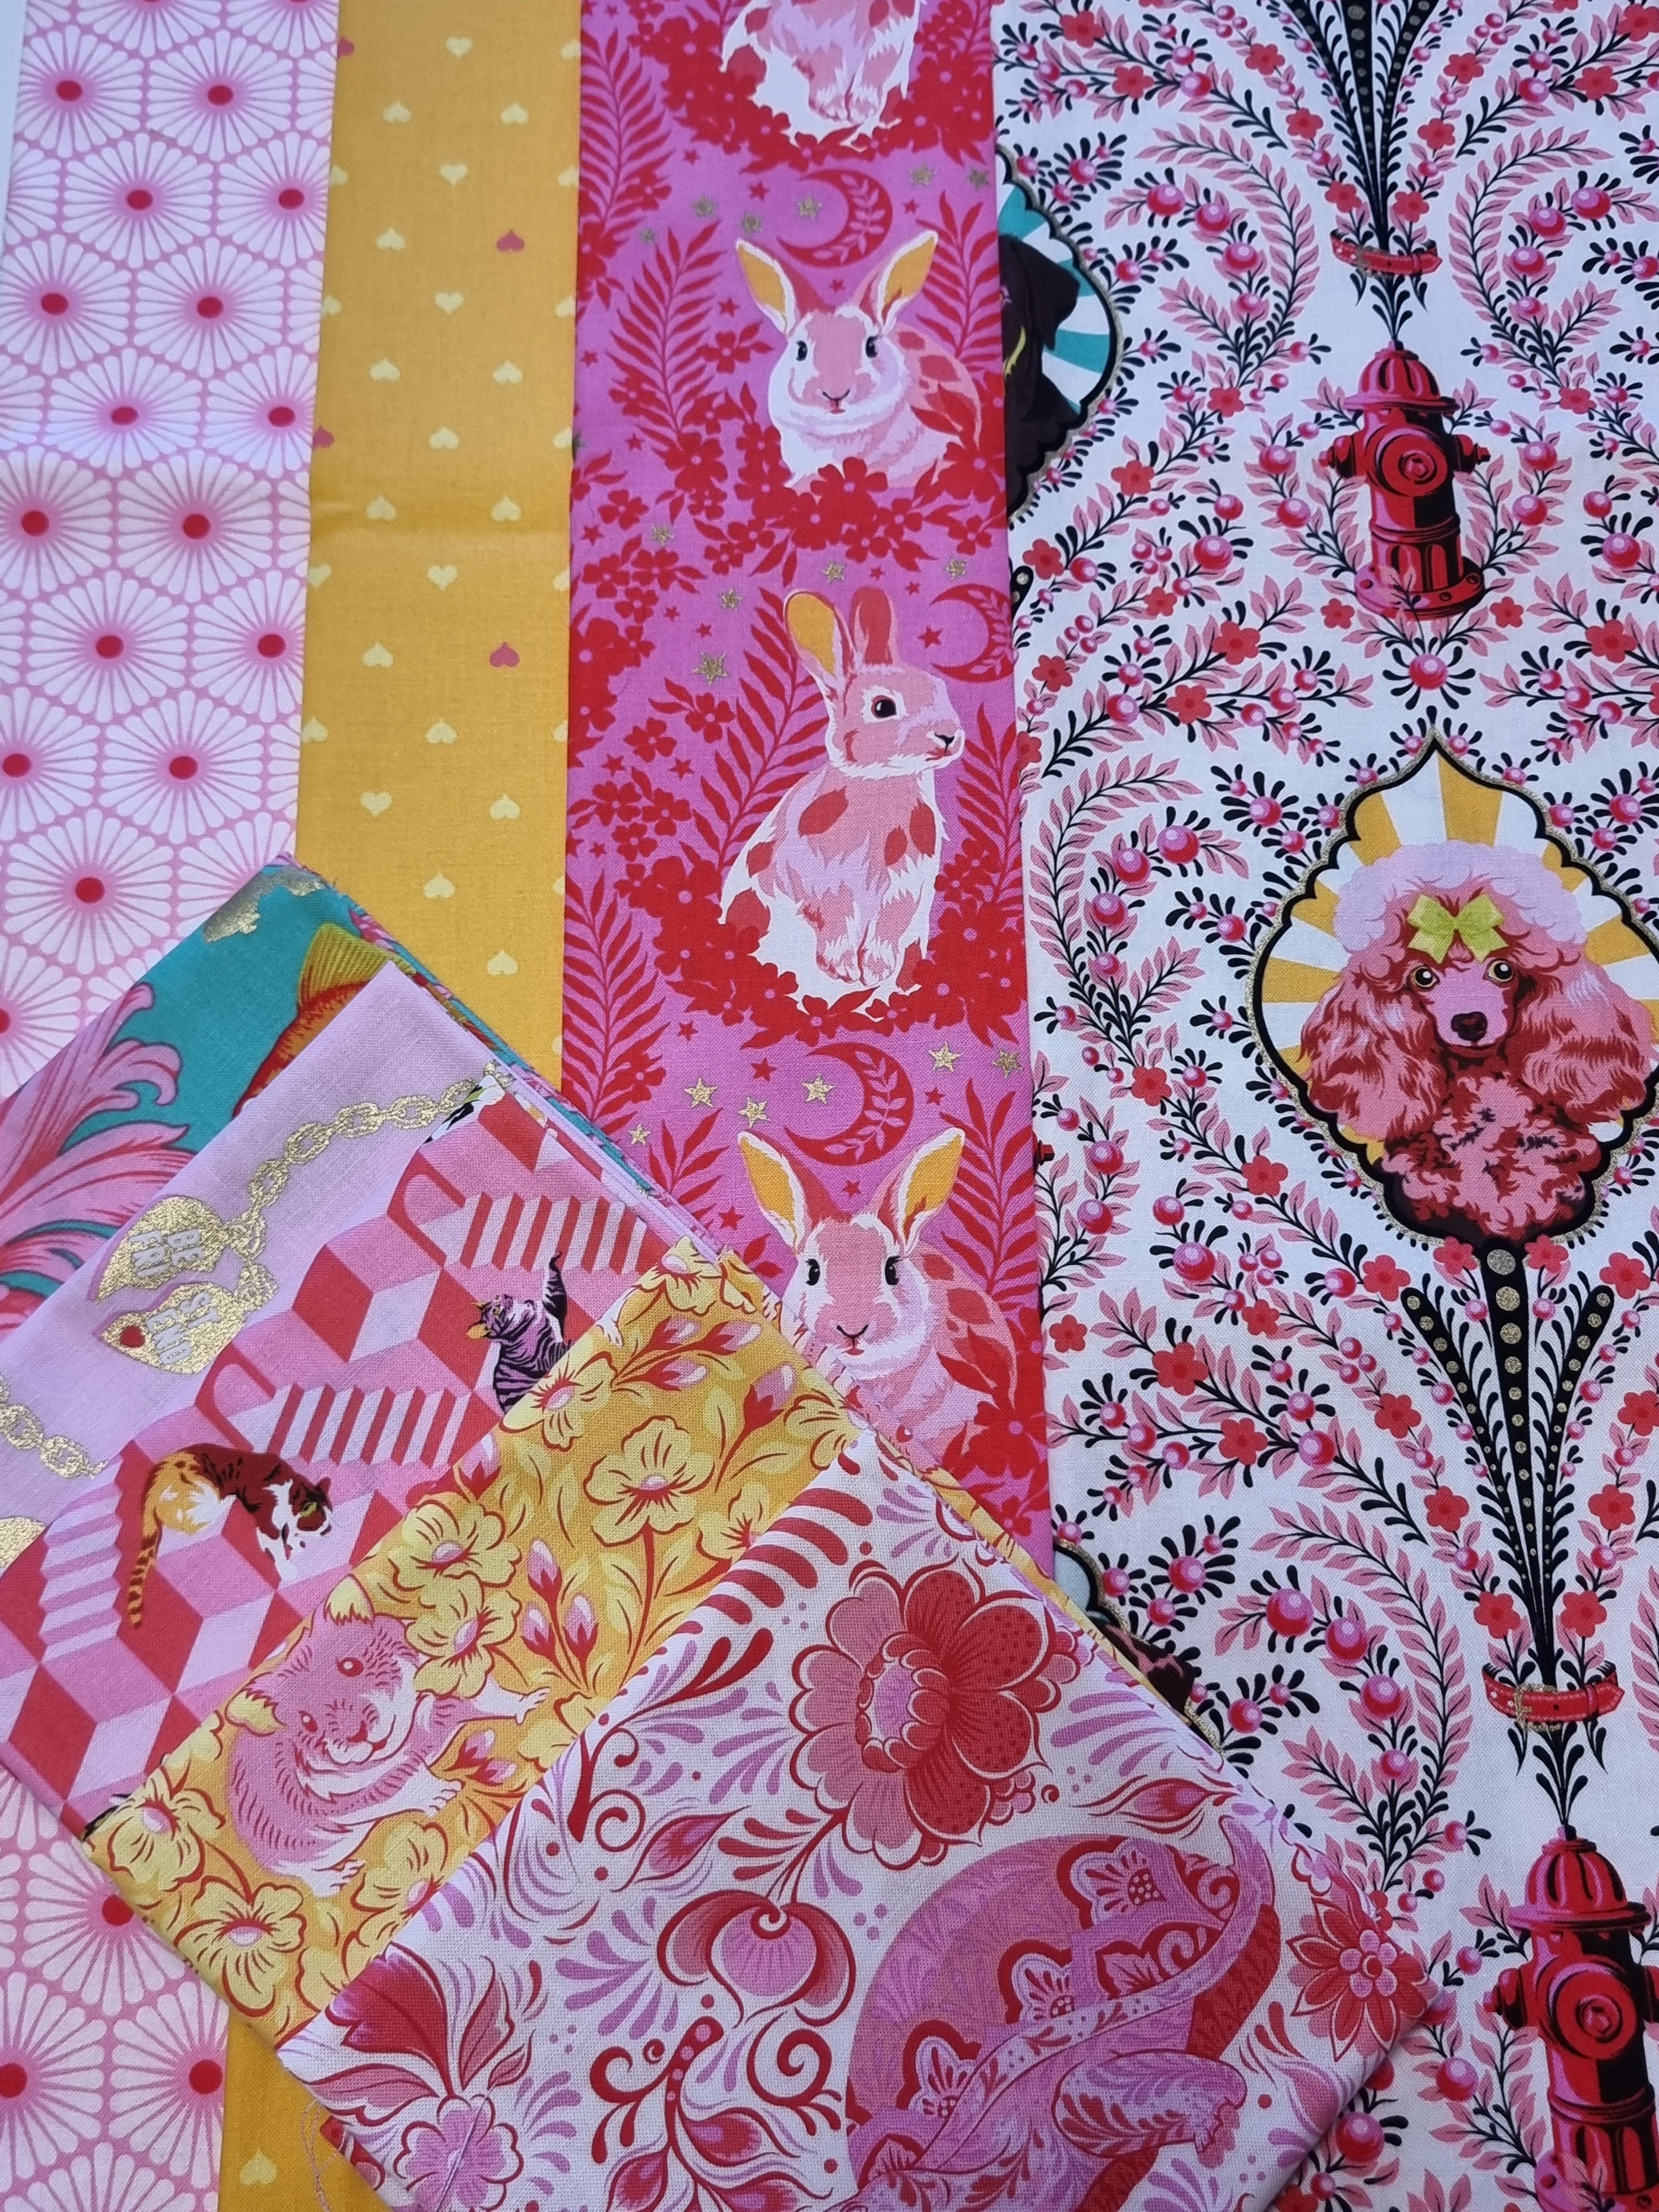
For my final Sew Hot brand rep parcel I was sent the Tula Pink Besties fabrics. The prints are so bright and fun, with some lovely character prints. Since I was sent some half-metre cuts this time, I was excited to use them and make some slightly larger projects. 


First up was some storage. I wanted a large pouch or tote to store my webbing together. Since my sewing room has some glass cupboards, it is only right that I make some pretty storage. I chose the Gus tool bag pattern by Indigobird designs. I made the small size as it fits perfectly into my deep billy bookcase. I love the style of this caddy and best of all no binding. I think that is the main reason it is a nice and quick make. The instructions are great and so easy to follow too.


My second project was a new bed for Millie in my sewing room. I already had a dog bed/pillow that she liked but it had a brown cover, which just didn't look nice in my sewing room. Of course, I wanted a pink quilted one and when this dog print fabric came, I just knew I had to do it. 
I added some more Tula pink fabric I had left over from a quilt I made, which worked perfectly. I think the stripy binding adds some fun and really makes the print stand out. 
I made the cover with a zip so it can be easily removed and washed too. I was asked on Instagram if I would be making it available as a pattern. I didn't plan to make it a proper pattern for sale but will be doing a free blog post tutorial with all the measurements and some basic instructions, so keep an eye out for that if you are interested.


I am sad this is my last Sew Hot brand rep parcel. I loved the challenge of getting the surprise fabric, which wasn't always to my taste, but using it to make something lovely and show off the fabrics. The team at Sew Hot have been great and the special brand rep retreat for the reps was wonderful. All the other brand reps are fabulous makers and it has been a joy getting to know them this year. 
It has been a wonderful experience and I'm so pleased Sew Hot gave me the opportunity this year. 
I can't wait to see what the new team of brand reps do next year.
Mx


Sew Hot brand rep… take 3


Another Sew Hot brand rep parcel has arrived and it is fabulous!
I love these Ruby Star Society fabrics. It is the new Lil range by Kimberly Knight and has such pretty little florals. 


Of course I had to make some new cushion covers for my sofa. Before I started my projects, I had to narrow down the fabric selection. I went for the smaller prints for the patchwork and two of the larger scale prints for the zip backs.


First up I made my own pattern using simple half square triangles (HSTs). I think it is the colour and print placement that make the pattern so effective, in my opinion.
I have made it available in my Etsy store as a cute pocket pattern.

There is no other way to finish a cushion, than a hidden zip back. Tutorial here.


I did simple straight line quilting with my walking foot and love the results. It adds such lovely texture to the cushion.


For my second cushion, I decided to go with the Made Just Sew 'pointing' cushion pattern. I adapted it slightly as my cushion was rectangle, I didn't make all the rows, I also turned the pattern since I thought it fit the direction of my cushion better.
This was a free pattern for an event but you can check out her other patterns here.


I love this larger scale print for the cushion back and I couldn't resist leaving the selvedge on this one.
I had to adapt the way that I made the cushion back but I still wanted to add a zip to close my cushion back.


I think they look great together on the sofa. I will be adding my Ruby Star Society fabric cushion cover to the sofa next year and these are a great start to the collection.
Mx

Monday, 23 October 2023

New sewing room!


Since moving at the beginning of the year, we have been renovating the house. I have been waiting for my sewing/crafting space to be finished. It isnt quite there but enough to work in and share with you.


My desk has a set of tin draws underneath for tools and notions. I also have a small trolley with my projects and EPP, tucked to the other side. I have also added a peg board for my scissors, pins and few bits that I think I will use the most. 
There was already a shelf up, which was perfectly placed for above my desk, for some photos and decorations.
I found the pink office chair on facebook market place. 
At the side of the desk is an old piece of furniture I found on facebook marketplace. I plan to paint this so will share more photos when I finish that.


At the other side of the desk is some storage. It is a smaller depth Pax wardrobe either side of a Billy bookcase in a wider depth. There is only a couple cm difference so they sit quite nice together. The bookcase only comes in the white, but I chose the wood effect wardrobe doors to warm the room up a little bit. I have just added shelves into the wardrobes to sort my fabric and other sewing bits away.
The chair at the side was a find at a vintage markets many years ago. It is great and turns into a ladder, perfect for getting to the higher shelfs. At the side of that is the other piece of old furniture I have got but will be painting next year, so will share more when I do that.


On the other side of the room is more storage. At this side I did the same setup as the other side, but I had a bit more space so I used 100cm wide Pax instead of the 50cm. 
In the centre of the room I had made an island. Unlike in my old room instead of just using desks, I wanted something with storage. I reused the two Kallax units (with fabric boxes in) we had and laid them on the side, pushed them together. I found the table top that was the perfect size to go on top. It is a touch longer, which I have put at one side as I think I could use it to sit at if I really wanted to, although it will mostly be used for cutting out. I found a nice patterned large rug to go under the unit. It breaks up the vinyl flooring, adds pattern and warmth and best of all saves my floor from the inevitable ruler dropping.
The curtains were from next although in the sale, so I cant find them online to link.

The last design feature for my new room is the pink ceiling... It might be a bold choice but I love it! 
The light is the same as my old sewing room and I would highly recommend it.
Overall I'm so happy with how my room looks and excited to use my room and create.

I have added links from all the items, if you want to check them out. I think I have done everything but if you have any questions, feel free to ask in the comments.
Mx
 

Saturday, 21 October 2023

Sew Hot Brand rep... Take two!

My second parcel for the Sew Hot brand reps arrived and this time I was sent a selection of fat quarters from the Swatch book fabrics by Kathy Doughty for Figo fabrics. 

It has been a year since I released the Bestla Quilt pattern, and it has been on my mind, especially because I decided it was about time I finished the matching cushion pattern. When the fabrics first arrived, making a Bestla cushion was an obvious choice. However there was a lot of fabric for just a cushion or two, so I couldn't resist making a small quilt.
I chose the baby size of the Bestla pattern. After making a few mock-ups, I decided to add a spectrum solids in 'optic white', to really brighten up the fabrics. I also needed to add a binding fabric from my stash. 

I cut out the quilt and the cushion at the same time, to make it quicker and easier for me. Also making sure I had enough to finish my projects. When the quilt top was finished, it was time to choose a backing fabric. As I am really trying to be more mindful of buying fabrics and trying to use what I have, I decided I would try to do a scrappy back using the pieces I had left over. It took a little time playing with the layout but I finally found a combination that I liked the look of and was big enough to baste. 
After basting it was time to quilt. I only do straight-line quilting with my walking foot. I couldn't fully decide on a pattern, so I did something very strange for memuch and made it up as I went along. I just kept adding lines as I went and was happy with how the design developed and turned out in the end.

I thought instead of just doing my cushion ahead of my week, I would make it in real-time during my week. I figured it would be a great opportunity to repeat my cushion in a weekend challenge so I did #bestlacushioninaweekend. It was a lot of fun to see how fast I could make it to cushion and secretly wanted to beat my time from last year... I did! My sewing has probably improved but I think mostly the time improvement came from the patchwork being less pieces and much simpler quilting. 
It was lovely to revisit the Bestla pattern and I am thrilled with my new quilt and cushion. I think the fabrics are a little too grown up for a baby quilt however, it will be a great size for use in my wheelchair, in the car and no doubt be stolen by my cheeky fur baby who has already proven it is the perfect size for her. 

Mx

Friday, 7 July 2023

Bestla cushion pattern testers parade

 It's a year since I released my Bestla quilt pattern, so I thought it was about time I finished the Bestla cushion pattern. The cushion pattern takes a section of the quilt pattern and makes the centre stars a feature. It is a different block from the Bestla quilt block but still has a nice and simple construction. There are many ways to customise your cushion, using different colours and prints in different sections. This is because there are many ways to make the Bestla quilt, it was only right the cushion should be able to match if you wanted it to. If you don't fancy making the Bestla quilt, no worries, you can just make the cushion pattern as a stand-alone. 
As always with my patterns, I like to get pattern testers to catch any mistakes and make the pattern the best it can be. There are the cushions my testers made and a little about them. I think they did a wonderful job, so be sure to take a look and give them a follow on Instagram!
If you want to make your own, grab the pattern from my Etsy store HERE. Why not also join the fun of a little sew-along on the 14th of July over on Instagram too.
I cant wait to see all your cushions, Happy sewing!
Mx

Hi I'm Lolly from Birmingham, UK. I've only been quilting for about 3 or 4 years now. I still consider myself new to quilting but becoming more and more confident in my quilting skills This is my 4th test for Crafty Lil Mouse! I had so much fun stitching the Bestla quilt patterns. So I signed up for this one as it's a accompany piece for the quilt.

It turned out so great I am so pleased!
@lollypopstitches

Hi, I'm Sanne, a Dutch quilter with a love for threads and fabrics. This was the second time I had the honour to test a pattern by Stacey. I had so much fun creating this one with a very special fabric bundle. I bought these fabrics last year in Scotland when I was over there for a wedding of a dear sewing friend, I just couldn't decide what to sew with it, but this pillow was the perfect project. The bigger squares give you the opportunity to do some fussy cutting like the highlander cow on the corners. It's a great pillow that comes together very nicely, I love the different options Stacey gives so you can construct it the way that works best for your skills and fabric of choice. You can check out my other projects on Instagram @SewbySanne or my blog sewbysanne.wixsite.com/blog.


I’m Shelly I am a children’s nurse by profession with a love for sewing. I have been sewing since around 2011 and had an amazing teacher in my mother-in-law who loves bears. I love turning people’s loved ones clothes into bears. Every day I am not working I can be found in my sewing room. I love making teddy bears, quilts, baby clothes and have started dressmaking for myself. I love a challenge and really enjoyed doing this pattern test. I loved the finished cushion and found the pattern was easy to follow with clear instructions. I am looking forward to creating more cushions with the pattern and think my next one will definitely be a scrappy one.
@shellysquiltandsew


I’m Lisa; I live in sunny Brighton UK. I started sewing as a child and made lots of clothes until my 20s, when I had a l-o-n-g break from sewing anything. In autumn 2019, I booked myself onto a patchwork course, as it was something I’d always wanted to try. I made a Bargello quilt and was hooked! During the Covid lockdown patchwork kept me sane, but it has become a bit of an obsession. In just over 3 years I’ve gone from a no-fabric household to every room containing at least some of my stash – I’m a big fan of Lewis & Irene and Dashwood Studios fabrics.

The Bestla cushion pattern was a great stash-buster for me. I’d just finished a large starry quilt, and I made the Bestla with leftovers, so now I have a gorgeous matching cushion on my bed. My husband is delighted with (yet another) cushion to chuck off at bedtime! I’d never thought of binding a cushion before, but it really finishes the project beautifully.

@lelbourne