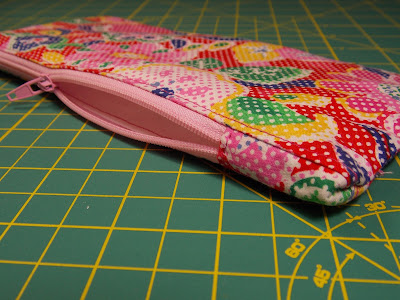
For this sewing step by step, I made another zipper pouch, but used a different technique for the zip on this one which requires a little more skill to create a neater finish.
To begin with, I added iron on interfacing to my lining fabric to give the pouch more structure. I then cut the fabric pieces as follows:
- Cut 2 x outer fabric measuring 9" x 4 1/2"
- Cut 2 x lining fabric measuring 9" x 4 1/2"
- Cut 4 x small rectangles measuring 1 1/4 " x 3" (2 from lining fabric and 2 from outer fabric)
- You will also need a zip, coordinating cotton and if you would like, a hand made tag. Some contrasting cotton and a hand sewing needle are also handy when altering the zip.
The first stage once you have cut all of your fabrics is to prepare the zip, by adding coordinating fabric stoppers onto either end. To do this, you will need to press the fabric for the stopper tabs, folding each of them in half, wrong sides together. Using a hand needle and contrasting cotton, tack over the zipper teeth 1" from the end of the zipper tape.
To attach, place the outer fabric tab right side down (opened out fully) onto the zipper teeth, and the lining fabric right side up beneath. Ensuring the end of the fabric aligns with the end of the zipper tape, sew across the zip through all of the layers approximately 1 1/4" from the end using your zipper foot on the machine. Now fold the tabs back along the half way creases to reveal the right sides of the fabrics. Trim the excess to remove the bulk, leaving only the outer fabric and the outer side of the lining fabric (cutting away the end of the zip and inner lining). Repeat for the other end of the zip, ensuring the zipper is pulled open to remain within the new length of the zip.
You can then begin construction of the bag. Layer one piece of the outer fabric and one lining fabric, right sides together. Place the zip between the fabrics along the top edge, with the zipper teeth facing the outer fabric. Pin and stitch using a zipper foot, leaving a 1/4" seam allowance. Fold right sides out and press, then top stitch. Repeat for the other side.
You should now have all of fabrics joined together with a zip across the centre. With a project like this, it may be necessary to trim the edges neat again at this stage to ensure everything lines up.
Now, open the zip to allow for turning through once sewn. fold the project so lining pieces are right sides together and outer fabrics are right sides together. Then position the zip so the teeth are facing down towards the lining. Pin your tag within the lining section if you are adding one. Then pin around the edges and sew, remembering to leave a gap in the lining for turning through.
To get the really neat points in the corners, it may be a good idea to trim the corners off the fabrics to remove excess... just don't cut through your stitching! Turn out the bag and slip stitch the gap in the lining. Press, then push the lining down inside the bag and push out the corners before giving it a finishing press. You may also need to use a bamboo turner tool to push out the corners without poking a hole through. It's a bit of a tricky one to master, but it does give a professional finish once complete.
Mx


No comments:
Post a Comment