Saturday 9 February 2019

My first blocks


 These were the first patchwork blocks I ever made and am so happy to see them finally made into something. I went to a patchwork class at a local shop, where every class you made a new block with the goal of having a sampler quilt at the end. I let my sister choose the fabrics with the intention of her having the quilt as a gift. Sadly though, the shop closed when we only had 7 blocks made. We didn’t have enough blocks to make a quilt and I wasn’t too thrilled with the designs to just make repeats. Without much experience the blocks just got shoved in a cupboard while I did other projects, until a few months ago. My plan was to make them into cushions for Christmas, however, I had lots of other gifts to make and these got pushed to the bottom of the list with the promise that I’d do them as soon as I had time.
She had a couple of large cushions that had covers which really didn’t match the décor. We had a discussion and I came up with this solution. I used 2 full blocks and split the 3rd in half, once joined together they made just the right sized cushion fronts. I added some batting to the back of the patchwork and did some straight line quilting about an inch apart. I backed the cushions with some plain grey fabric that I got from IKEA and did an envelope back to make them super simple. The blocks worked out to be enough to do both large cushions, one in each colour way.
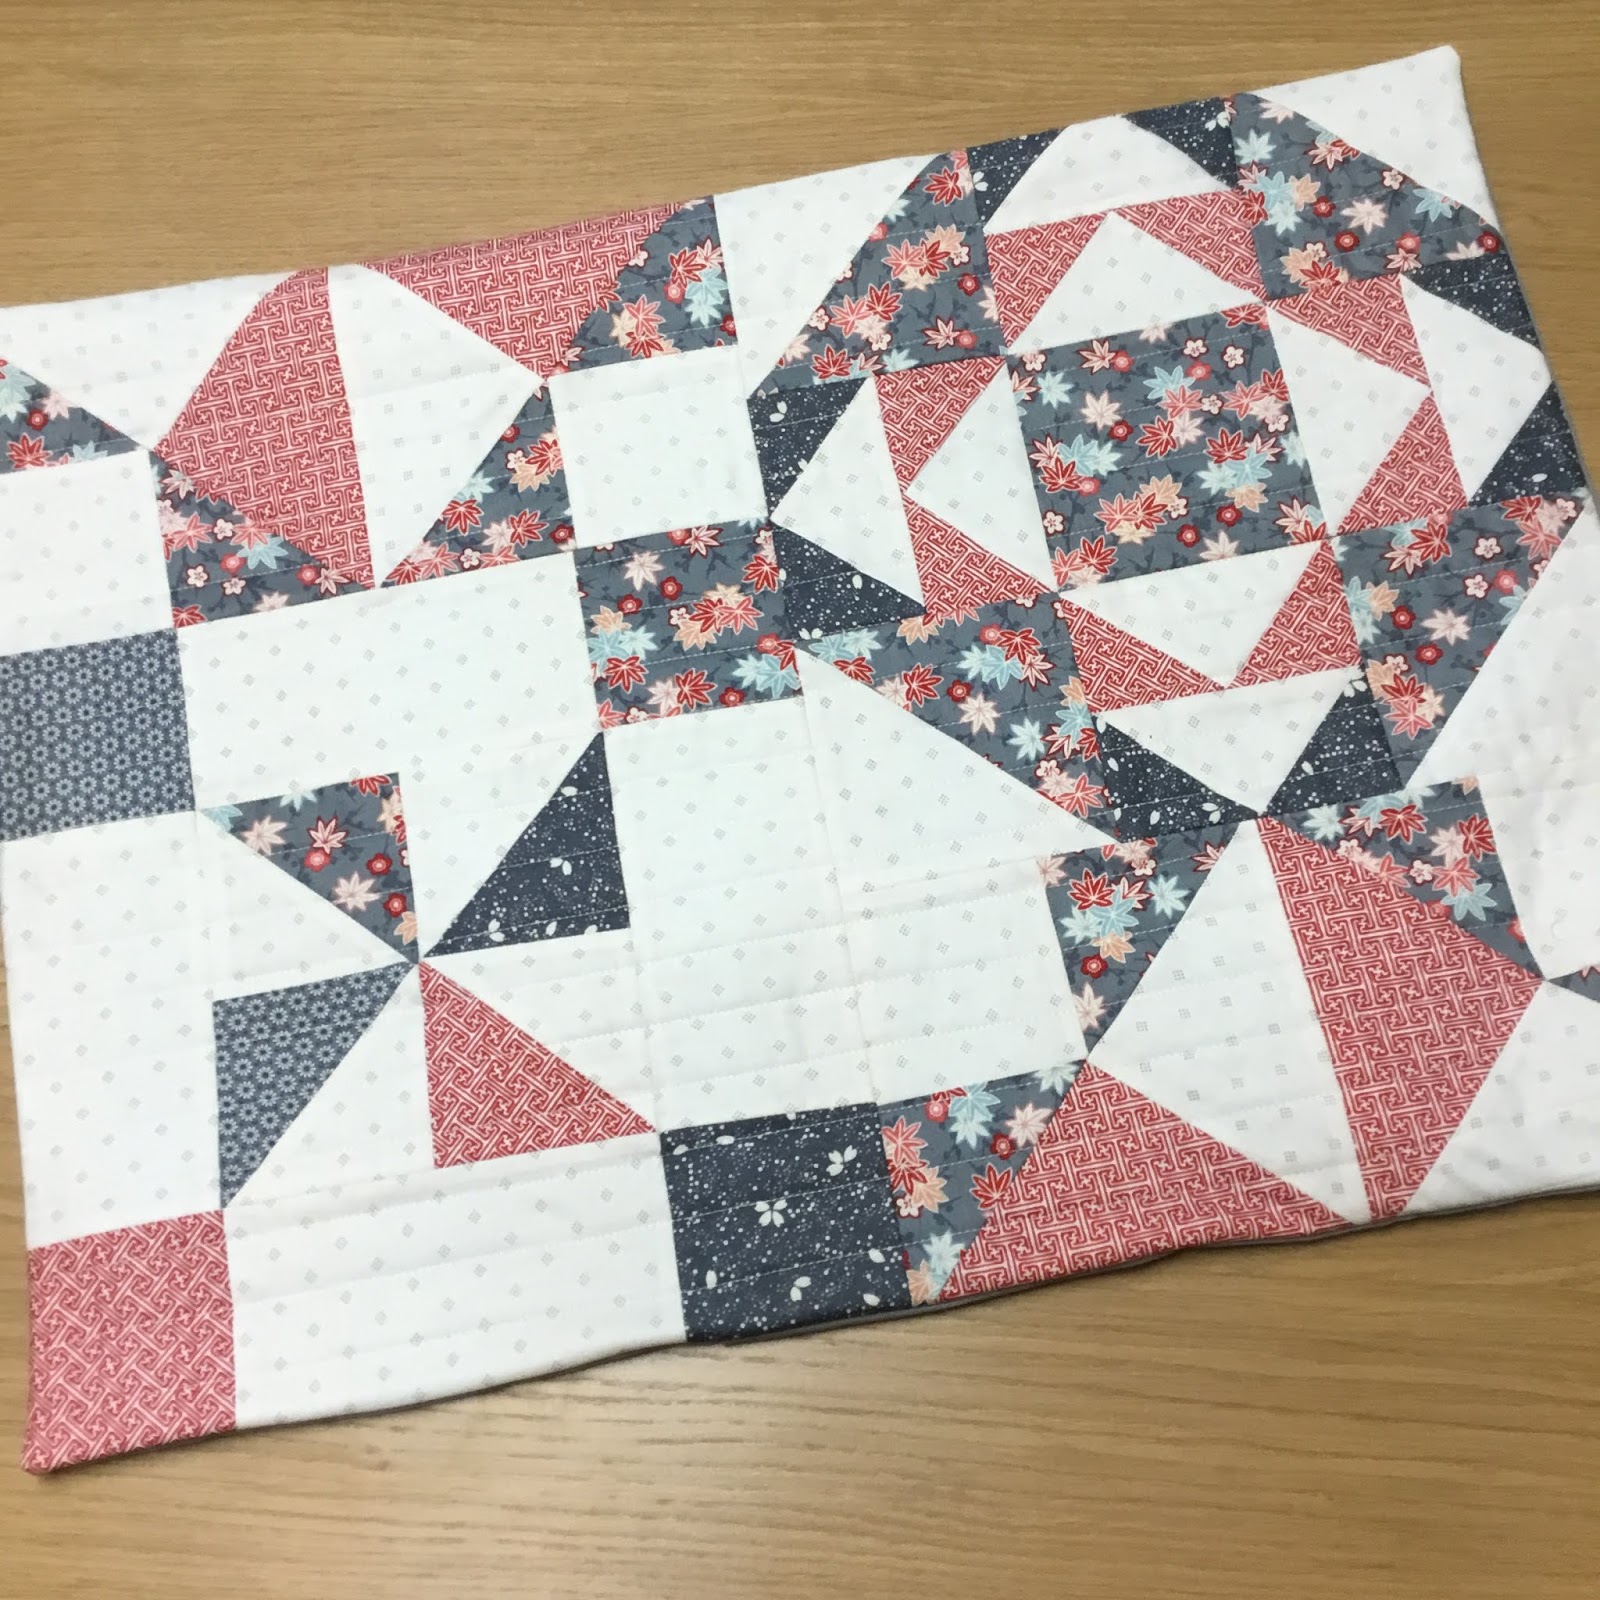
Since I had one block left over, I made one more smaller cushion. The block was slightly too small for the cushion she had, so I simply added a border to the block. I used some of the blue fabric I had left over to tie the cushions together a little more. I also finished this cushion with an envelope back in the same grey fabric.
These cushions were simple to make and I’m so happy with them. It’s a shame they weren’t finished earlier, however, they probably wouldn’t have been made the same or turned out as nice. They are quite a quirky design but fit both my sisters personality and room perfectly.
Mx


Thursday 7 February 2019

Micky quilt


Since I made a quilt for Annie’s christening (read about this quilt here) I thought it was only right that I made a quilt for another friends baby who was born at similar time. I knew he wasn’t going to have a christening, so his first birthday seemed like the perfect opportunity. 
For Finlay’s quilt, I wanted fabric that would also be quite timeless so he wouldn’t grow out of it too fast. I was lucky to find this Micky material on sale at a local shop and it seemed like fate... After all what is more timeless than Disney's Micky mouse!
As I had left it a little late to start, I chose to do a simple square patchwork design. I did however choose to combine 3 of the fabrics, using the layout to make a pattern. I think this makes quite a striking design and am very pleased I decided to make it this way. I was quite surprised how quickly it came together, made easier by a lot of chain piecing. My mum was also very helpful and did quite a lot of pressing the seams for me.

 
I chose the grey fabric for the backing since it was darker than the other prints but included all of the colours. I also made the quilt to the width of the fabric to save me piecing the back. I chose to do simple straight line quilting, going diagonally across the squares. I only quilted every other square too to give the quilt a softer feel. I used the red print as the binding to frame both the front and back nicely.


The measurements I used to make this quilt are below if you would like to make your own:
 
finished quilt size is 40.5" x 58.5"
 
fabric A (white) cut 35 @  5"x5"
fabric B (blue) cut 58 @  5"x5"
fabrc C (red) cut 24 @ 5"x5" plus 2.5" strips for binding
 
I cut the binding strips first, taking advantage of using the full length of the fabric. Then cut the squares from the remaining fabric. I cut and joined at least 230" of binding just to be safe.
I used 1/4" seam allowances throughout my quilt.
 
 
It was a very dull and windy January day so the pictures aren’t great, but the quilt was happily received and that’s the thing that matters the most.
 
This quilt was a project for my Q1 finish-a-long, you can read more about this here!
 
Mx

Tuesday 5 February 2019

Epp on the go


 As part of the #100hexies100days Instagram challenge hosted by @sewfoxymama, I was encouraged to baste 100 hexies. I chose to do all cotton and steel fabrics, although it was hard to find fabric to fit the weekly themes I just managed to do it. I was so pleased I completed all 100 days and on time! I was determined to make them into a project for me to keep and use. I originally thought of a bag but decided on this 2 in 1 pouch designed by aneela hoey. I actually had too many to just make this one pouch so I chose which hexies I wanted and gave the other half to my sister, for her to make a pouch too.
 
 
I decided on this layout and set to hand stitching them all together. Once stitched, I added batting to the reverse and did some straight line quilting going diagonally through the hexies. I chose my favourite girl with balloons fabric and used a medium/heavy interfacing on the reverse to line. Sparkle vinyl was an obvious choice for my pouch. I found a couple of bits from my scrap bag for the fastening tab and decided on a bright pink kam snap. I picked pink zips and the wonderful teal sprinkles fabric from cotton and steels basic range as my binding.
 
 
I must admit that I didn’t follow the book instructions completely. After making this pouch as part of the sewalong last year, I had a few little adjustments that made things a bit easier this time.

I am so happy with this pouch, all of my fabric choices and the cute fussy cut hexies makes it perfect. It is also super handy and has been used to hold my supplies for my ice cream soda EPP quilt I’m making. I will be doing most of the sewing on the go so it’s great to be able to pick this up in a rush and know I have everything ready to see, well apart from my glasses!
Mx