Tuesday, 16 October 2018

2018 finish-a-long Q4

I am slightly late to the party but have decided to join in with the 2018 finish-a-long. It is hosted by a few bloggers, the nearest to me is Sandra in Ireland. You can visit her blog to find out all the information about this here... but it is basically a low pressure online community that encourages you to finish all your wip (work in progress) and I have a few at the moment!

My projects for this quarter:


  • My last #sew6organisers sewalong pouch
  • Unicorn retreat bag
  • Cotton + steel #100hexies100days2018
  • Polar bear patchwork cushions 
  • Stitch and sew project (for my giveaway prize and the sewalong in November)
  • A owl Christmas stocking
  • Make a project from the blue liberty panel I stitched months ago
  • Christmas diamond patchwork (have some cut)
  • The Adele dress I cut out in summer
  • Dashwood advent calendar for myself 
  • Do something with the patchwork block I made for my sister
  • A mermaid bookmark (not pictured)
  • Easter hoop cross stitch (not pictured)
  • Christmas bunting (not pictured) 
I will also add the #12daysofchristmasswap2018 im working on and have signed up to do the #saturdaynightcraftalong swap!


This is quite a few projects and I know I will probably not finish them all. Also a high possibility I will start some more along the way but at least I’m doing this with good intentions of finishing everything... only time will tell.


Mx

Wednesday, 27 June 2018

bambi quilt


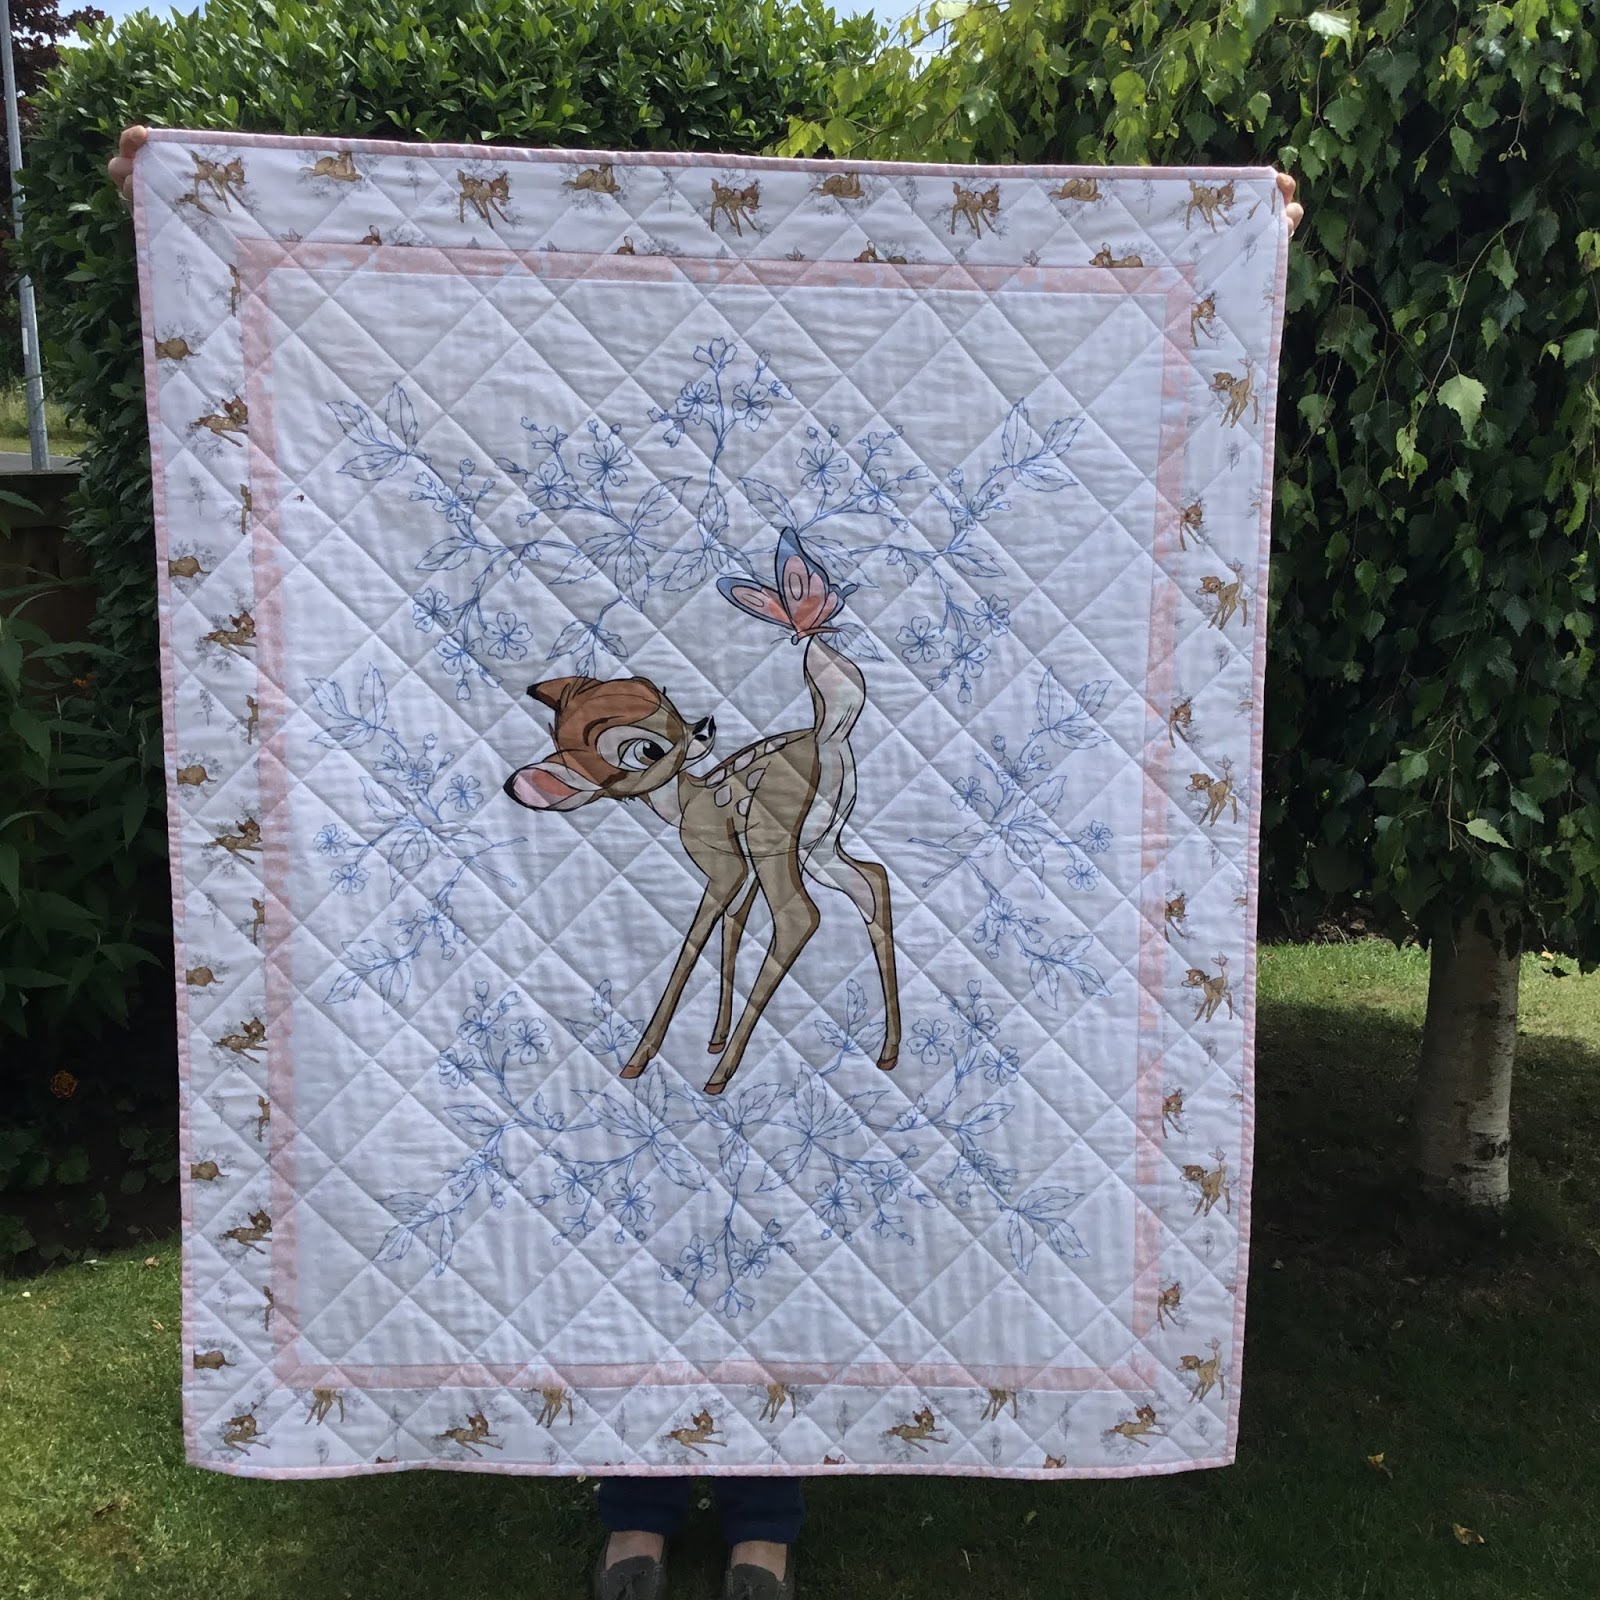
This is a very special quilt, not only is it the first quilt I have finished, but because it was made for a special occasion. A close friend had her first child and I just had to make this as a christening gift. Knowing how much we both like Disney, I knew this would be loved by them both for many years.
I originally bought the bambi panel to make a quilt for myself, but once the little one arrived, I knew it would be prefect for her.
I used other fabrics from the range to make borders, a pink to really frame the panel and add more colour, and then a larger border of small bambi images. I used the grey silhouette bambi fabric for the backing, and more pink for the binding. I chose to make my quilt to 43x52”, this was mainly so I didnt have to join fabric for the backing but it worked out a really nice size.
 
 
Since this was my first quilt and there was a deadline, the panel really helped cut down on the time it took to piece the quilt top. I did choose to thread baste my quilt sandwich as I'm not very good with pins and wanted it secure to help with the quilting. I did simple straight line quilting with my walking foot, using masking tape to act as a guide. I originally intended to just do evenly spaced diagonal lines, but decided to space them differently to make more of a pattern. I think this adds far more interest while keeping it achievable for my first quilt. 
Once I had finished stitching I needed to remove all my tacking stitches and trim all the edges, removing any excess batting. For binding I cut 2.5” strips and folded them in half before attaching to the edge of my quilt. I used a ladder stitch to hand sew the binding on the reverse to finish.
The final touch was a handmade by label, I recently purchased from wunderlabels uk... Luckily they arrived in time!! I just used a backstitch to attach it to my quilt.
 
Add caption

I am really pleased with how the quilt turned out, it was happily received and know it will be cherished. I can't wait to get sewing some more now ... I think its safe to say I have the quilting bug !!
Mx

I laid wool over the quilt to help decide on a quilt pattern.

close up of thread basting in progress
 

Thursday, 31 May 2018

home sweet home ...

I bought a cheap cushion to customise for some screen sensations home décor. I simply centralised the 'home sweet home' screen on the front of the cushion cover and printed with 'potting soil' ink to tone in with the neutral check. I think it makes for a simple but effective way to personalise your home and this screen is perfect for the job!!
If you fancy screen printing at home, check out my blog post here all about screen sensation... plus there is a discount code to get 25% off supplies at crafting.co.uk
Mx

Thursday, 24 May 2018

simply screen printed totes

I have customised plain white cotton and calico tote bags with screen sensation screen prints. I have used  the 'dog', 'gothic peony', 'kaleidoscope', 'plumage' and 'plumage & folliage' screens with 'black', 'chrysanthemum', 'harbour blue', 'raspberry' and 'turquoise' inks. The screen prints add a bit of personality to a plain tote, perfect to use for shopping or gifting to others!

If you fancy screen printing at home, check out my blog post here all about screen sensation... plus there is a discount code to get 25% off supplies at crafting.co.uk
Mx

Friday, 11 May 2018

colourful creations...


 I took some basic white tote bags and customised them using two processes to create these colourful creations. To get the background colour, I first dyed the totes using inkodye. Each bag was scrunched and folded in different ways to create the tie dye effect. Although the dye can look great on it's own, I decided to add another layer to some using screen sensations prints. I have used the 'dog', 'fantasy flight', 'gothic peony', 'kaleidoscope' and 'plumage' screens with 'black', 'chrysanthemum' 'raspberry' and 'shadow purple' inks. I think these make the perfect gift for somebody who likes to be unique, since no dyed bag comes out the same and the screen adds a bold dash of personality to each one.


If you fancy screen printing at home, check out my blog post here all about screen sensation... plus there is a discount code to get 25% off supplies at crafting.co.uk
Mx

Friday, 27 April 2018

don't quote me!!

 I've been using some of the quote screens to customise more tote bags. Above is the 'be courageous and the wonders will follow' design printed in 'black' ink on a black handled calico tote and 'follow your dreams they know the way' screen printed in 'white' ink on a black tote. I think the lettering looks really nice in these simple monochrome variations, but it also works well in more colourful options.
 I have printed these two white tote with the 'be the reason that someone smiles today' screen. To create the two prints, I added blobs of  'berry', 'raspberry', 'bubblegum' & 'orange zest' inks. The first pull creates a streaked effect with the different colours, whilst the second pass creates a more subtle blend as the inks mix together more. The two white bags below were printed in the same way, this time with a mix of  'key lime' and 'blue sea' inks. I pulled across the 'make today amazing' screen for the first print, then downward on the second pass to create quote different looks on each.

if you fancy screen printing at home, check out my blog post here all about screen sensation. plus there is a discount code to get 25% off supplies at crafting.co.uk

 Mx

Tuesday, 3 April 2018

Screen sensation


One year ago, an at home screen printing system was launched, called screen sensation. It was something new and quite exciting, so I bought the first kit and have added to my selection of designs with the new screen collections released since. I mainly use my screen sensation to decorate tote bags, clothes and print my own fabrics, however, the possibilities go far beyond this.

Screen sensation is made up of 3 parts... 
the kit, the screens and the inks:
  • The kit includes a base unit, frame, squeegee, stir sticks and a collapsible ink bowl
  • The screens come in two sizes (12x12" & 5x7") in a wide variety of designs. You simply fix the screens to the frame using screen sensation fixing tape. This tape has been formulated especially to use with the screens, to be safe for use on the emulsion layer. If you are feeling really creative there is also a kit available to design your own screen.
  • The ink is water based, drain safe and washes out in cold water. Once the ink is fully cured (about 7 days) onto a solid surface or heat set on fabric (iron on reverse for 2 mins, washer safe to 40'c) it becomes permanent. The inks are very thick and need to be stirred before use. There is a lovely selection of colours available, but you can also mix them together to create your own custom colours.

How to use your screen sensation:
  1. Use the fixing tape to attach the screen to the back of the frame, where the screen sensation logo is. Also consider that if you have text on your screen this needs to be the right way up when printing (so backwards when taping). For the best quality of print the screen must be fixed so it is drum tight. At this stage, you may also wish to mask off areas of the design. Simply tape over the section you don't want to print (see image below). Once fixed, slide  the frame into the base unit.
  2. Place the item you are wanting to screen print onto the base unit. If you are printing onto fabric it is best to iron it first to remove any creases and put a piece of card/paper behind where you will be printing (inside a t-shirt for example) to catch any ink which could go through the layers of fabric. Push the base unit lid down to hold the item in place.
  3. Give the inks a good stir before adding to the top of the screen. It's better to have a lot of ink on as you don't want to run out and you will scrape the excess back into the pot when you have finished printing so it doesn't go to waste!! You can use multiple colours at a time to create different effects. I use less ink when doing this as you don't want to put mixed colours back into the original pots. You can still reuse this ink though, just buy empty pots to put your mixed colours in.
  4. Pull the ink across the surface of your screen using the squeegee at a 45 degree angle. I like to spread my fingers over the length of the squeegee to get even pressure. You don't need a lot of pressure as too much can wrinkle the screen and ruin your print, (you can do a dry run to check if you're unsure). When you print occasionally you feel like you have missed a bit, in this case you can just add a little bit of ink to that piece with the small squeegee. Although not advised, if you are worried you have missed quite a lot, you can carefully reprint the screen pressing lighter on the squeegee. I have done this with no problems but there is a risk of getting a blurred image.
  5. Finally, lift the lid to reveal your print. Remove the printed item from the base unit and set aside to dry. I often hang my bags and clothes onto a clothes airer to allow them to dry flat without taking up all of the counter tops.
  6. When you have finished printing your chosen design, lift the frame out of the base unit, remove all the fixing tape (if it doesn't have any ink on this can use re-used) and wash your screen in cold water. The water must be cold or it will set the inks and ruin the screen. Once you have washed your screen and removed all the ink residue, lay this flat to dry on a towel. You don't want any fluff sticking to the screen so it is best to use an older towel.
  7. Once your screen is fully dry, it can be put back in its packaging for protection and kept ready to use again. Once your prints are dry don't forget to heat set them or leave them to cure for 7 days.
Alternatively, if you are printing a bulky item that wont sit flat inside the base unit, you can print using the frame separately from the base unit. To do this, tape the screen on the opposite side of your frame (without the logo) ensuring your design is seen in reverse at this stage. Then, lay out your item that you are wanting to print directly onto a hard and sturdy flat surface. To print, turn the frame over so the logo is facing up towards you and hold it down firmly in position on the item. It is important not to move the frame during printing as this can smudge the print. If possible, I find it's best to get someone else to hold it while you print. Once set up, you can simply follow the instructions above from stage 3 onwards, (except at stage 5, simply lift your frame up in one smooth motion, ensuring it separates from the print item as the ink can hold the print to the screen.)

If you are interested in learning more, you can visit the screen sensation website to find out more information and videos demonstrating the system.

If you want to screen print at home, you can get 25% off any screen sensation purchase at crafting.co.uk ...simply checkout using the special discount code: SSBL25-OHC21
(valid until 30 June 2018)
Mx